While you choose WooCommerce as your selling platform, you can use WooCommerce with Appsero only. That means you are giving Appero permission to handle your licensing and the Appsero Helper plugin will handle everything.
Let us see the steps.
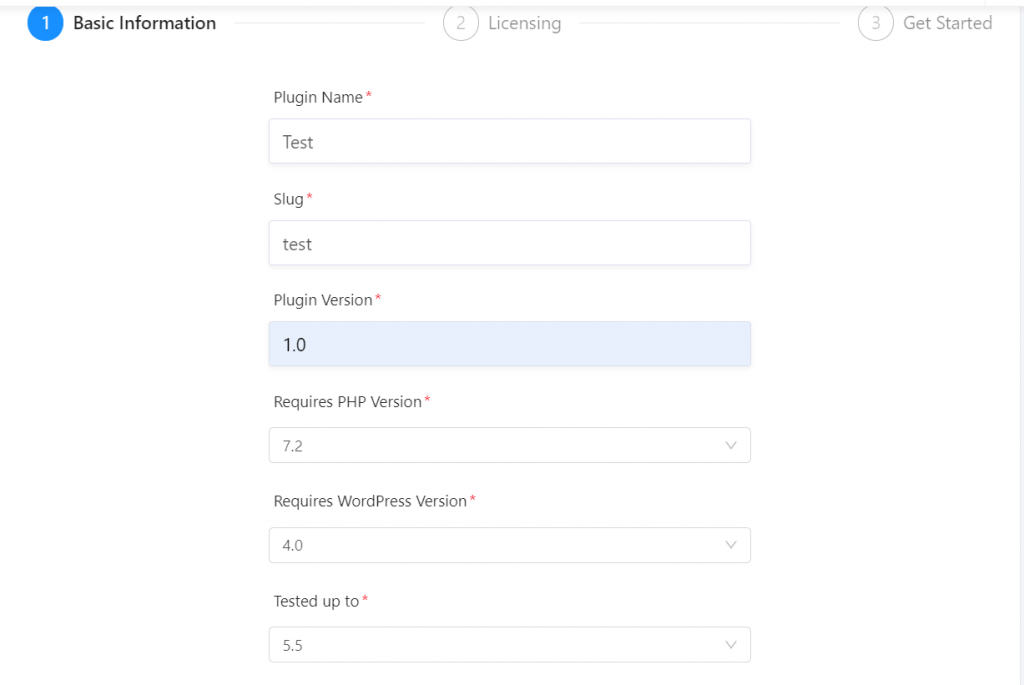
Basic Information
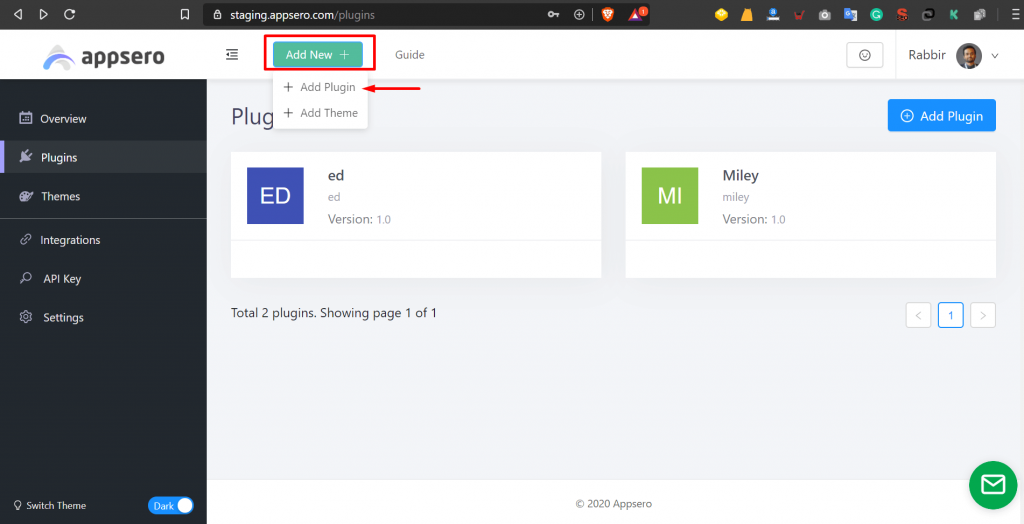
To add a new plugin, click on the Add New button. There you will find two options “Add Plugin” and “Add Theme“. Click on the “Add Plugin” button.

Now you have to click on “Yes, It’s a Premium Plugin” button.

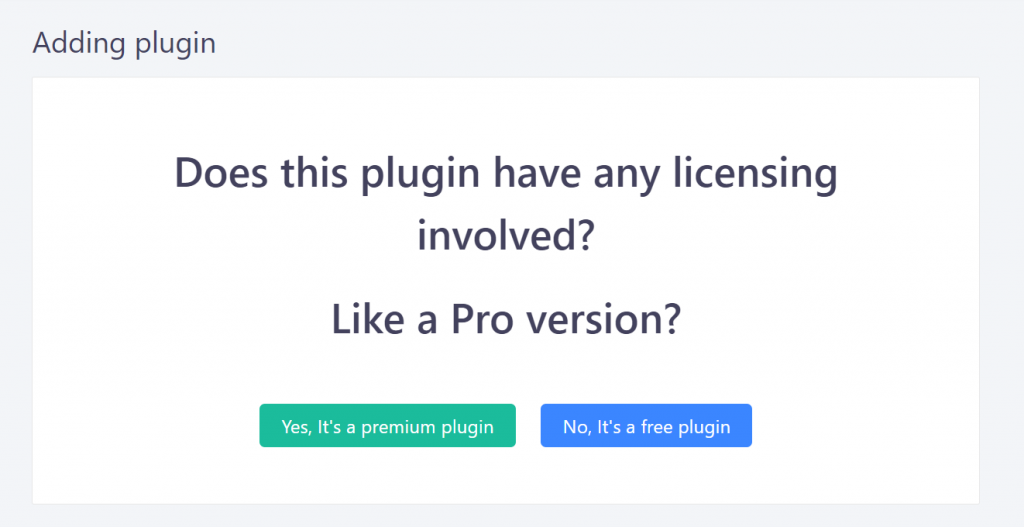
Because it is a premium plugin, all the details have to be filled up manually. All the necessary data needs to be added. Check out what you need to add.
Now, you can add the details in the fields.

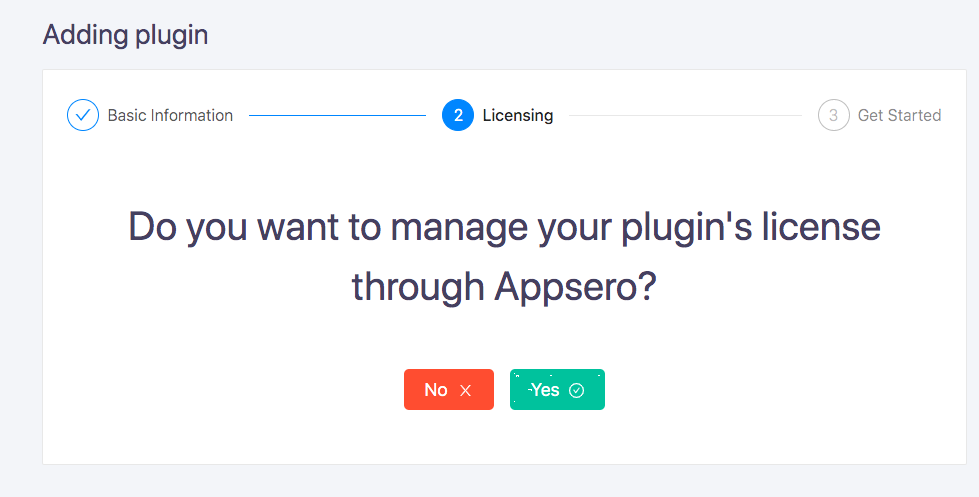
Licensing
Now, onto the Licensing part. Appsero will ask you a question, Whether you want to manage your plugin ‘s license through Appsero or not. Now, we recommend choosing “Yes“
By choosing Yes, you will use for Analytics, Licensing & Deployment. So it is recommended to select Yes.
You can choose “No” also. In that case, then you can only use the analytics & deployment part. Appsero will not handle licensing for this project.

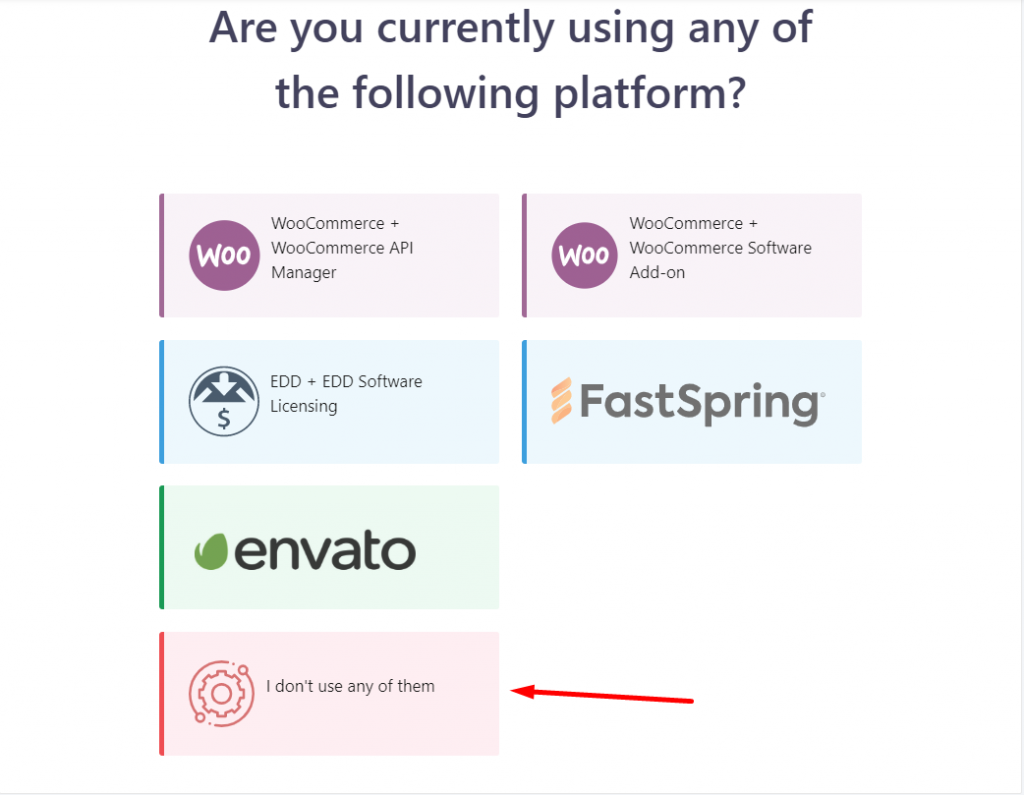
Now, to let Appsero handle your licensing you need to choose “I don’t use any of them”

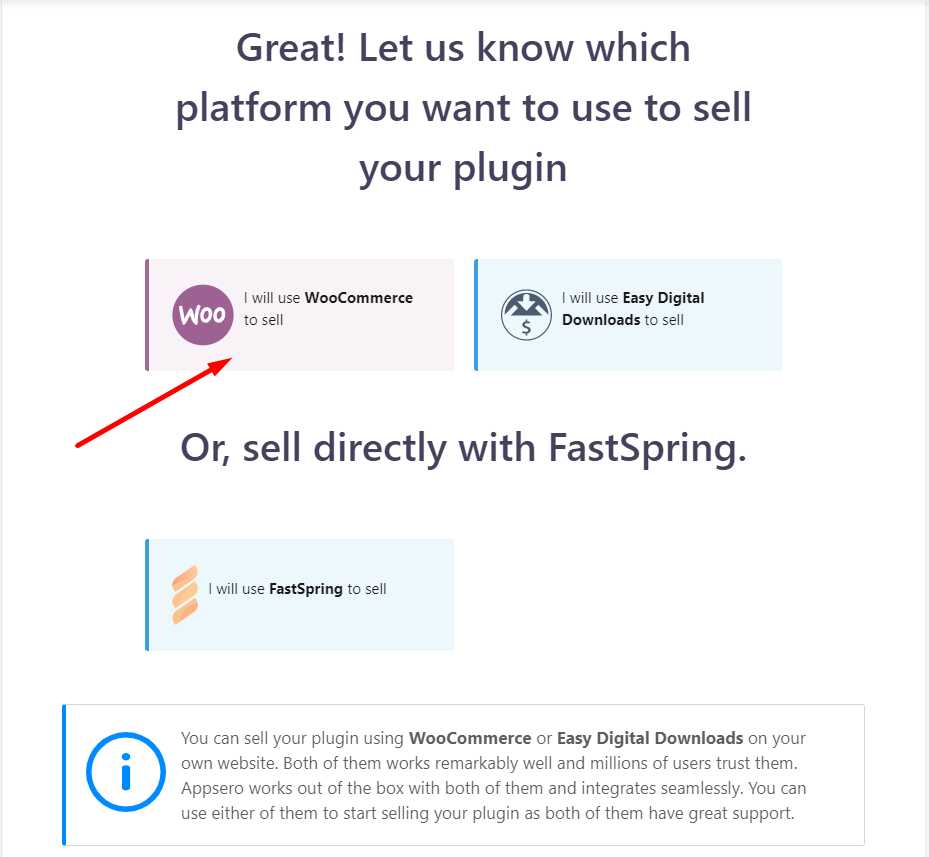
As you are using WooCommerce with Appsero, you need to choose “ I will use WooCommerce to sell”. That means you are choosing WooCommerce as your selling platform.

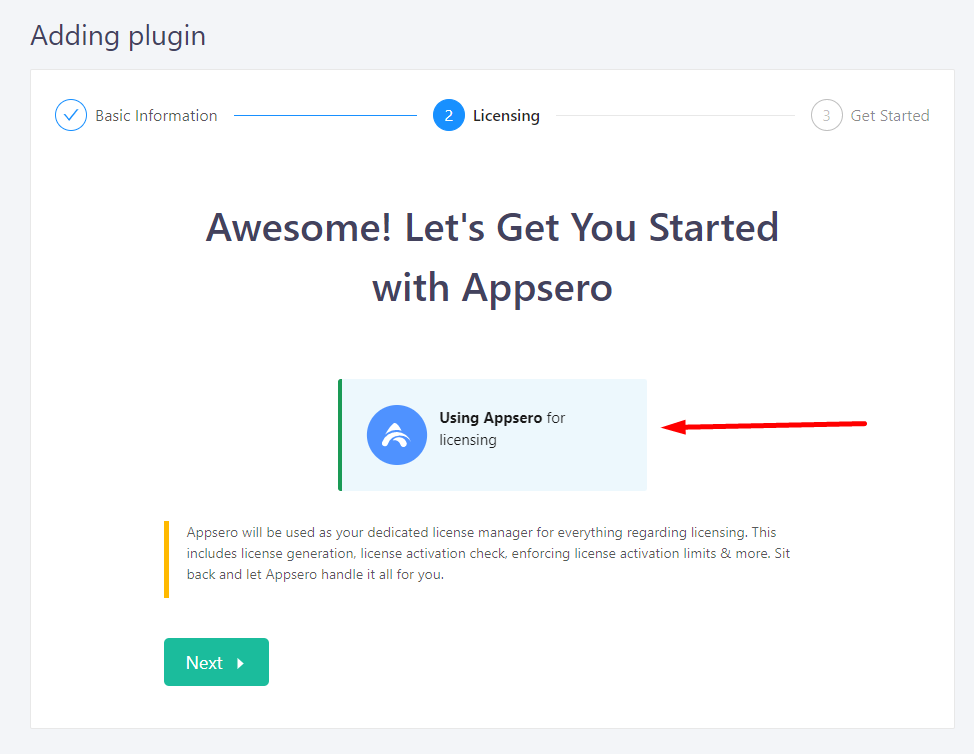
On the next page, select ” Using Appsero for licensing“.

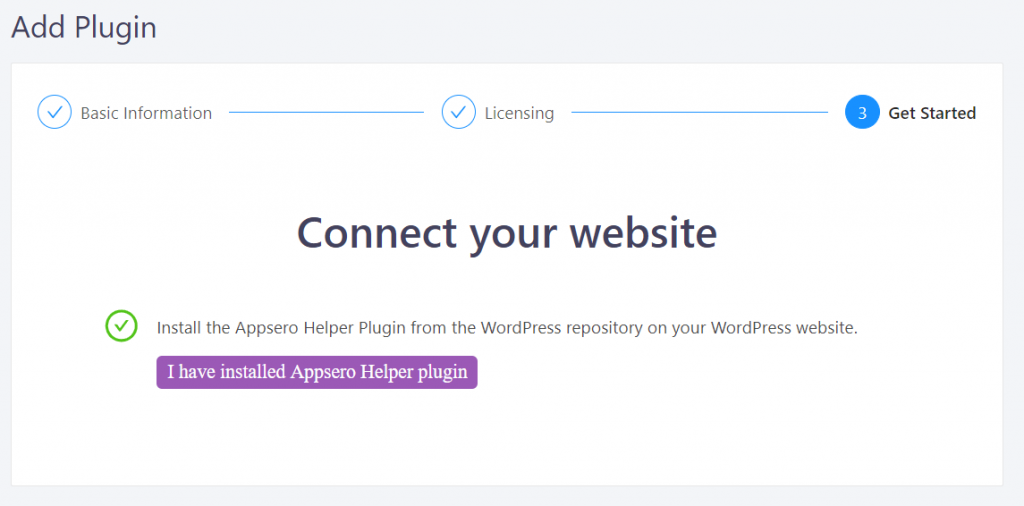
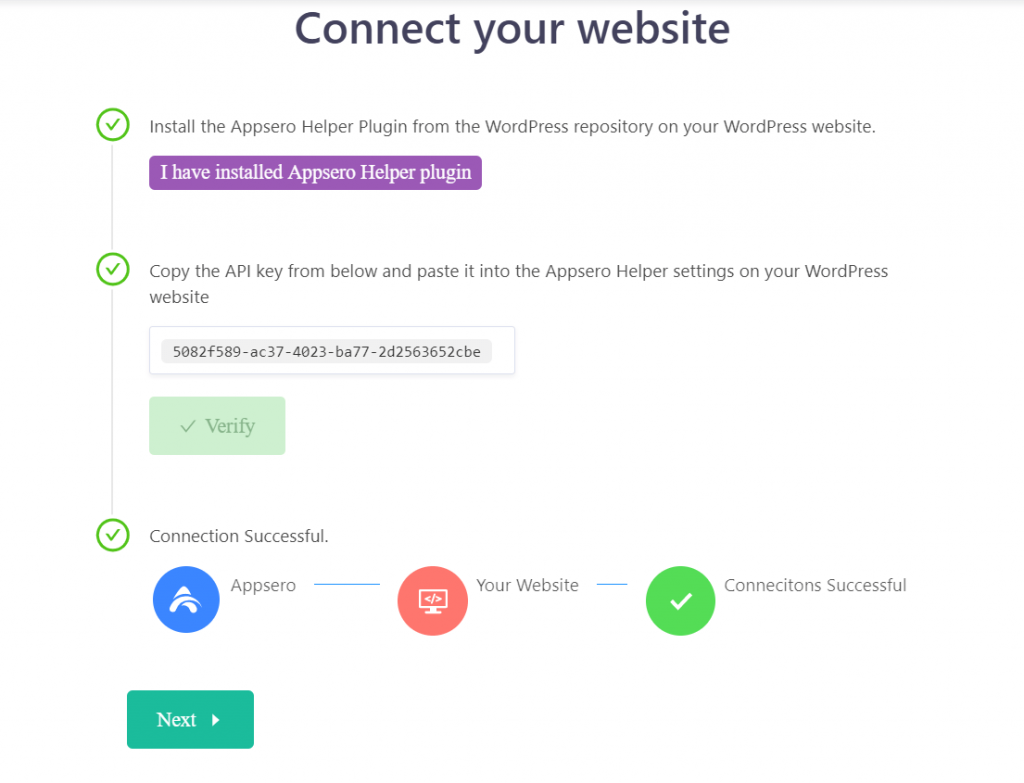
The redirected page will show you a message to install the Appsero Helper plugin. Once you have done that, click “I have installed Appsero Helper plugin”.

When you click on the “I have installed Appsero Helper plugin” you will get an API key.

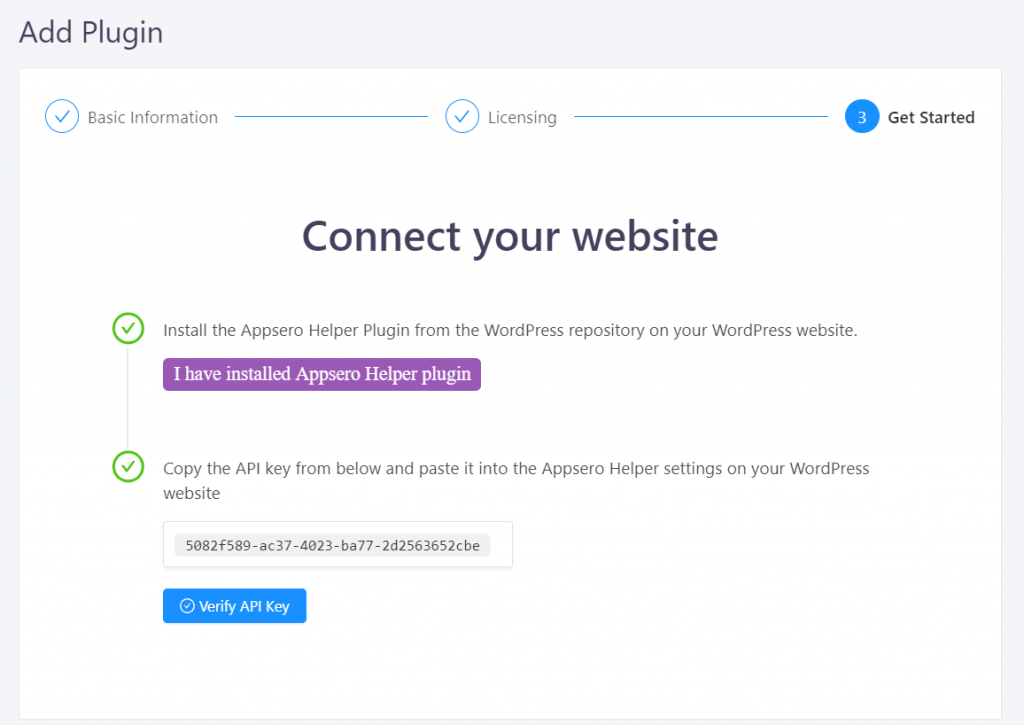
- Now, to verify the API key, you need to head over the website where you had installed the Appsero Helper plugin.
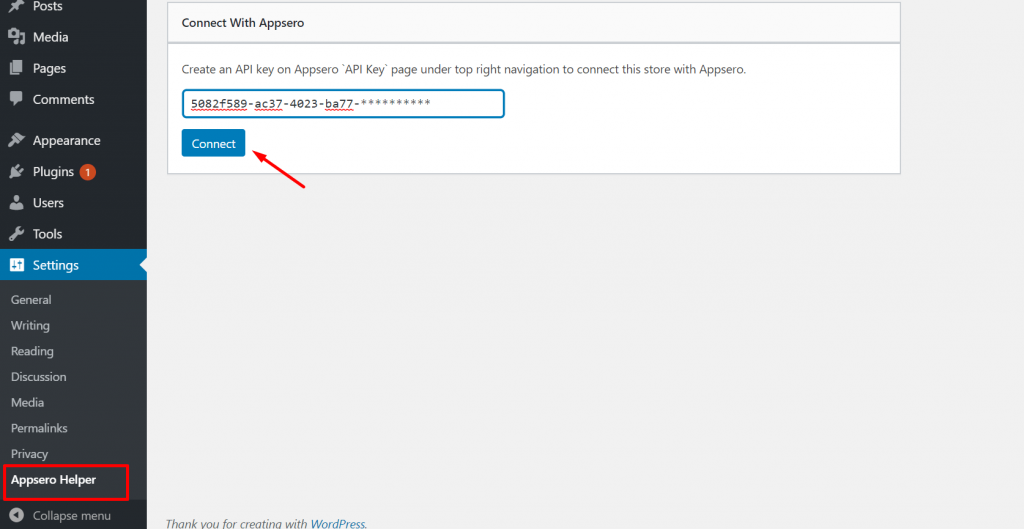
- Navigate to WordPress Dashboard -> Settings-> Appsero Helper. Then you need to paste the API key from Appsero to your website and hit the Connect button.

Head back to Appsero Dashboard. Now, when you click the Verify button, it will give you a message that the connection is successful.

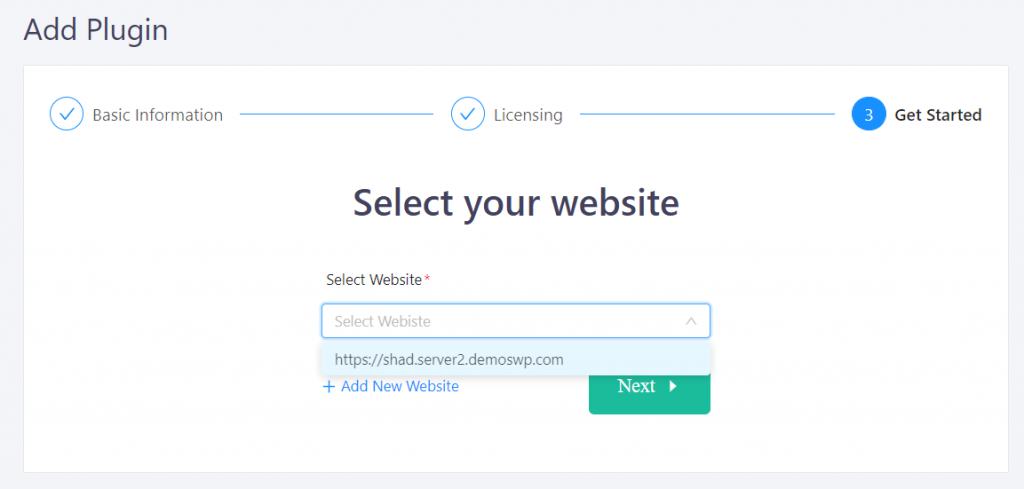
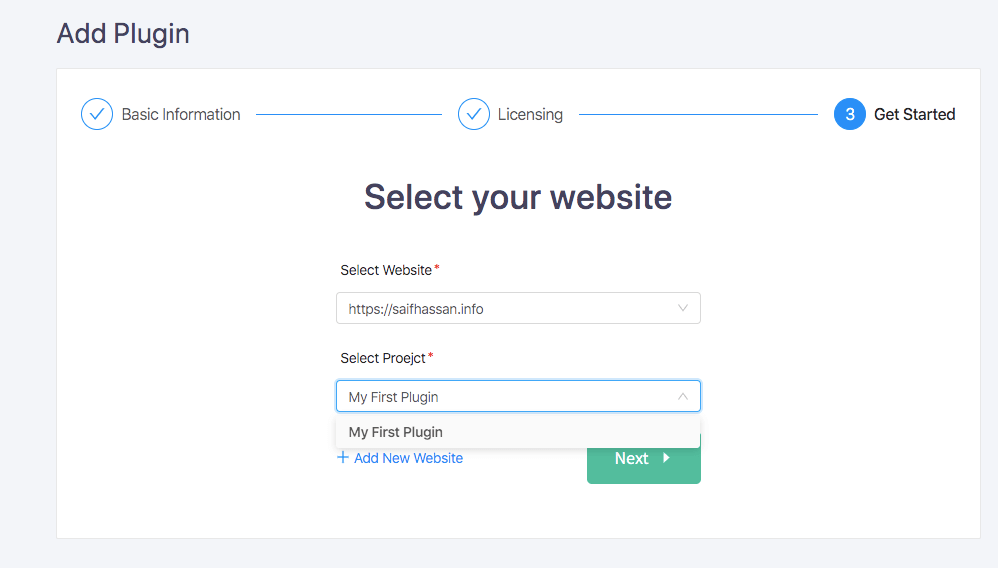
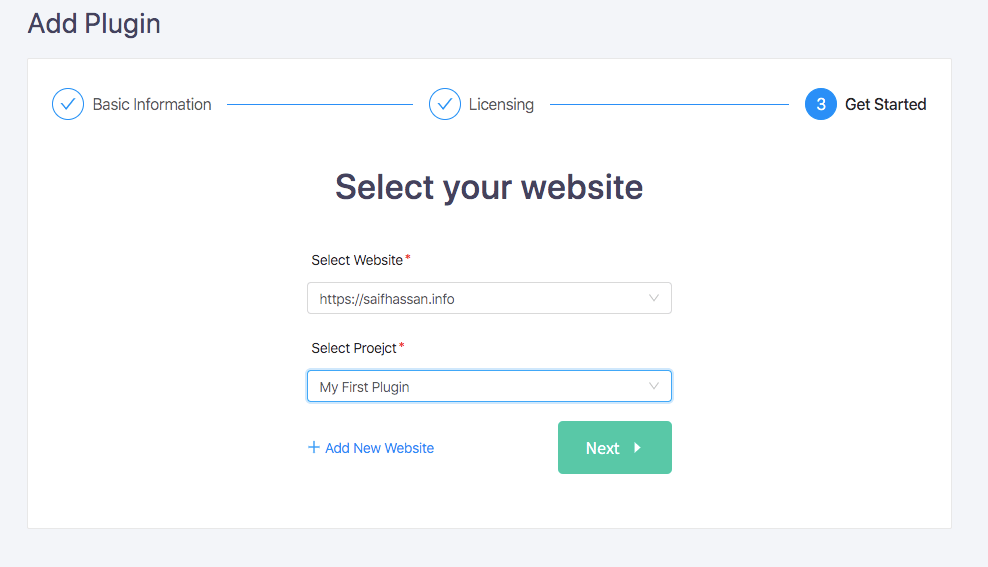
Now, you need to select your website that you connected with Appsero.

Mapping WooCommerce Product with Appsero
After selecting the website, you need to select your existing WooCommerce product that you want to manage licensing for. If you haven’t created your product – add your first product and select virtual and downloadable.
To make sure Appsero works without issue, make sure your WooCommerce product is marked as both virtual and downloadable.


If you are getting any error in this step, we recommend adding your product already and reloading this page.

After adding your project, you need to hit the Next button to complete.

That’s it. Rest is the same as adding a Premium plugin or theme. You can get help from this documentation.
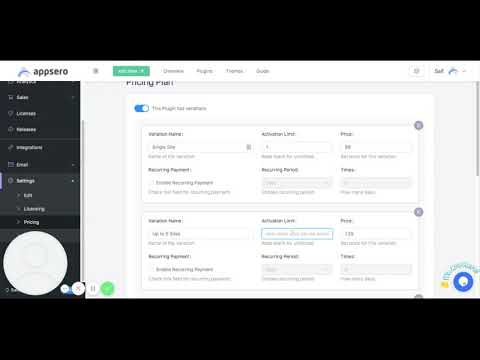
Choosing License Validity of Each Product
After you have gone ahead and added your Appsero Client, head over to Settings -> Pricing. Make sure the pricing section mirrors your product information like your WooCommerce product.
Also, make sure to change activation limits
That’s how you can use WooCommerce with Appsero as the license manager. If you face any issue, feel free to send an email to [email protected]

