You can add a premium plugin using Appsero. Then you can easily sell the plugin. There are two platforms that you can use to sell your plugin.
- WooCommrece
- Easy Digital Downloads(EDD)
Let us see the steps of how to add a premium plugin.
Basic Information
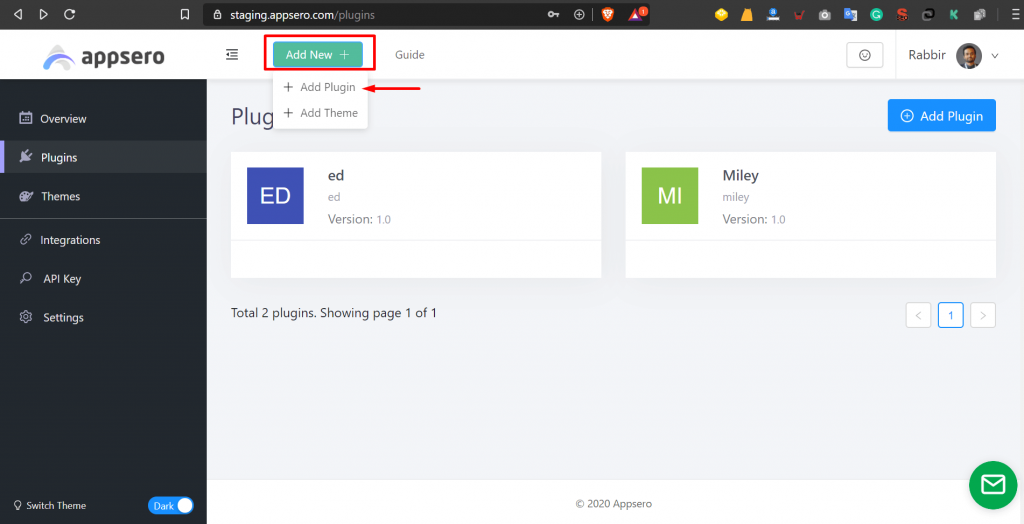
To add a new plugin, click on the Add New button. There you will find two options “Add Plugin” and “Add Theme“. Click on the “Add Plugin” button.

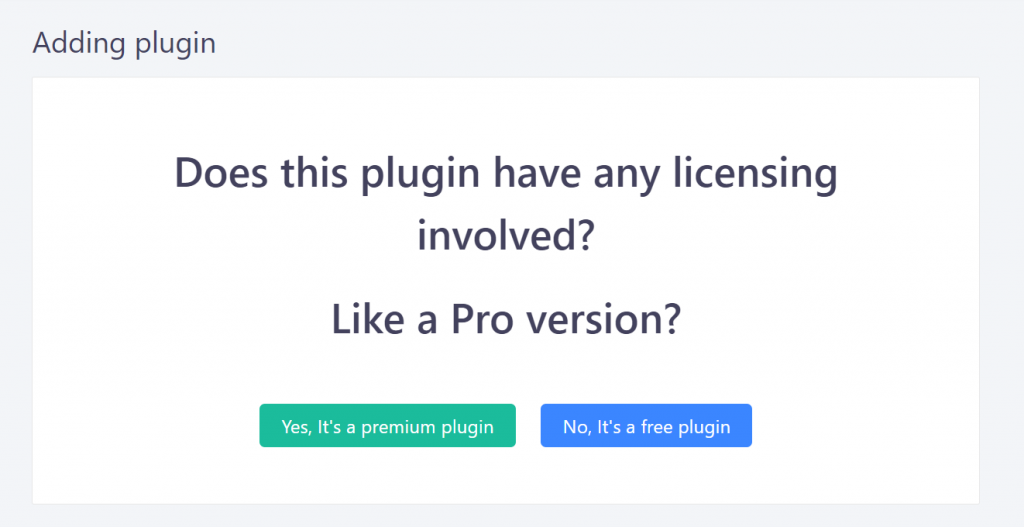
Now you have to click on “Yes, It’s a Premium Plugin” button.

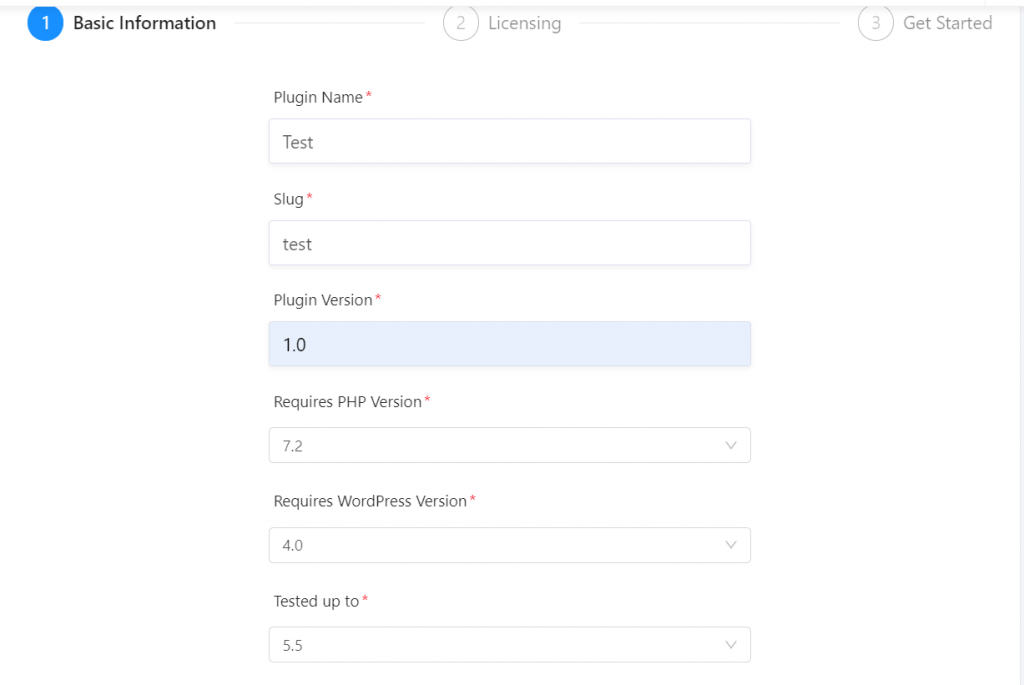
Because it is a premium plugin, all the details have to be filled up manually. All the necessary data needs to be added. Check out what you need to add.
Available Fields
| Name | Required | Description |
|---|---|---|
| Plugin Name | Yes | The name of the plugin. |
| Slug | Yes | Slug of the plugin. It will be generated automatically but you can change it. Note that you will not be able to update it later. |
| Version | Yes | The version of the plugin. You will be able to add new version at the time of release. |
| Requires PHP Version | Yes | Requires PHP Version for the plugins. |
| Requires WordPress Version | Yes | WordPress version requires for the plugin. |
| Tested up to | Yes | Maximum version of WordPress the plugin has been tested. |
| Homepage URL | No | Website URL of the plugin. Put Website URL based on the hosted store. Put WordPress.org URL of the plugin, if it is hosted on WordPress.org. |
| Demo URL | No | Demo site URL of the plugin. |
| Description | No | Give a description of the plugin. This field is markdown supported. |
Now, you can add the details in the fields.

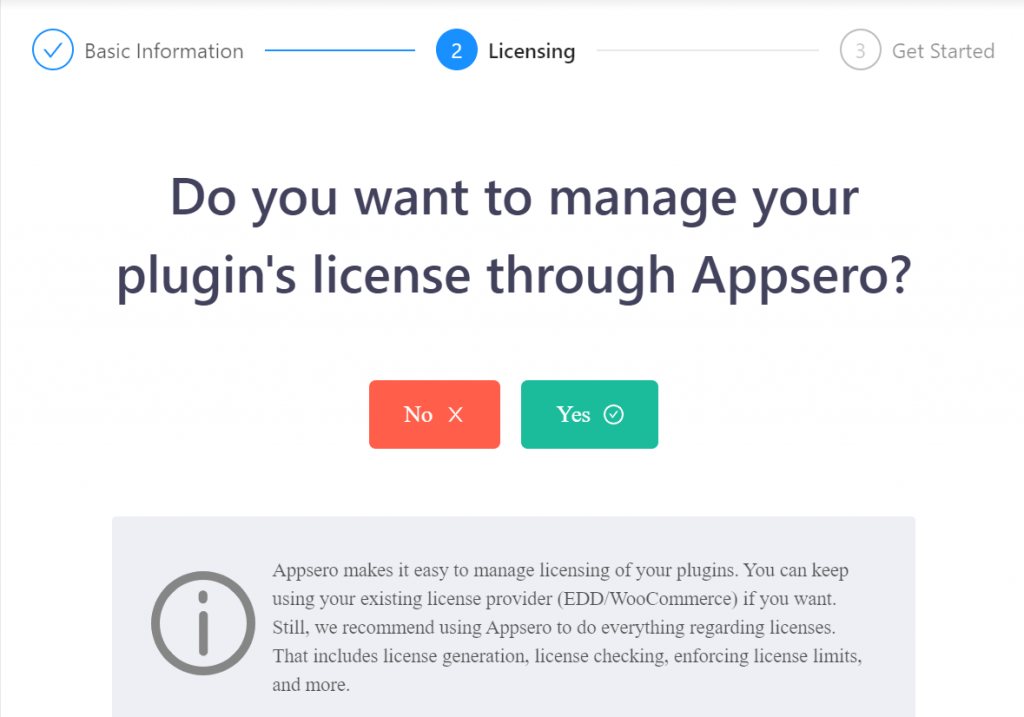
Licensing
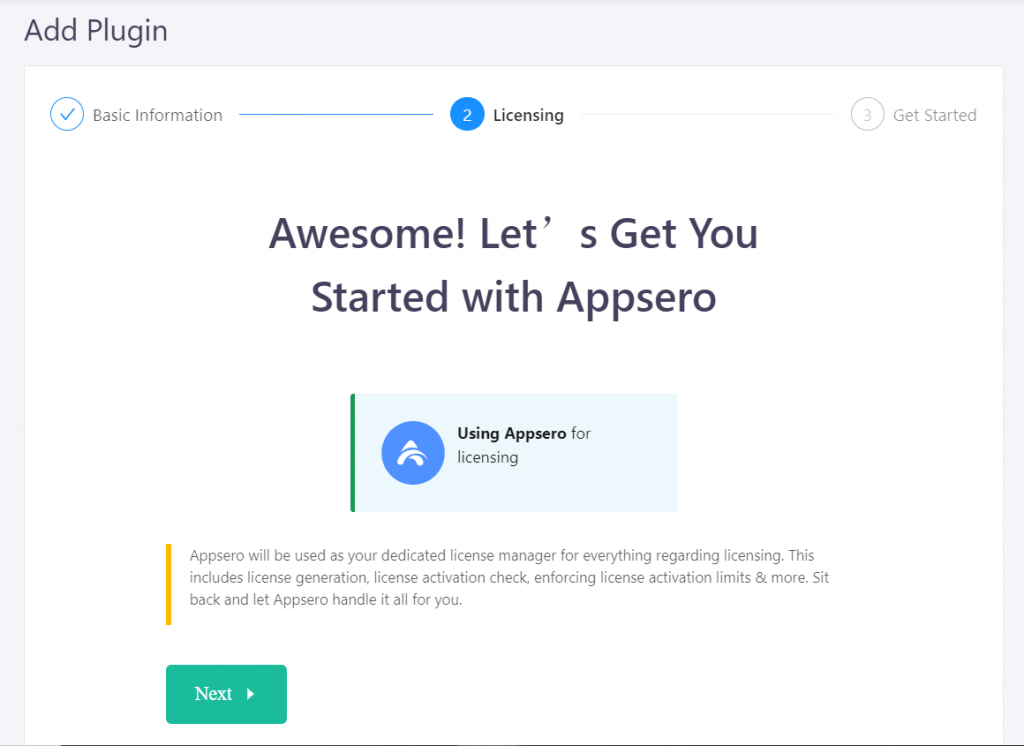
Now, onto the Licensing part. Appsero will ask you a question, Whether you want to manage your plugin ‘s license through Appsero or not. Now, we recommend choosing “Yes;“
Then you can use every feature of Appsero including Analytics, Licensing & Deployment. So it is recommended to select Yes.
You can choose “No” also. In that case, then you can only use the analytics part.

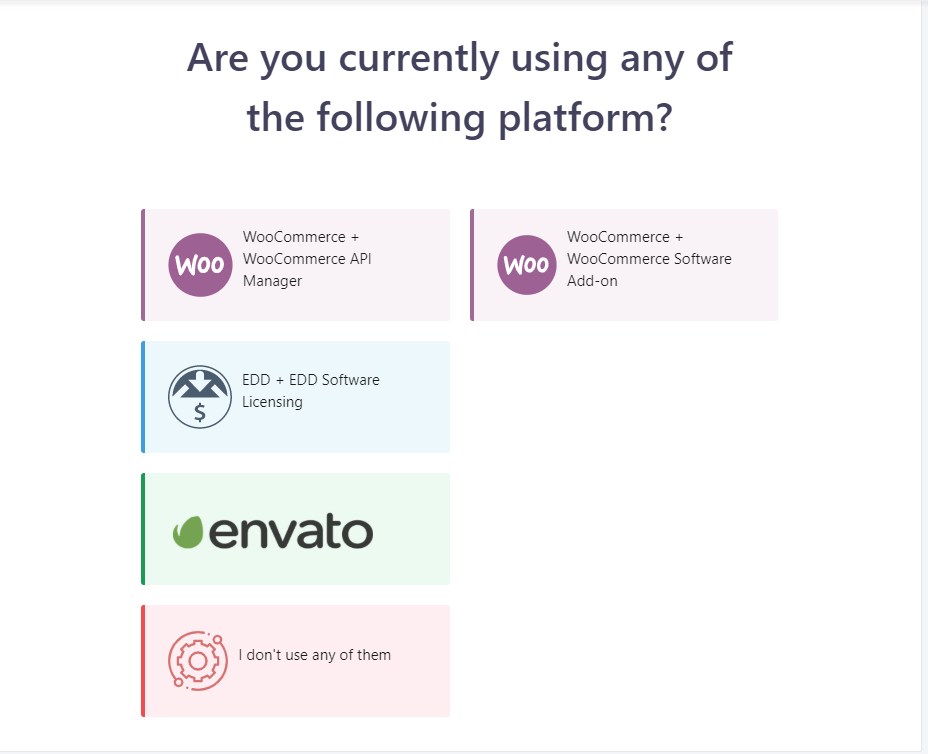
Next, if you were using any platform to manage your plugin already, then you can select them. The options are
- Woocommerce + Woo Commerce API Manager
- EDD
- Envato.
Or you can choose to start afresh. Then you have to select “No, I don’t use any of them” button.

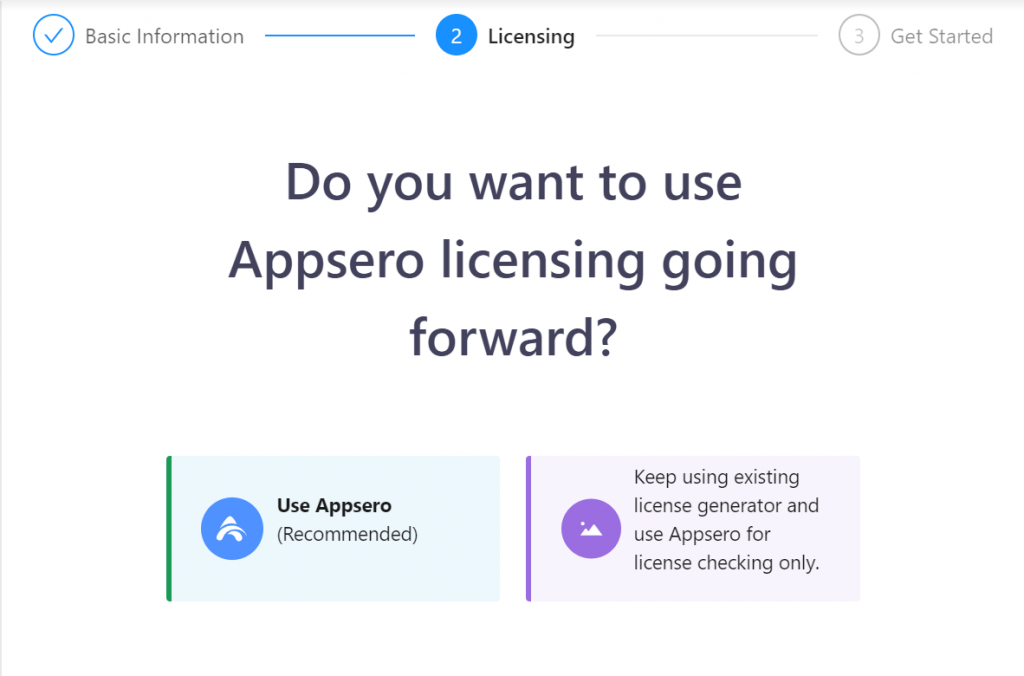
If you select WooCoomerce, EDD or Envato then you will be asked to choose how do you want to manage your licensing in the future.
If you select WooCoomerce, EDD or Envato then you will be offered to choose from two distinct license managers.
- You can use Appsero licensing here to generate new licenses through Appsero going forward. It’s recommended you use Appsero licensing. That way – you can provide a better experience to your users.
- You can also use the existing license provider. In that case, Appsero SDK can be used for license checking only. Appsero will not generate new licenses.

If You Don’t Use Any of The Platform
If you don’t use any of the platforms, then you can to select “No, I don’t use any of them”.
For WooCommrece
To use WooCommerce as the platform click on “I will use WooCommerce to sell” button.

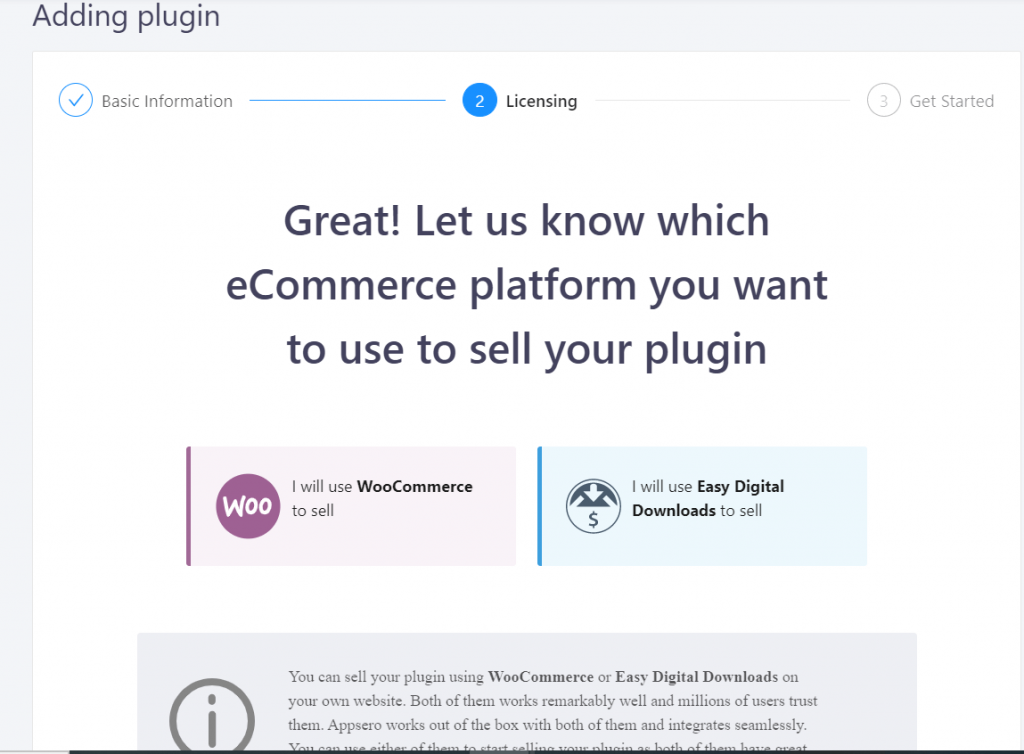
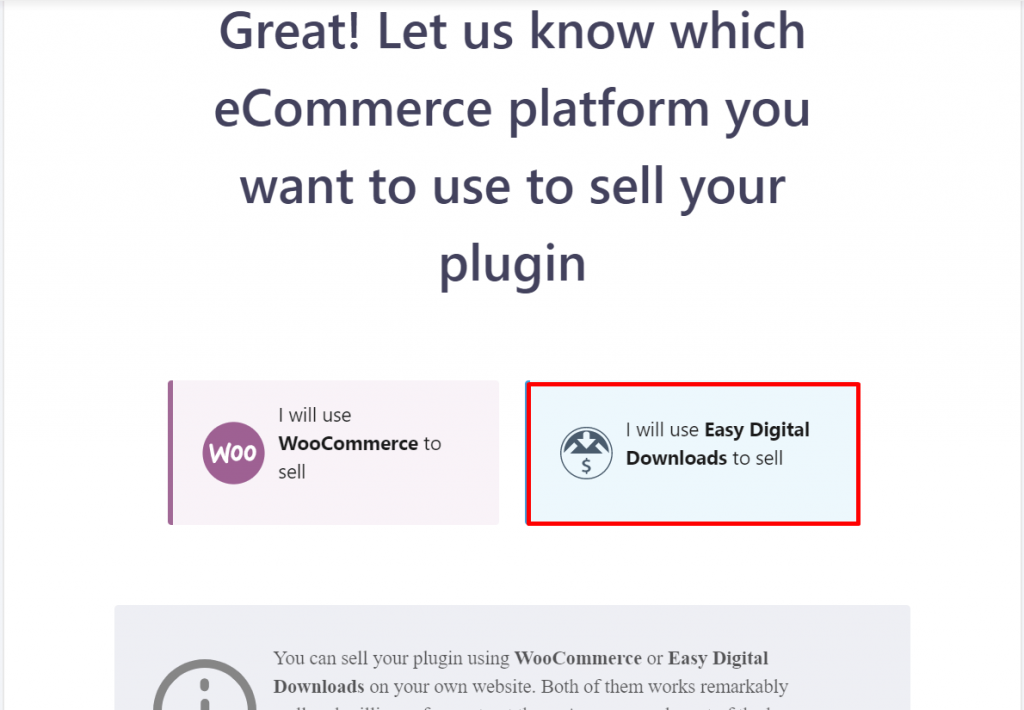
For Easy Digital Downloads(EDD)
To use EDD as the platform click on “I will use Easy Digital Downloads to sell” button.

Note: After choosing the platform it’s recommended that you create your product already from WooCommerce/Easy Digital Downloads. Otherwise, Appsero will not be able to connect with your store.
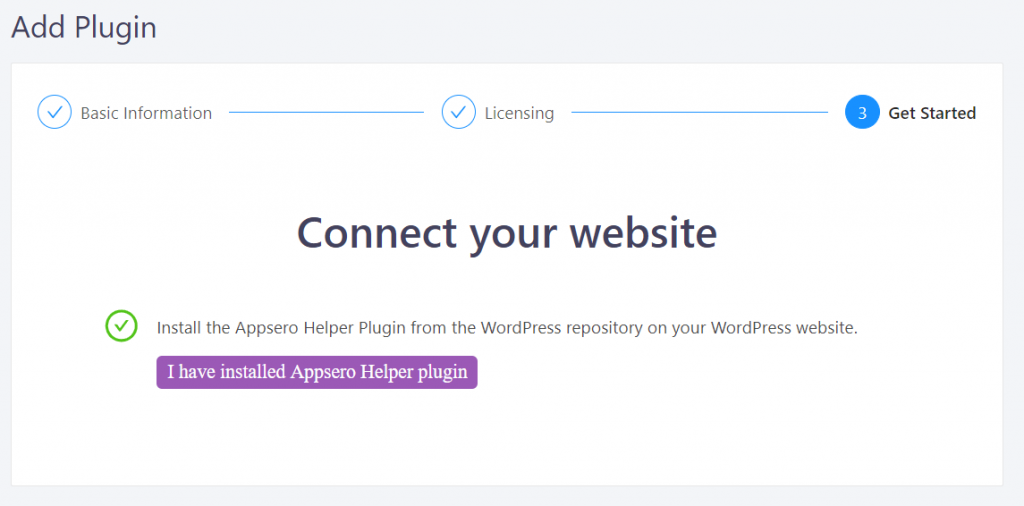
If you click on Using Appsero for Licensing or Next, then you will be redirected to a page.

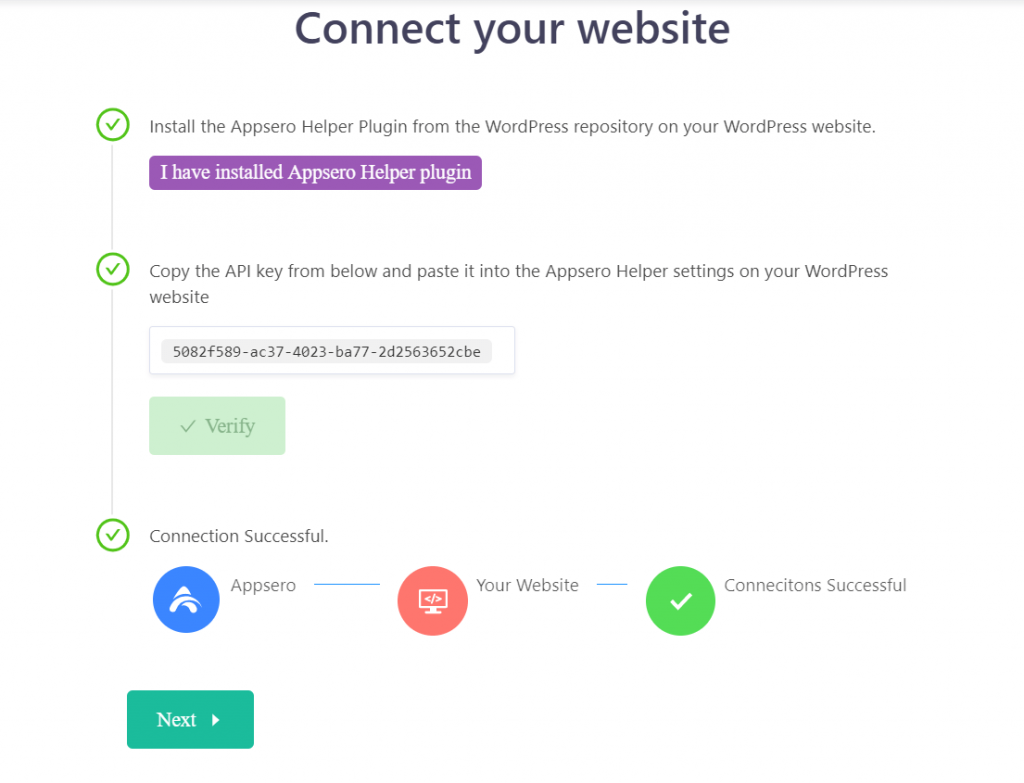
The redirected page will show you a message that “I have installed Appsero Helper plugin”.
- If you have installed Appsero Helper plugin click “I have installed Appsero Helper plugin”.

When you click on the “I have installed Appsero Helper plugin” you will get an API key.

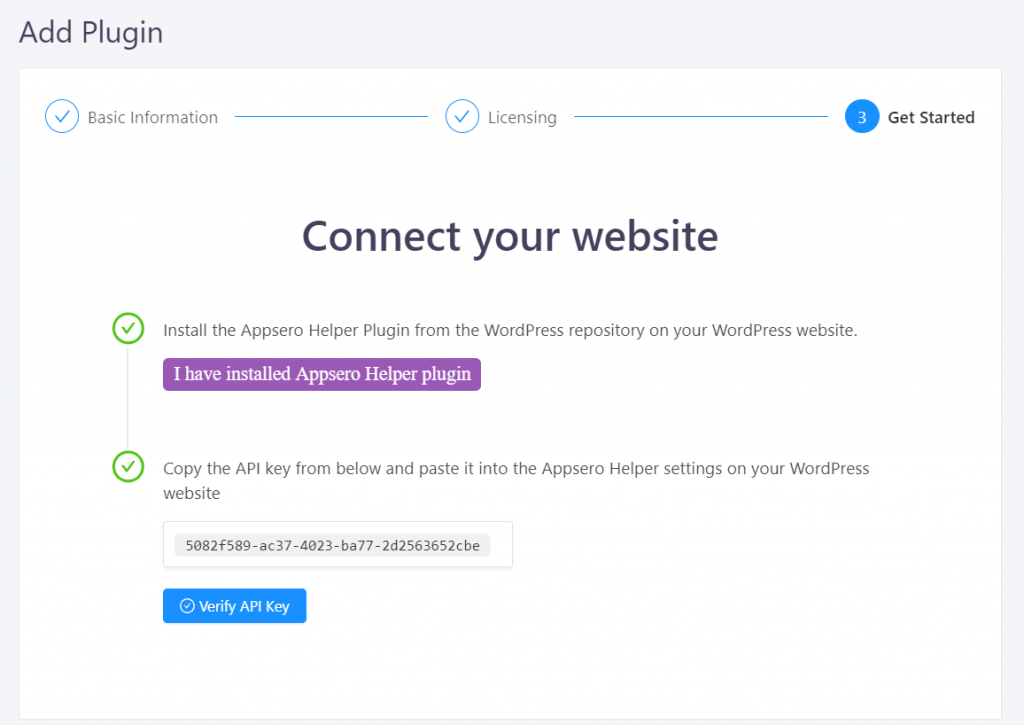
Now, to verify the API key, you need to install the Appsero Helper plugin on your website. Then, you need to navigate to Admin-> Settings-> Appsero Helper. Then you need to paste the API key from Appsero to your website and hit the Connect button.

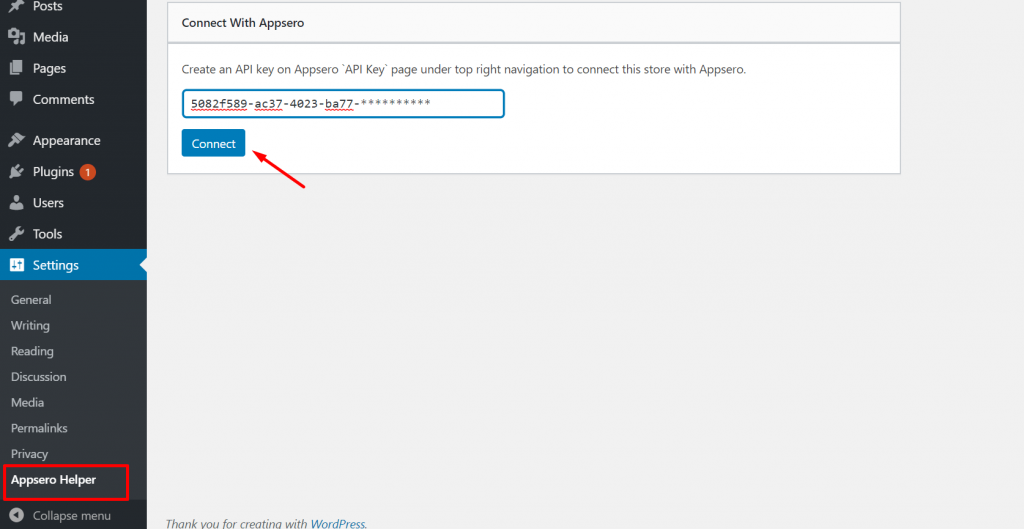
Now, when you click the Verify button, it will give you a message that the connection is successful.

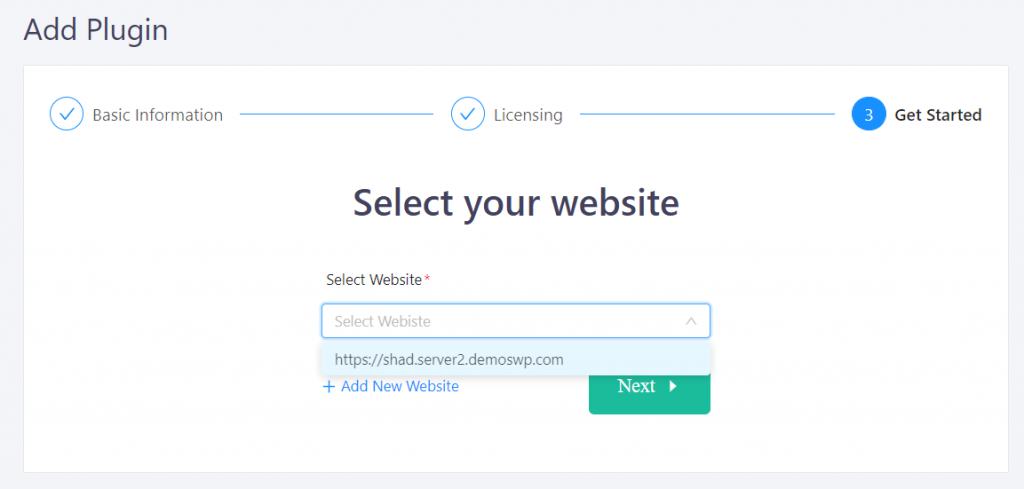
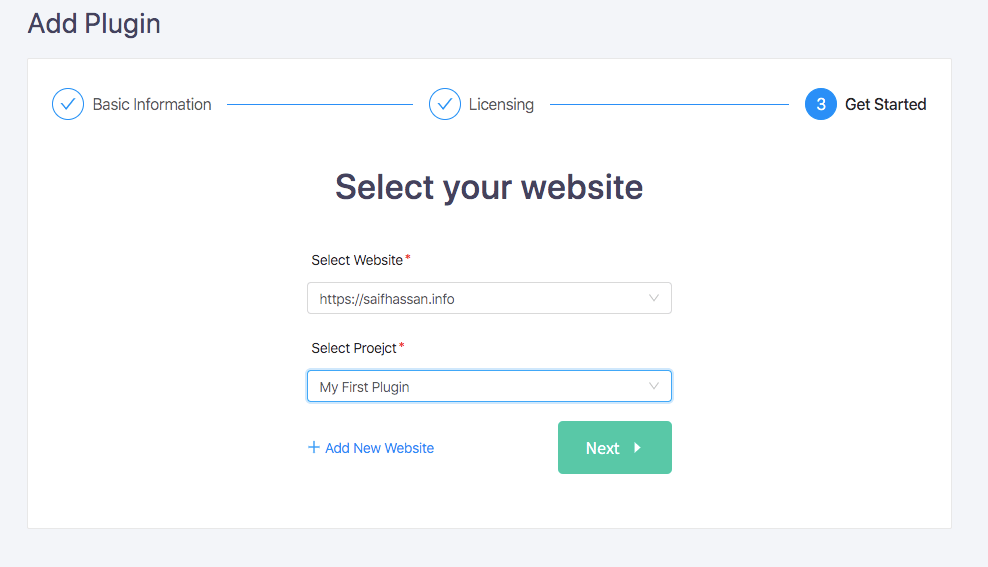
Now, you need to select your website that you connected with Appsero.

Note: If you don’t have created products already from WooCommerce or Easy Digital Downloads – Appsero will not be able to map your product.

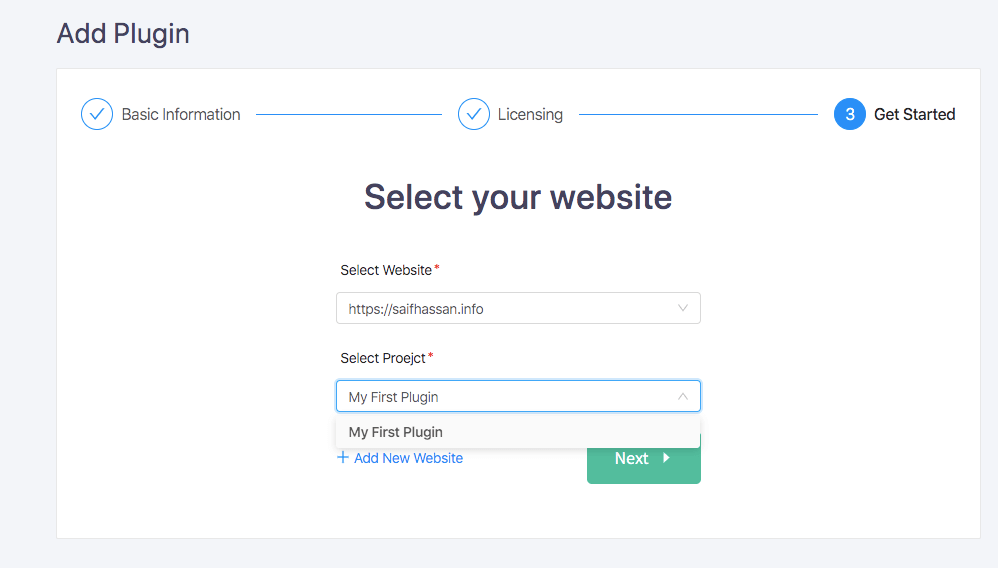
After adding your project, you need to hit the Next button to complete.

Get Started
After, Adding a plugin and Licensing now it is your turn to get started.
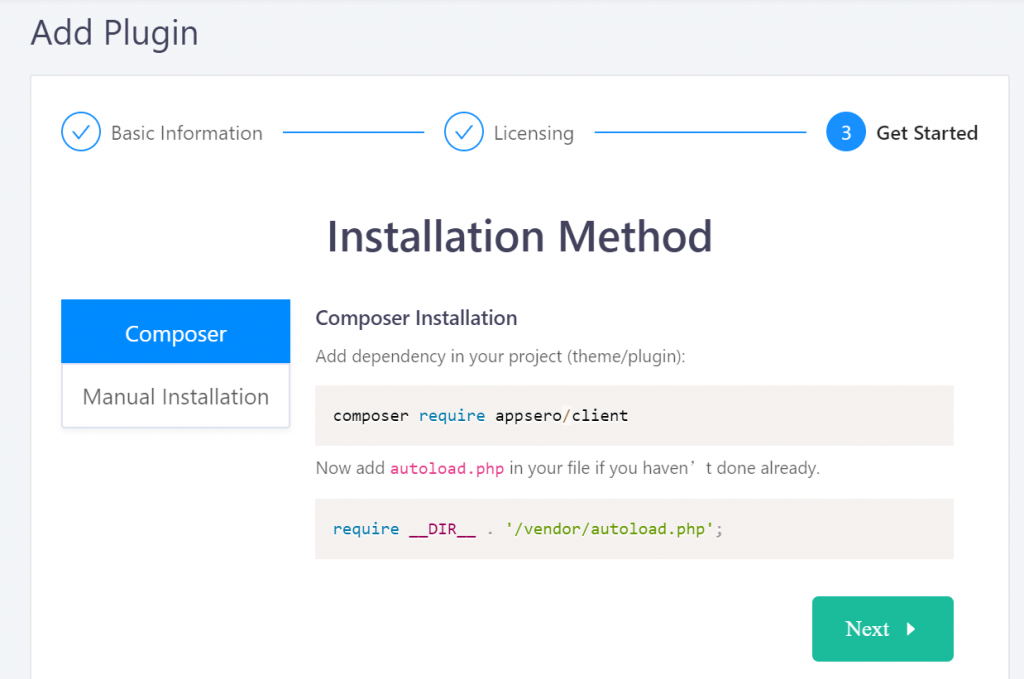
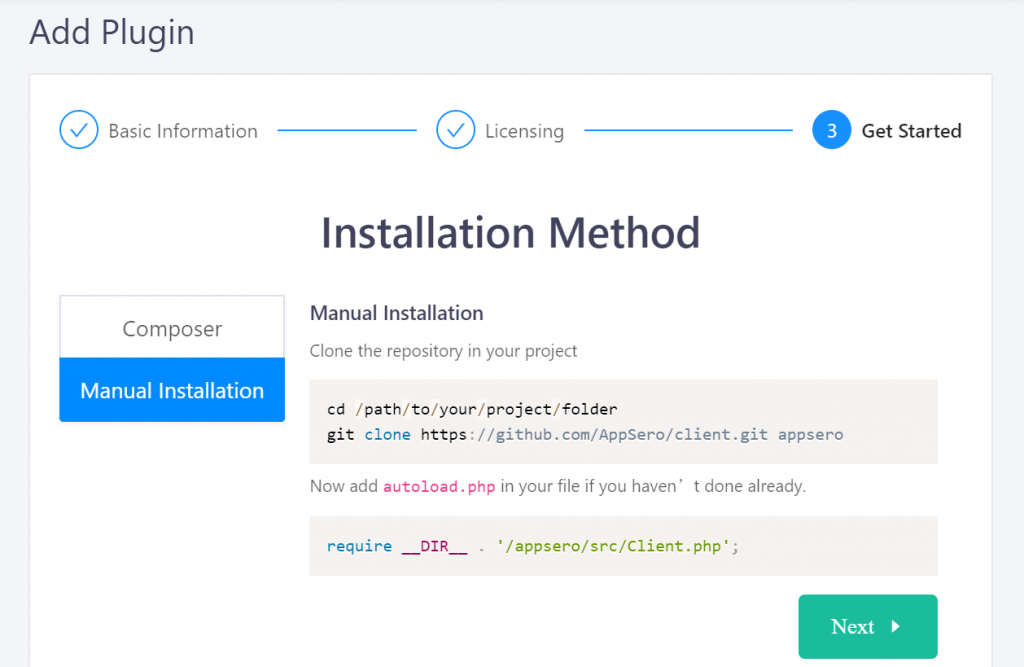
You will find an Installation Method section. You need to install an Appsero-Client plugin. You can do that in two ways.
- Composer
- Manual Installation
In the case of Composer, you need to use these below commands.

But in the case of Manual Installation, you need to clone the Appsero Client to your project folder.

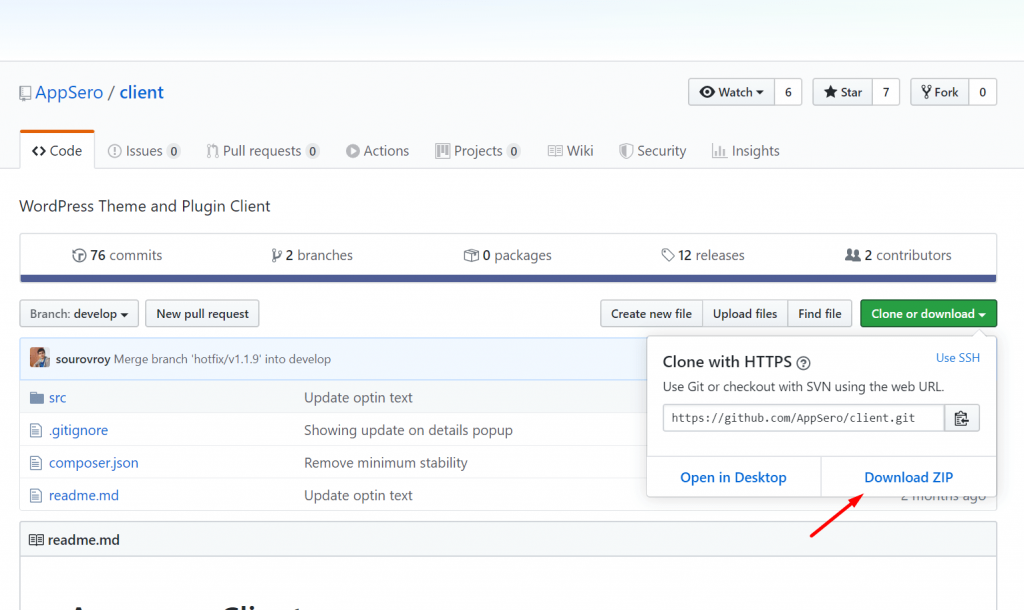
You can also directly download the repo, and extract the content inside your project’s root folder.

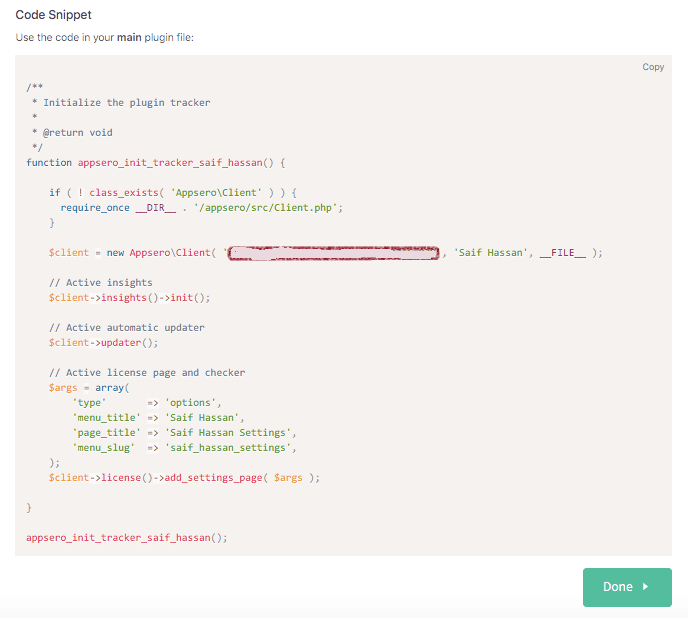
Lastly, copy the Code Snippet generated for you into your main plugin file. Click Done to finish. (You can find the same usage code in the Usage Guide menu inside Dashboard)

That is how you can add a premium plugin to Appsero.

