You can sell your plugin or theme through the Paddle integration using Appsero.
Here are the steps to integrate Paddle with Appsero.
Video Tutorial
Watch this step by step video tutorial for starting selling with Paddle.

Step 1: Creating a Paddle Account
At first, you need to create your Paddle account. Just add your first name, last name, your company website, and email and headquarters. The signup process is very straightforward.
Step 2: Creating a New Plan On Paddle Account
Now, you need to create a new subscription plan after entering into your account. Navigate to, Catalog-> Subscription Plans. Click on New Plan.

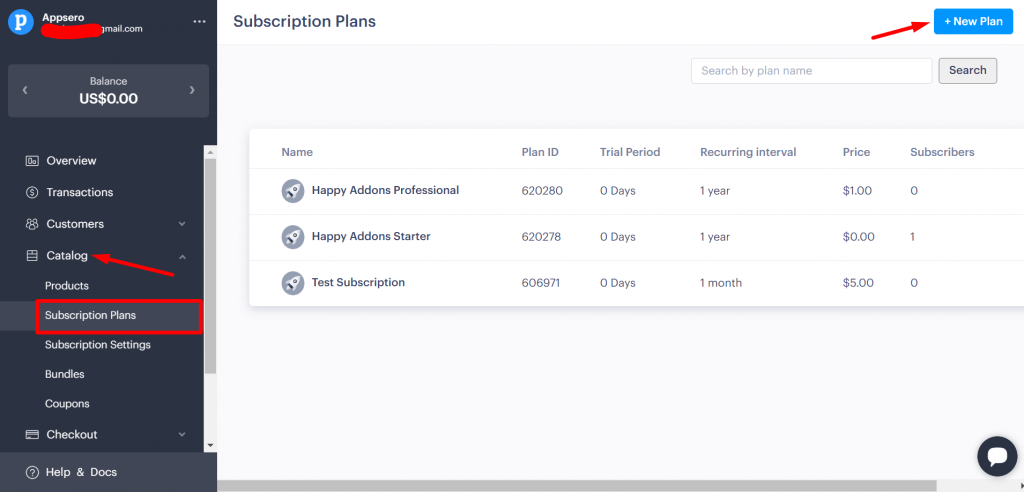
Add all the necessary credentials to create your plan.


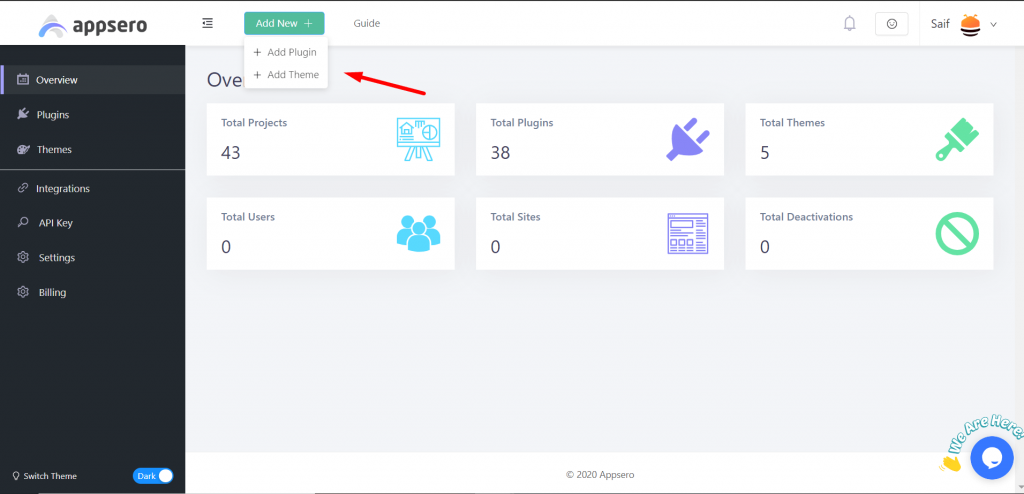
Step 3: Log in to your Appsero dashboard and Add a new plugin/theme
Now, go to your Appsero dashboard and add a new plugin/theme.

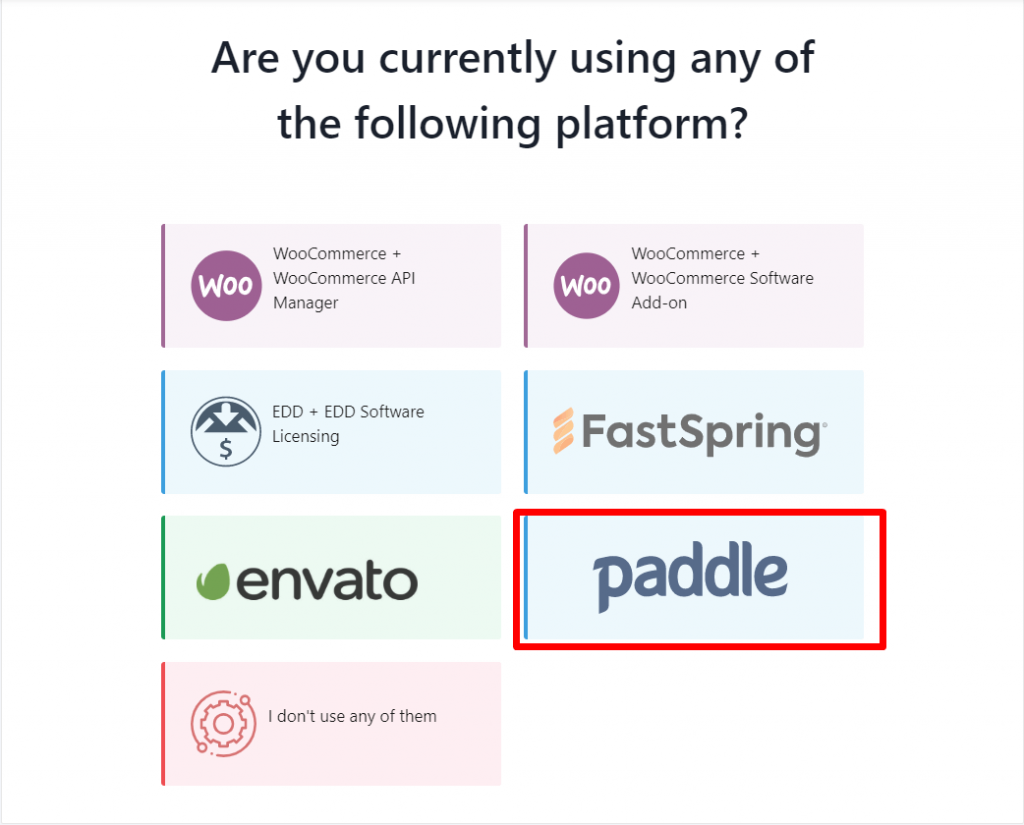
Step 4: Choose Paddle as your platform
Now, you need to choose your selling platform. After adding a plugin/theme, choose Paddle as your selling platform.

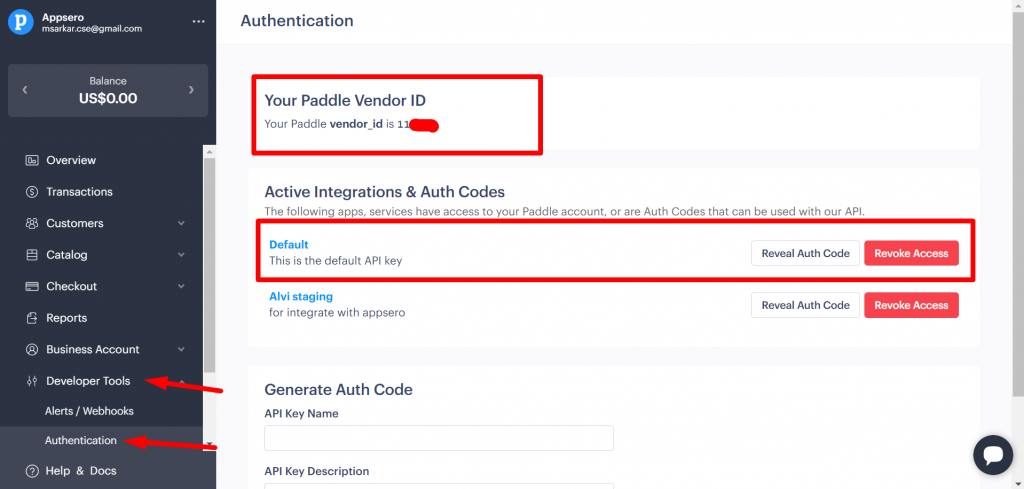
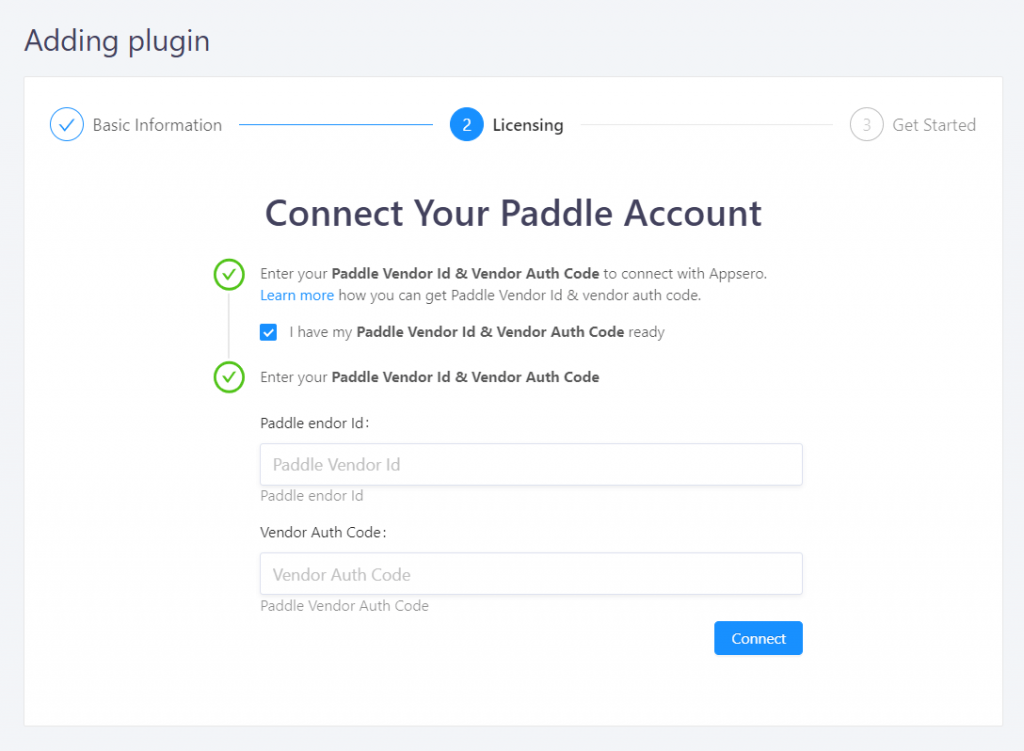
Step 5: Collect vendor id & auth code
In order to connect your Paddle account with Appsero, you need to add your vendor id and vendor auth code to your Appsero account.
Go to Developers Tools-> Authentication from your Paddle account. There you will find your vendor id and code.

Step 6: Add vendor id & vendor auth code to Appsero
After collecting your vendor id and auth code, add them to Appsero and click on Connect to finish.

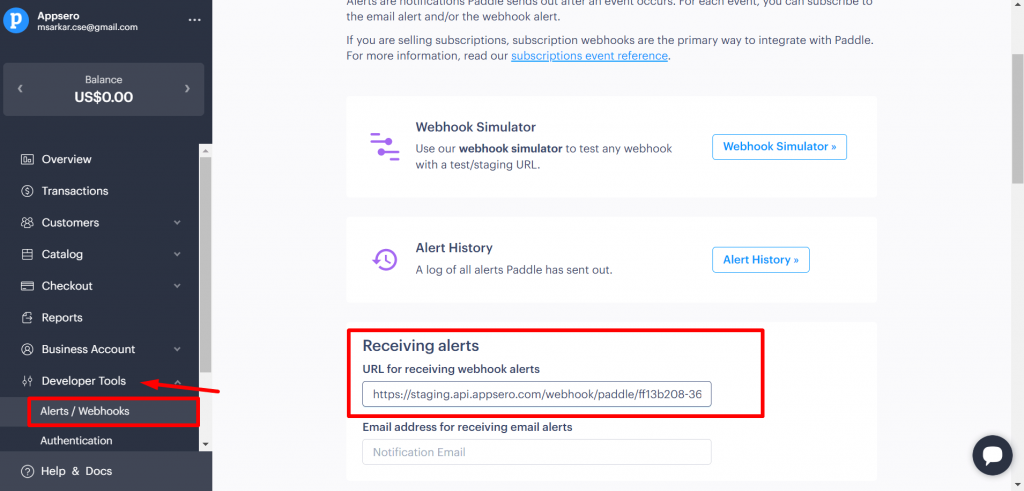
Step 7: Adding webhook
After you successfully finish the connection, you need to add the webhook from Appsero to your Paddle account.
After you check “I have my products ready at Paddle” , you will be given a webhook.

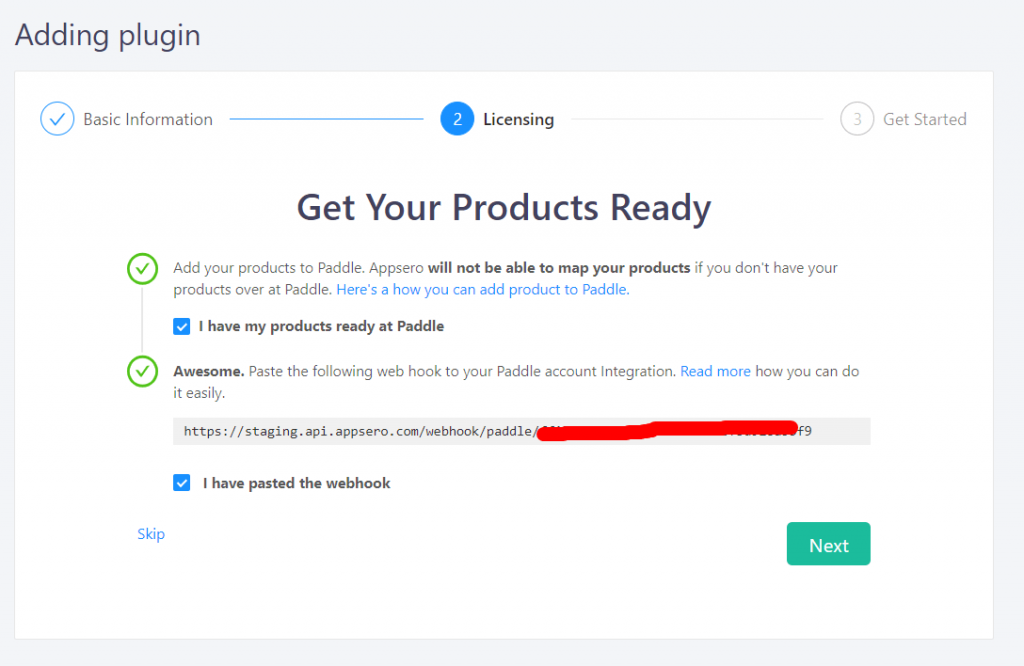
Now, paste that webhook at, Developer Tools-> Alerts/Webhooks on your paddle account. Save changes.

Step 8: Add your products to Appsero
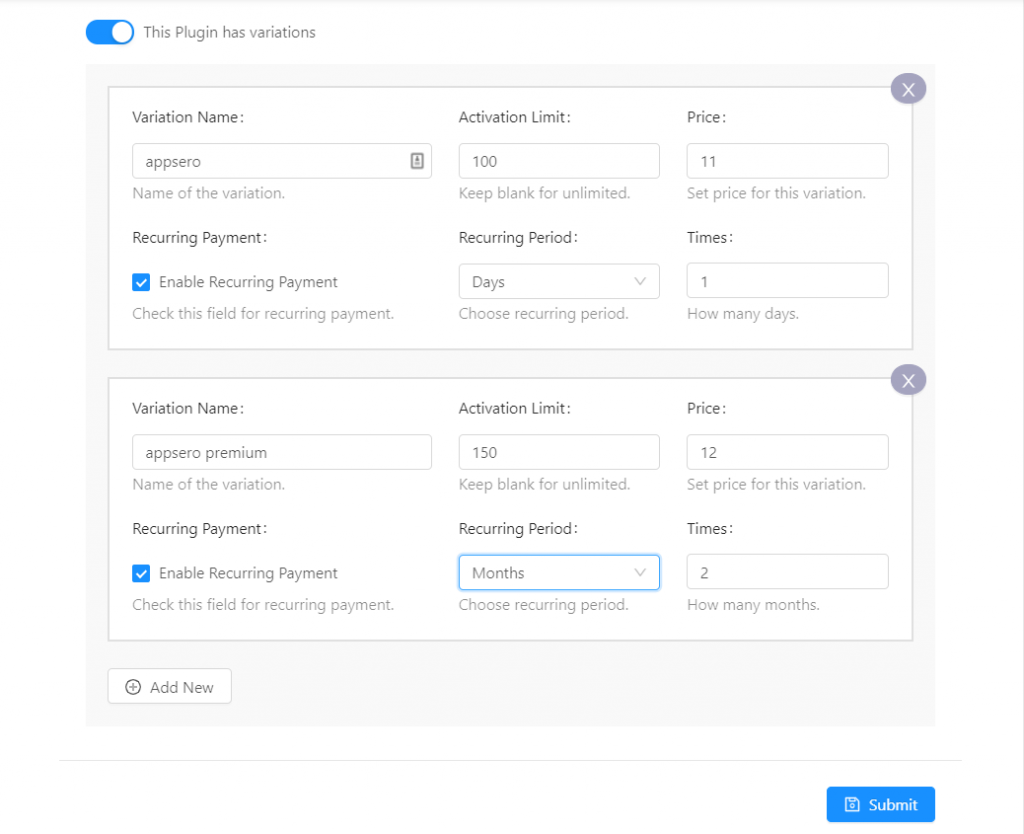
Add the product to Appsero. You can also set your activation limits if you want. If your product has recurring payment, you should check the Enable Recurring Payment.

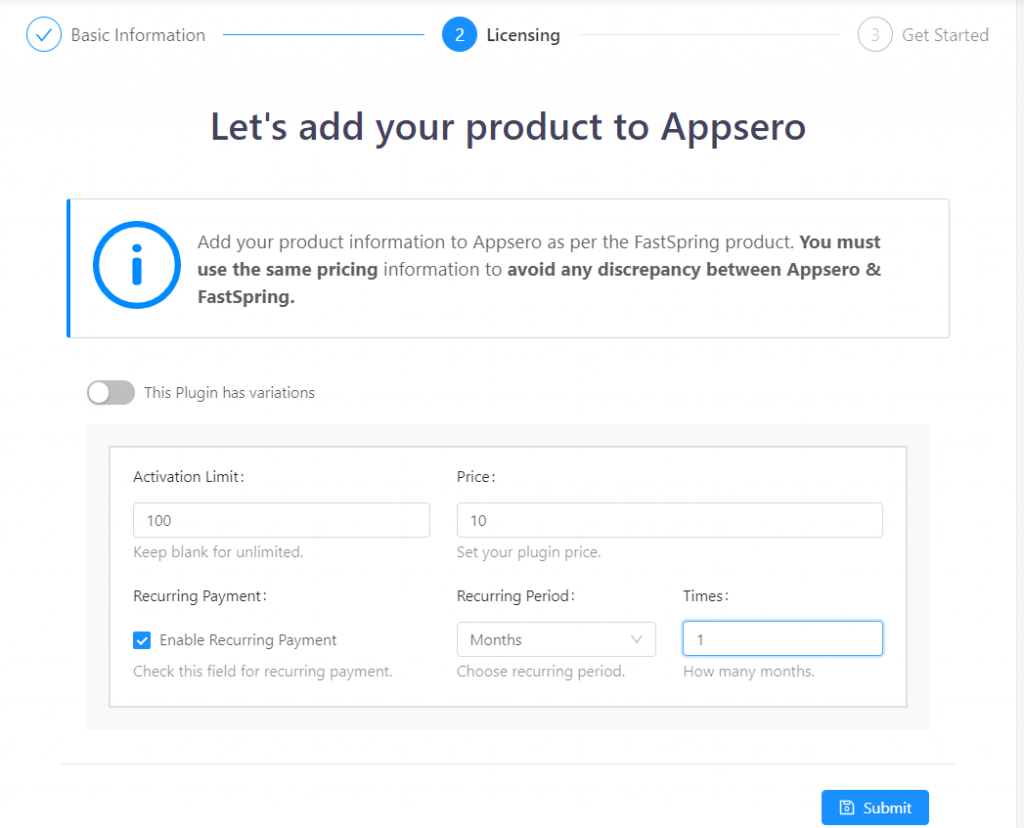
If your product has variations like “Free” and ” Pro”, then you can enable “This Plugin has variations“. Then you can add both the products.

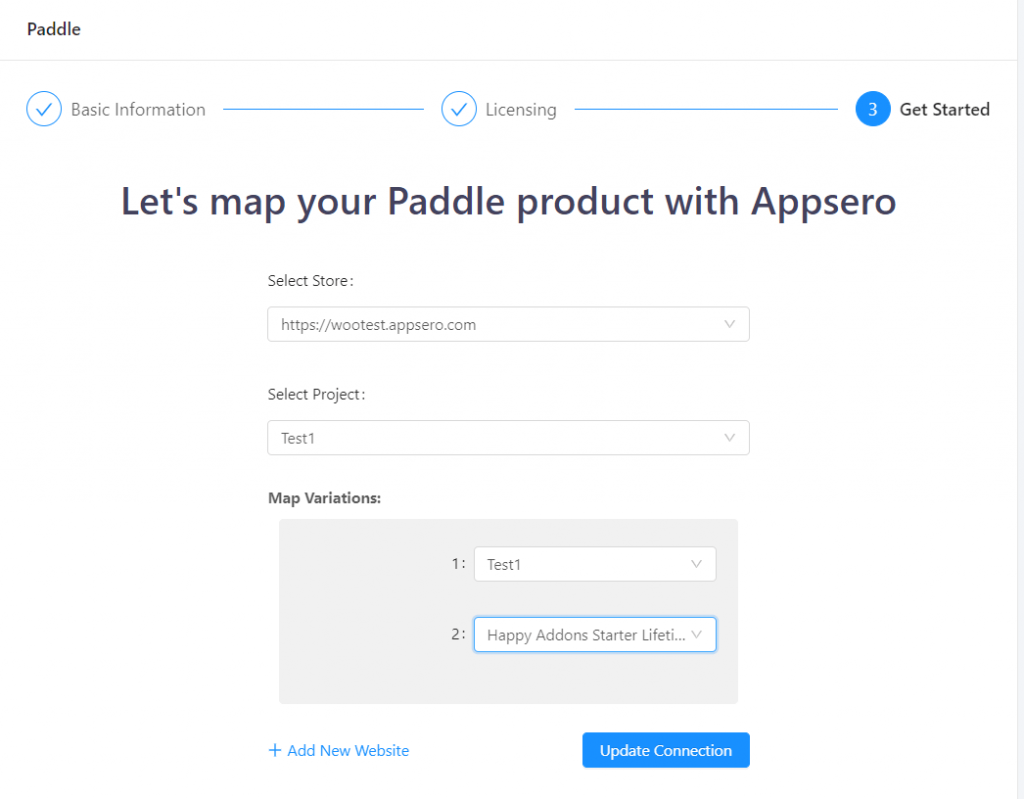
Step 9: Map your Paddle product with Appsero
Now, select the store you want to sell your products from. And, then choose the Paddle product.

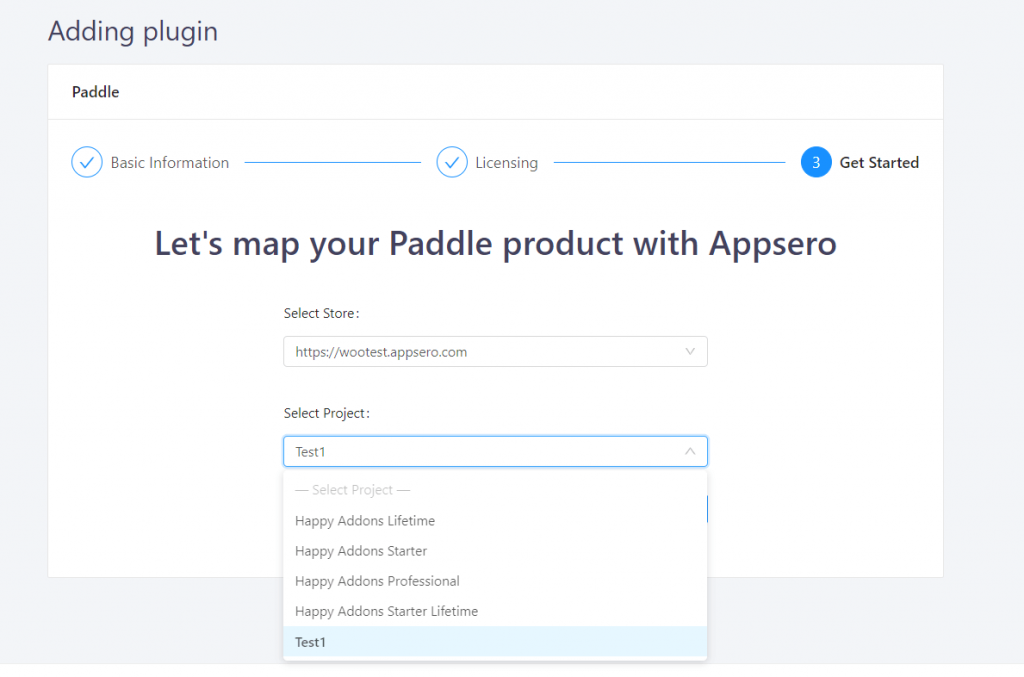
If you have variations, you need to map them accordingly.

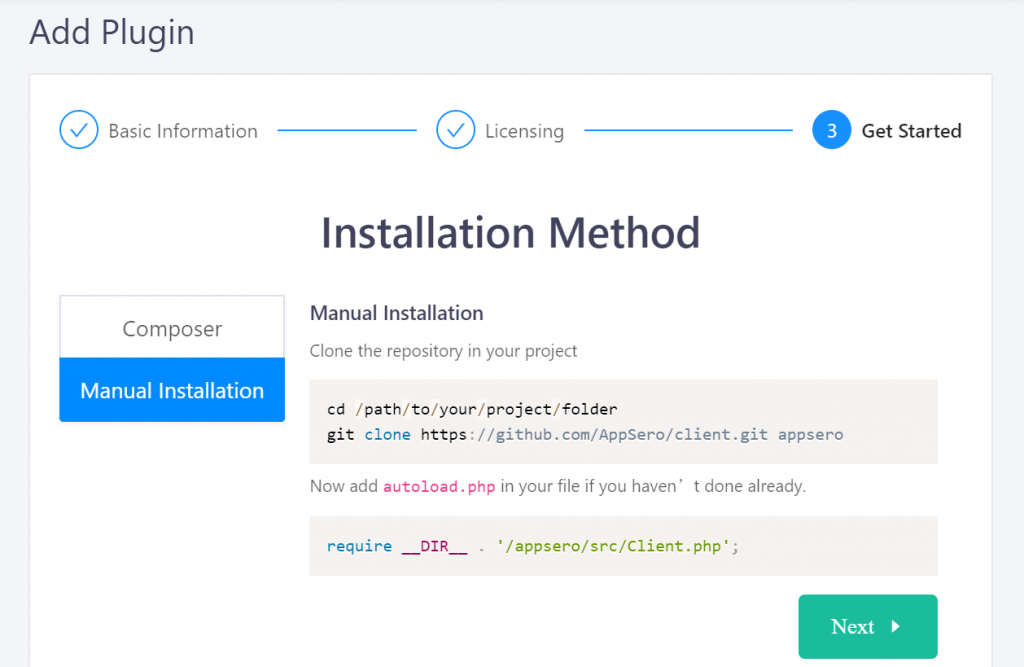
Step 10: You are done!
Finally, you will find an Installation Method section. You need to install an Appsero-Client plugin. You can do that in two ways.
- Composer
- Manual Installation
In the case of Composer, you need to use these below commands.

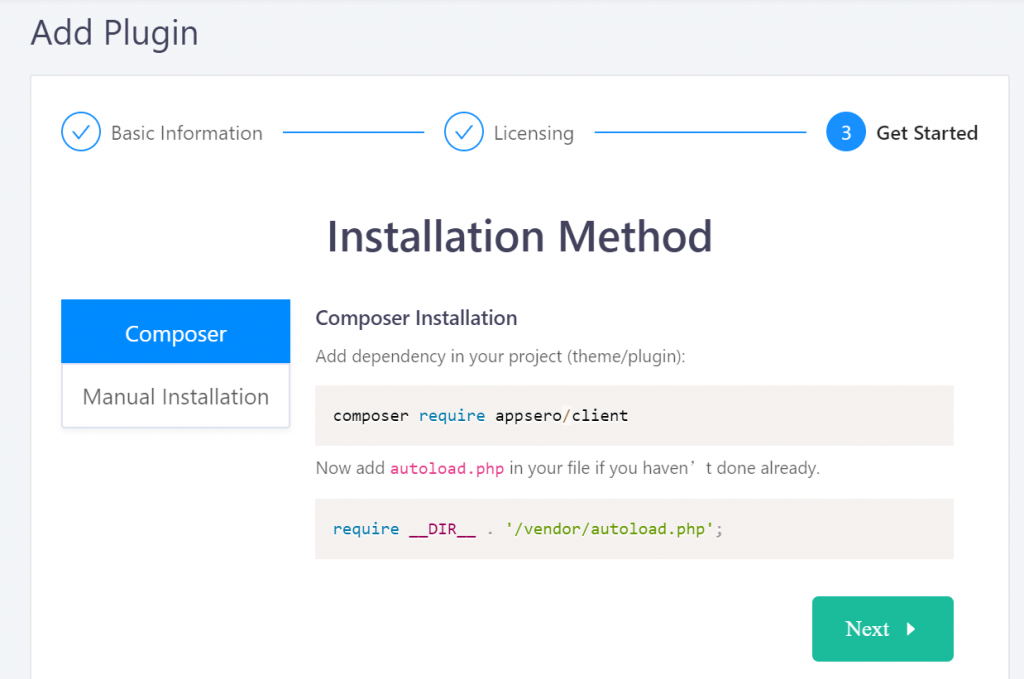
But in the case of Manual Installation, you need to clone the Appsero Client to your project folder.

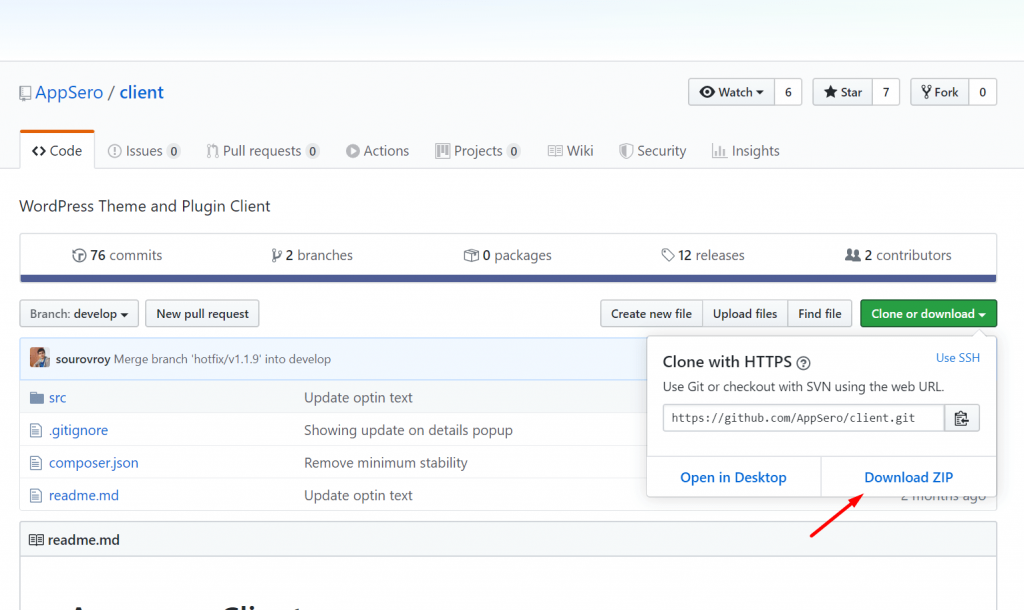
You can also directly download the repo, and extract the content inside your project’s root folder.

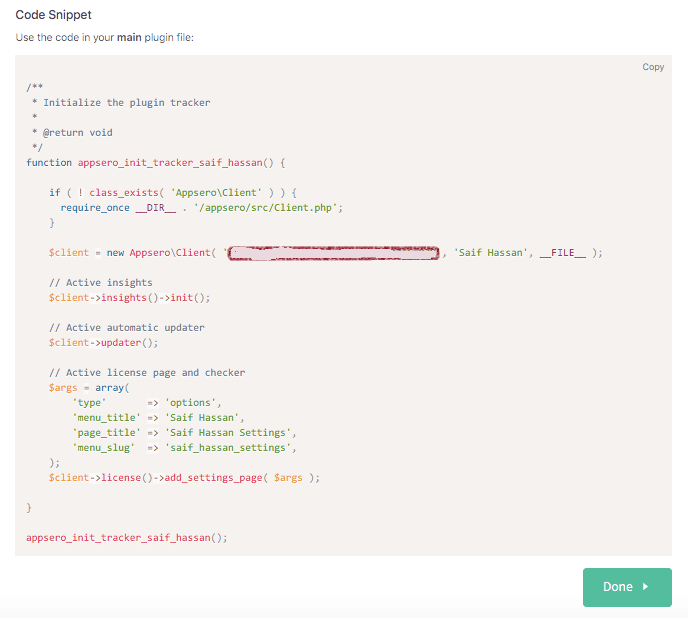
Lastly, copy the Code Snippet generated for you into your main plugin file. Click Done to finish. (You can find the same usage code in the Usage Guide menu inside Dashboard)

You will get an “Successful” message after finishing.

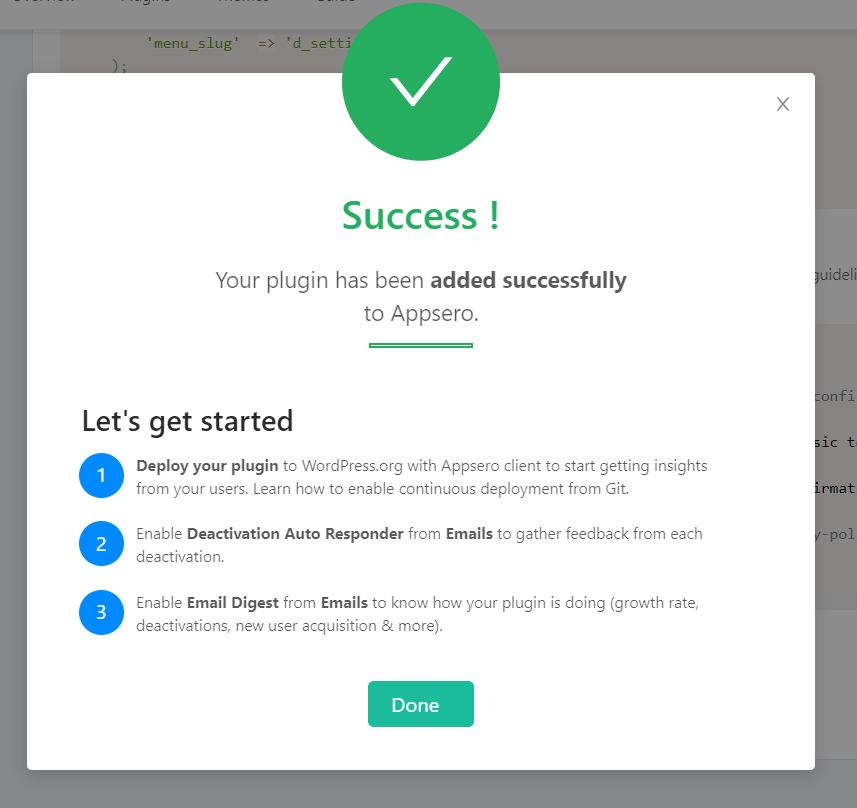
That’s it for Paddle integration with Appsero.

