You can add a free theme using Appsero. Here are the steps.
Basic Information
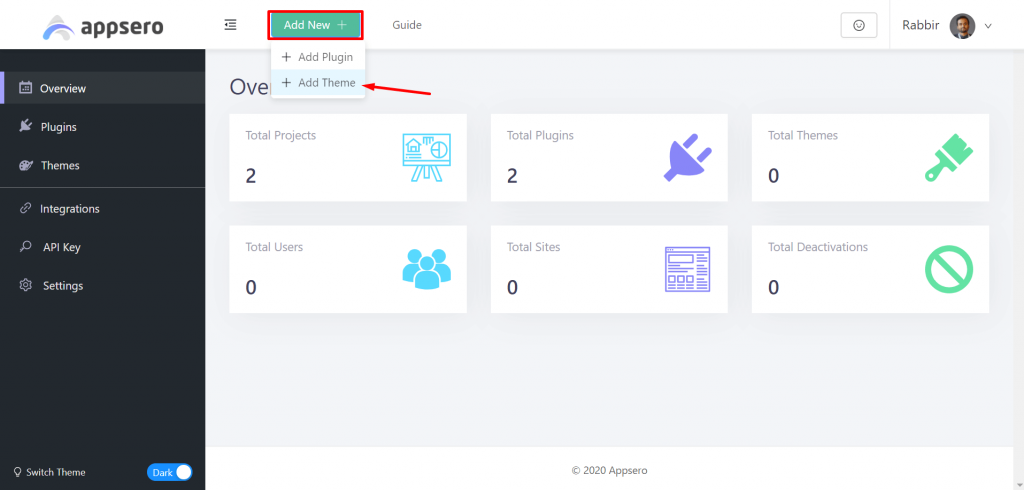
To add a new theme, click on the Add New button. There you will find two options “Add Plugin” and “Add Theme“. Click on the “Add Theme” button.

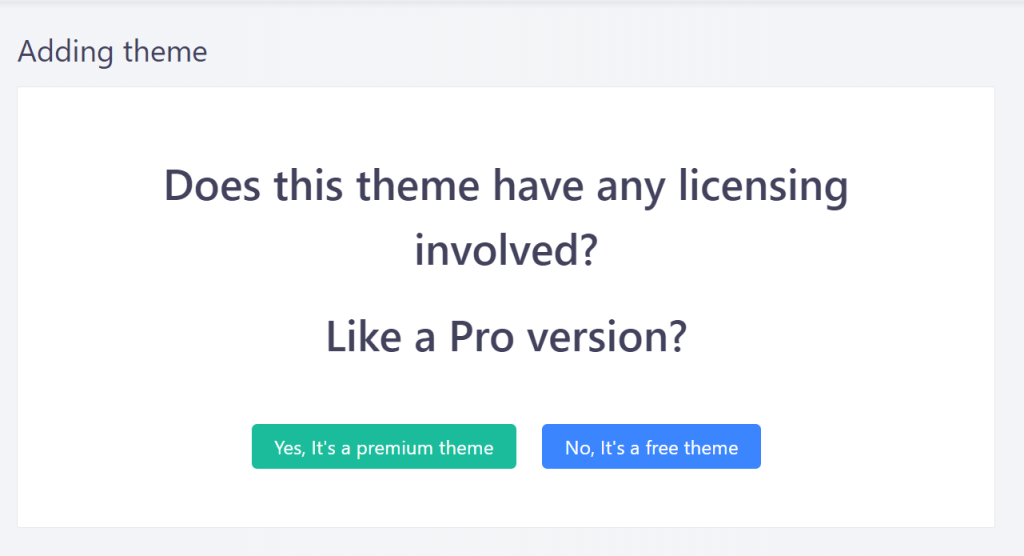
As you are adding a free theme, click on the “No, it’s Free Theme” button.

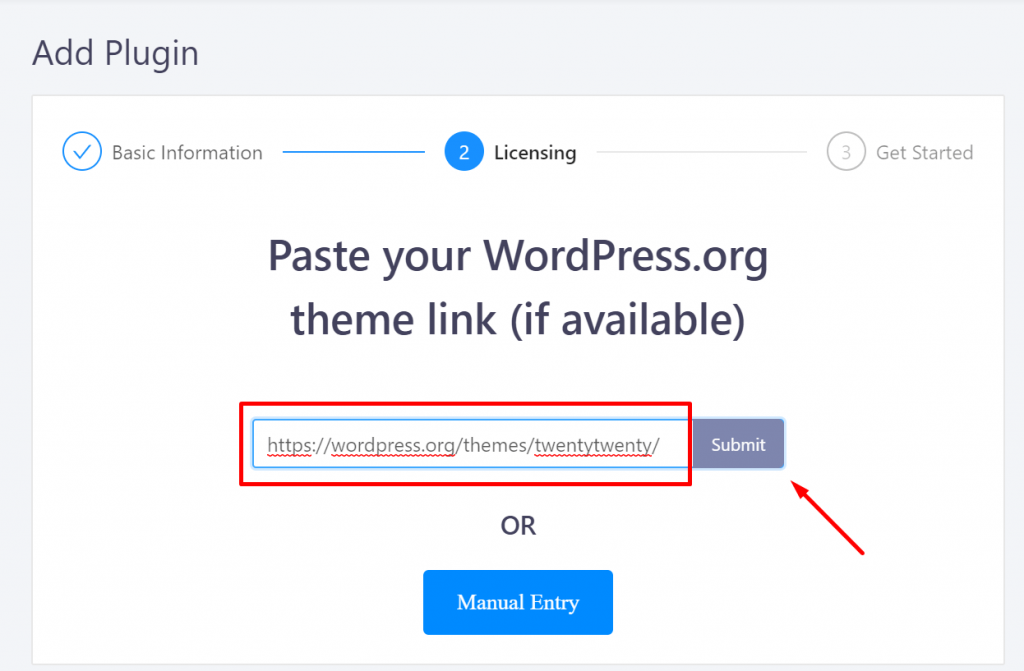
If you have the plugin on the WordPress repository already, just add the Slug/URL of that plugin. Click on Submit to finish. Appsero will automatically fetch all the information.
But, there is also an alternative way. Hit the Manual Entry button to enter all the details manually.

Next, there two things. If you add the slug of your theme then Appsero will automatically fetch all the details from WordPress.org.
But, if you hit the Manual Entry button, then you will have to enter all the details by yourself.

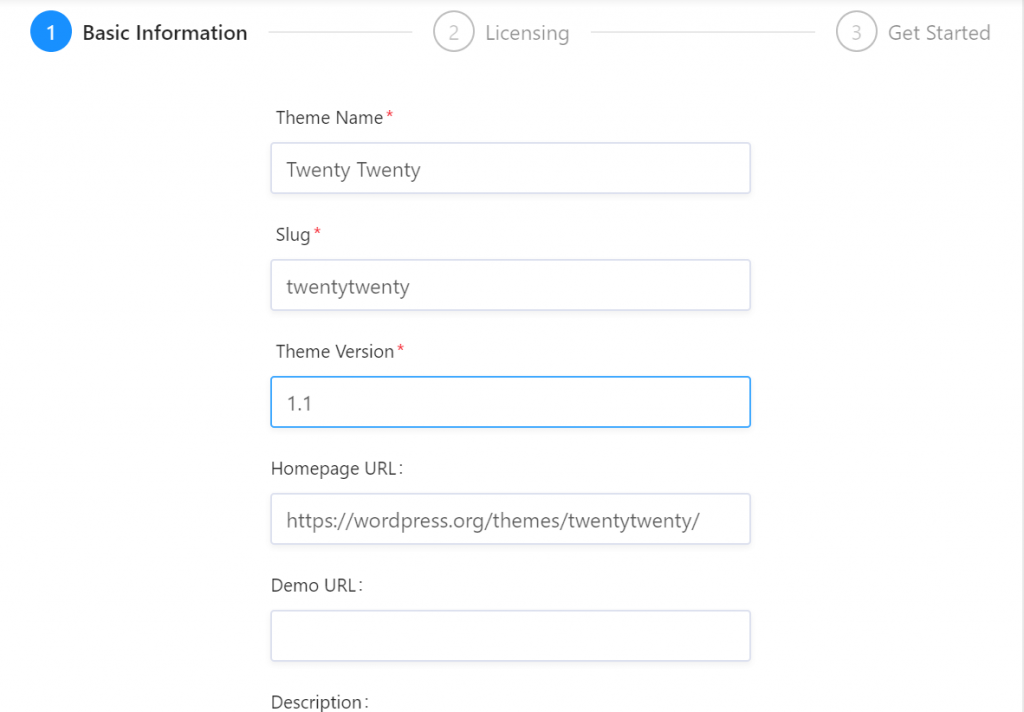
Now, below are listed all the fields that will be filled up. You can find what is the required field and what is not.
Available fields
| Name | Required | Description |
|---|---|---|
| Theme Name | Yes | The name of the theme. |
| Slug | Yes | The slug of the theme. It will be generated automatically but if you want you can change it. Note that you will not be able to update it later.| |
| Version | Yes | The version of the theme. You will be able to add a new version at the time of release. |
| Homepage URL | No | Website URL of the theme. Put Website URL based on the hosted store. Put WordPress.org URL of the theme if it is hosted on WordPress.org. |
| Demo URL | No | Demo site URL of the theme. |
| Description | No | Give a description of the theme. This field is markdown supported. |
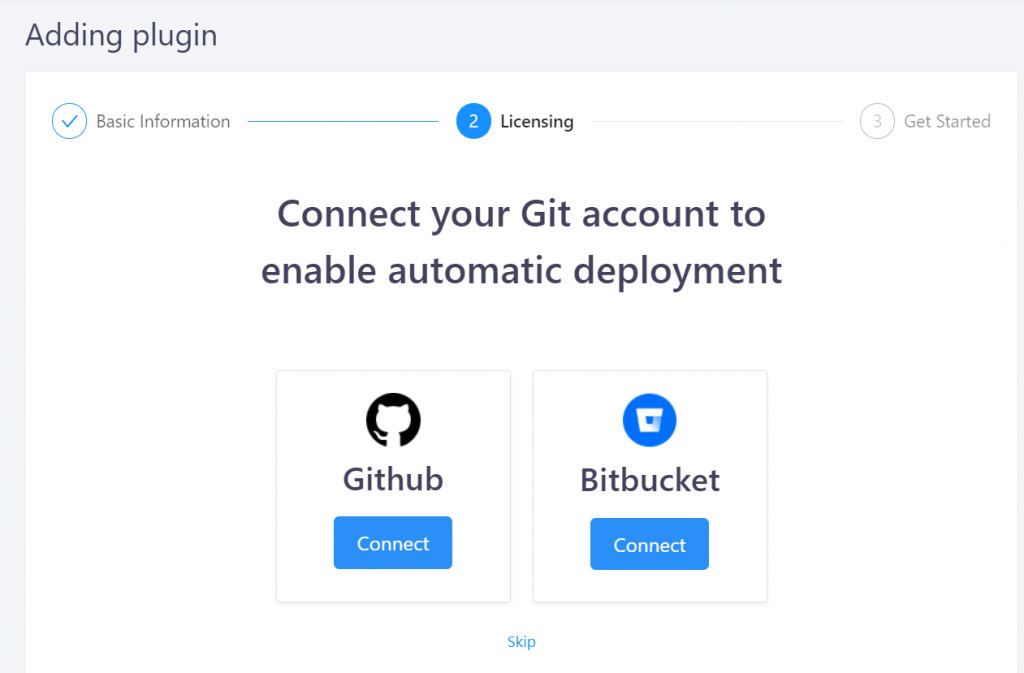
Licensing
Now onto the Licensing part. You need to add your theme. There are three options to add your theme.
- GitHub
- BitBucket
- Gitlab (Upcoming)
You can choose to connect your account with GitHub or Bitbucket.

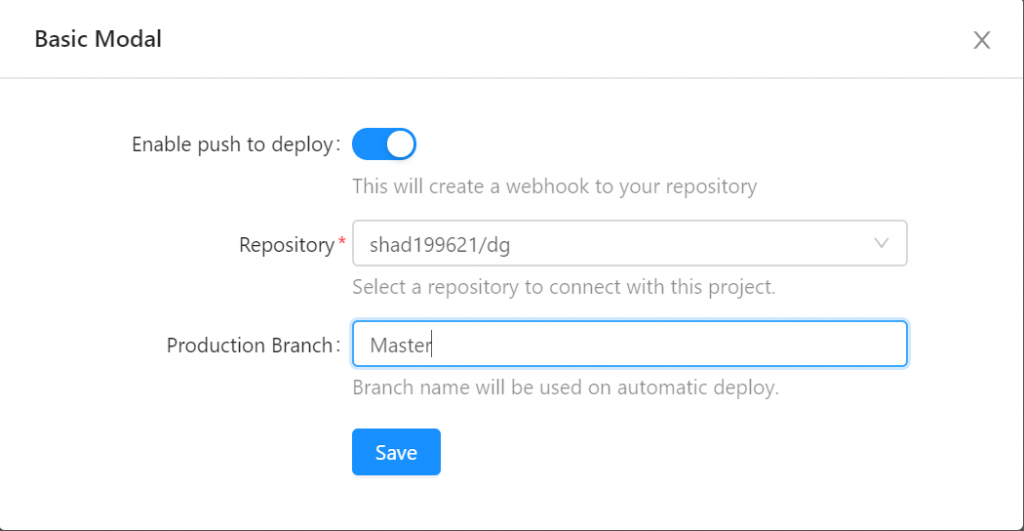
When you click on the Github’s “Connect“, you will get a pop-up. There you can Enable push to Deploy, and fill up your Git Repository and the Branch.

Then, if you want you can connect your WordPress.org account. It will enable you to deploy to WordPress.org from Appsero directly from Git.

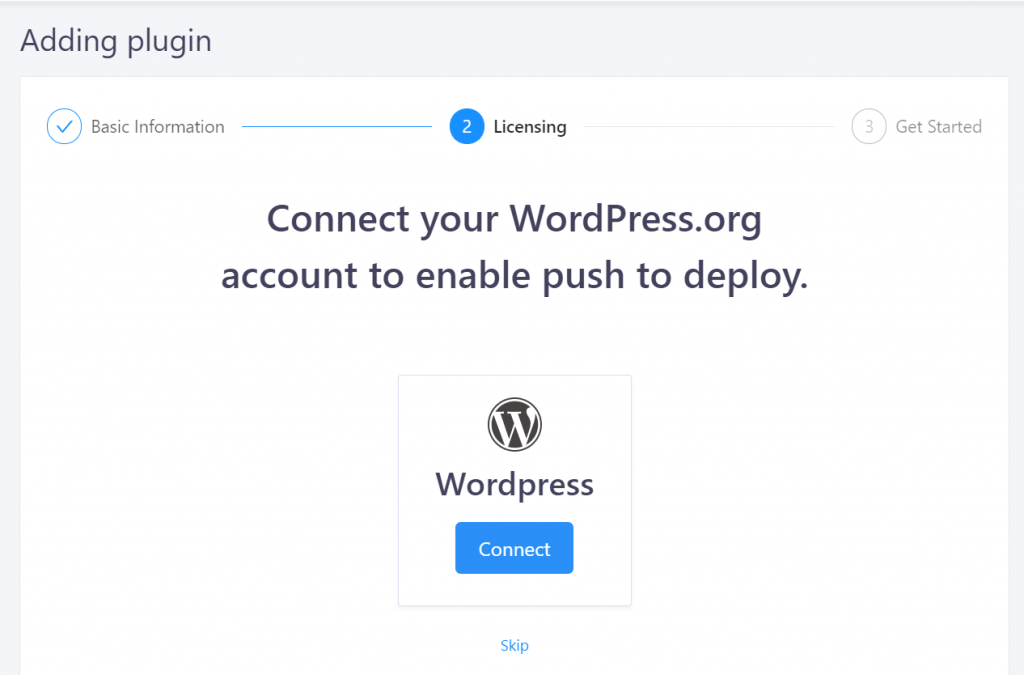
You are done with your Licensing.
If you skip or forget to connect to any of these platforms, you can easily do that from the Integrations section.
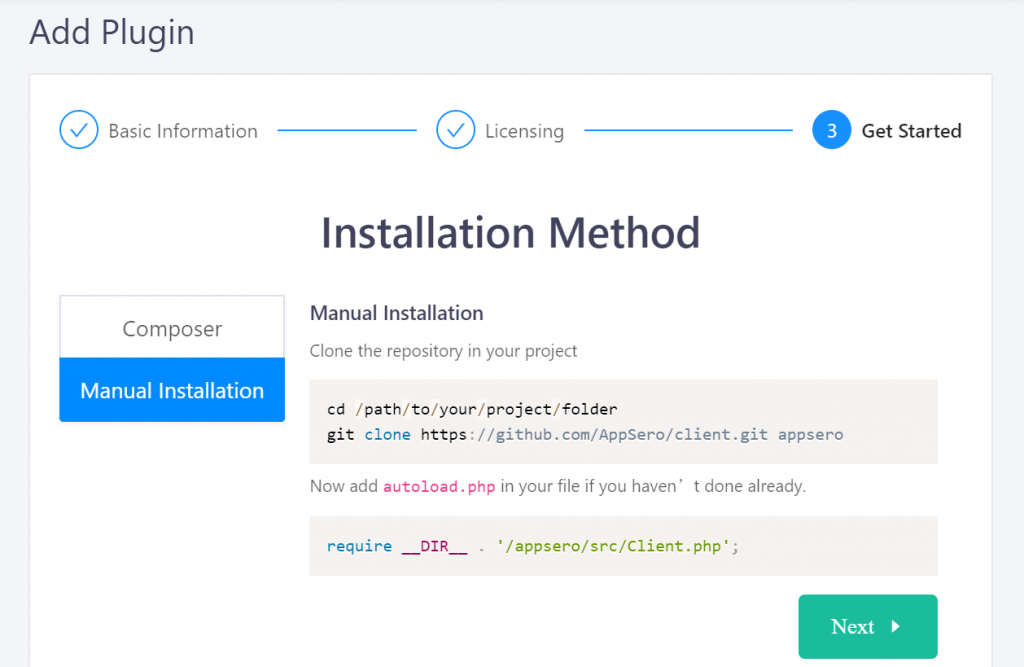
Get Started
After, Adding a plugin and Licensing now it is your turn to get started.
You will find an Installation Method section. You need to install an Appsero-Client plugin. You can do that in two ways.
- Composer
- Manual Installation
In the case of Composer, you need to use these below commands.

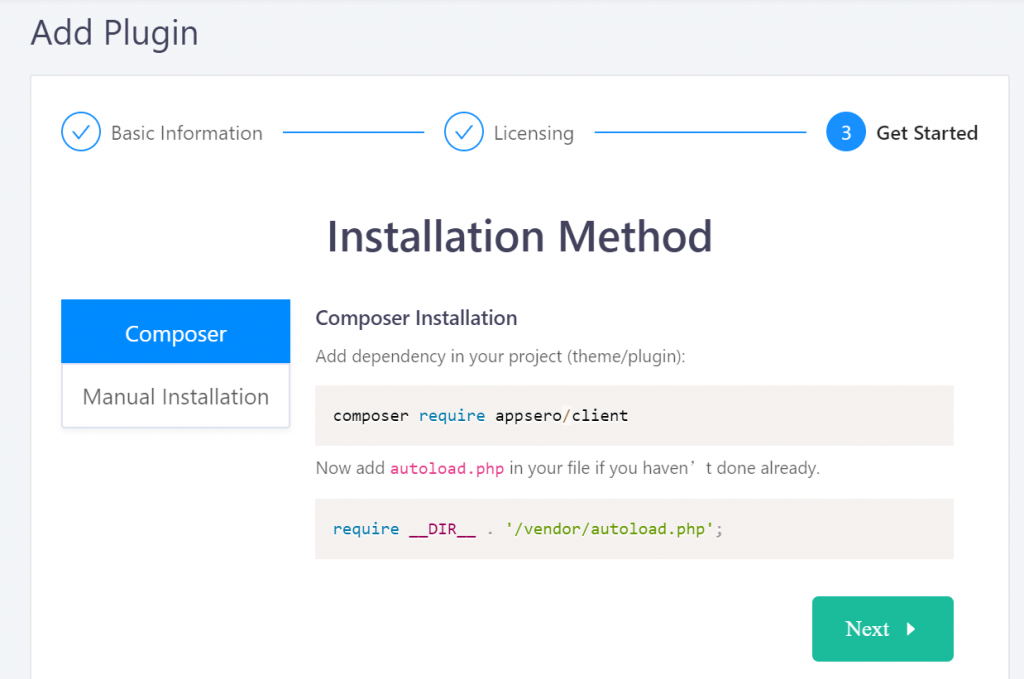
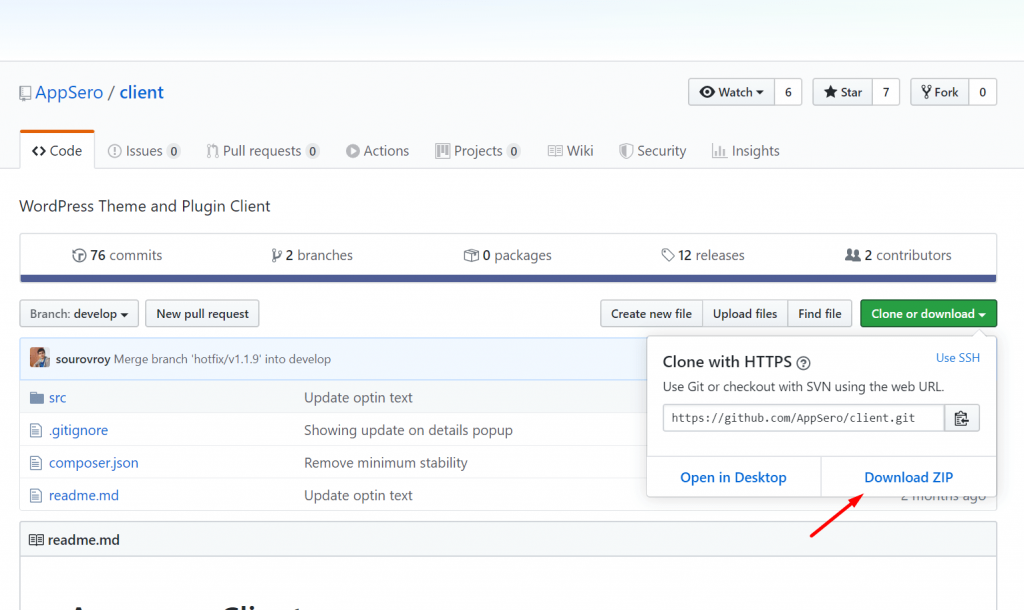
But in the case of Manual Installation, you need to download or clone the latest Appsero client.

Download or clone the Git repository from Github. Remember to save and extract the folder in your root folder of plugin/theme

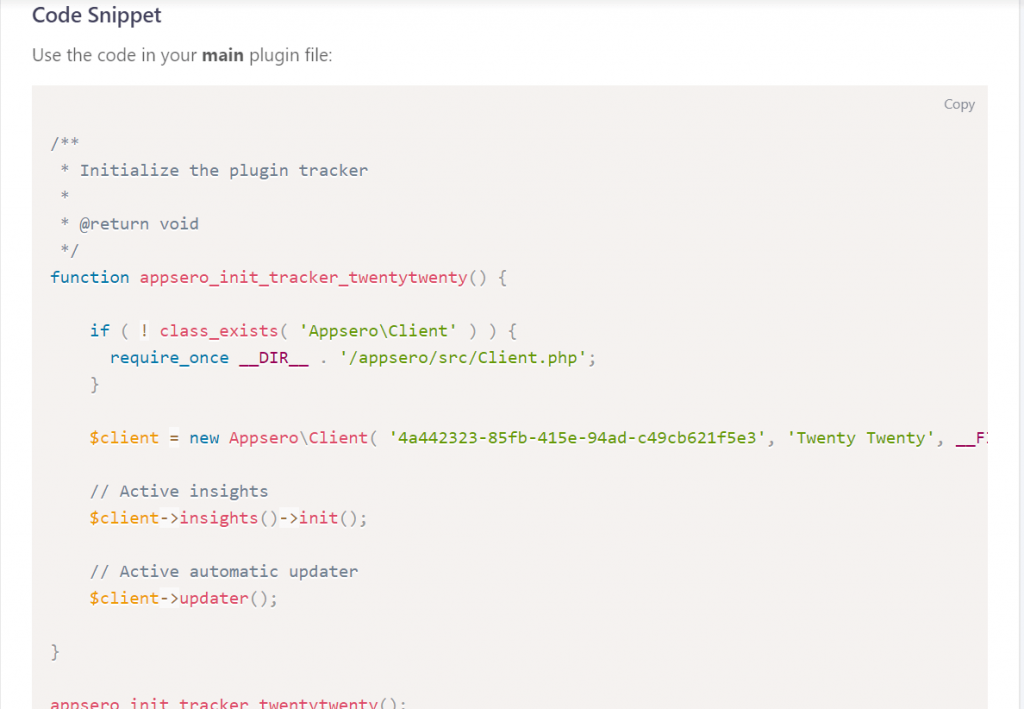
Lastly, copy the Code Snippet into your main plugin/theme’s file. Click Done to finish.

If you follow the on-screen instructions, you will be successfully adding your theme to Appsero.

You have added a free plugin!
Congratulations 🎉 the plugin has been successfully added to Appsero. Read more about the Appsero Client documentation
Lastly, you can read the Push to Deploy documentation to deploy your plugin directly from your command line.

