
How to Translate WordPress Plugins and Themes Automatically As a Developer
As you know WordPress is the most popular CMS (Content Management System) and people all over the world are using it. According to a study it powers over 33% of the websites.
By default, WordPress speaks English. But there is no guarantee that all of that 33% of WordPress users use English. They may take their native or other languages as their website language. After all, you can’t control which language they should choose.
So, as a WordPress plugin or theme developer, you must offer multilingual products to outreach as many users as possible.
Translating WordPress plugin manually is quite an impossible and time-consuming task. So, here we are to show you a path to translate WordPress plugins and themes in an automated way. Keep reading.
Why You Need to Translate WordPress Plugins and Themes
As a developer, it’s important to make available your products in different languages. WordPress websites are accessed from all across the world by people who speak languages other than English. In fact, according to a recent survey, 55 percent of users preferably shop online in their native language.
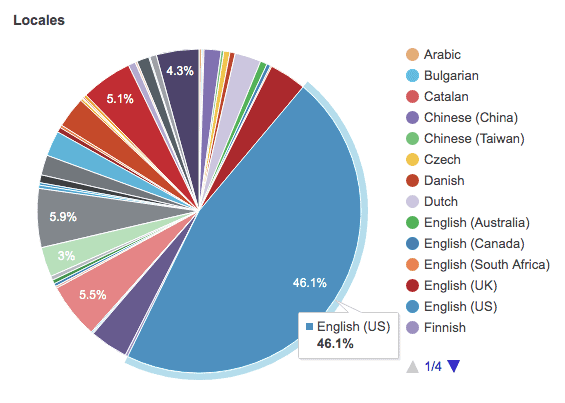
Surprisingly enough, less than half of all WordPress sites have their locale set to English! If you don’t have translations set up already, that means more than 50% of your potential customers probably can’t work with your product in the language they best understand.
One of the best ways to open up your product to the world is by creating high-quality translations of all user-facing text.
Providing translation ready WordPress products, you will also be benefited in many ways like,
Bigger Audience: Not all users understand English. And, there are many people who prefer to get plugins in their native languages. So, when you offer the same plugin with and without translation ready. You will hardly find anyone who goes without a translation-ready plugin.
Better SEO: Not everyone searches on Google using English. So, if you offer translation ready products, you will get a better search result. And, your users will get better SEO results as well.
Psychological Advantage: Translating your plugin or theme has some positive psychological implications for your customer. Multilingual plugins reflect that the developer invested time on more than just technical issues. Customers will recognize this value and hopefully therefore see the quality of your product in a different way.
How to Translate WordPress Plugins and Themes Automatically

First thing first. All plugins must be internationalized before being localized. A great place to start is the WordPress.org guide I18n for WordPress Developers that explains the steps.
Once you’ve created your .pot/.po files, you can proceed on the scripting process below.
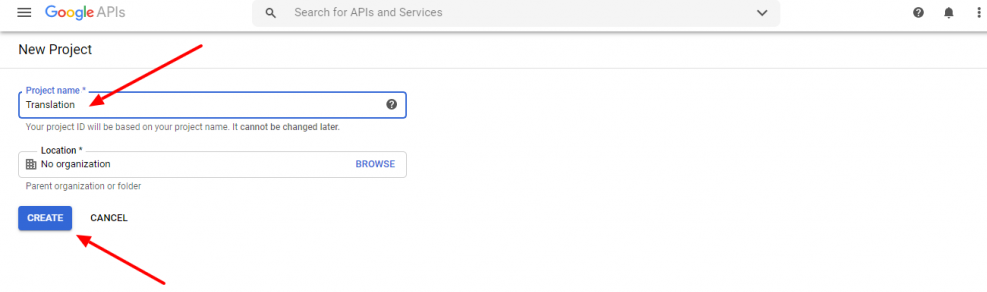
Step 01: Create a Project
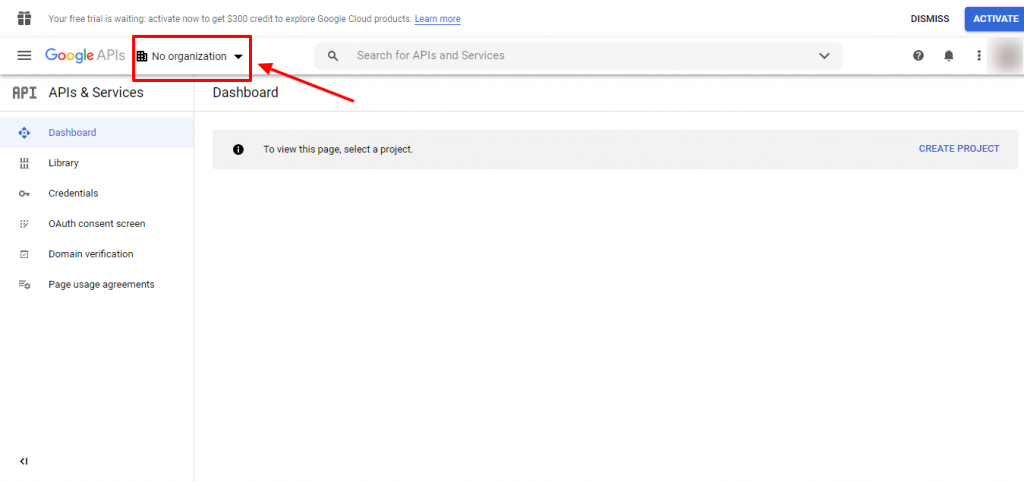
- Go to https://console.developers.google.com and login
- Click “No organization” or select your preferred organization
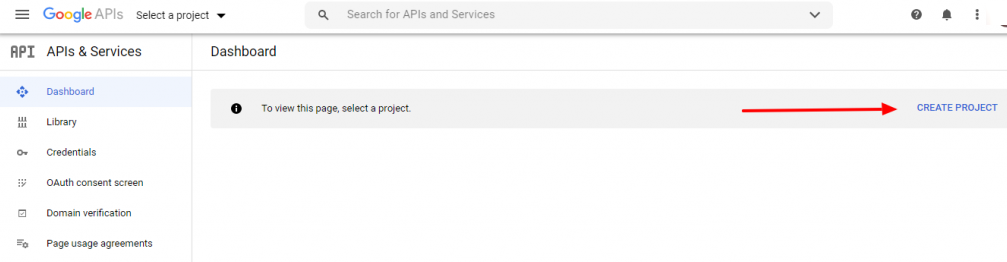
3. Click “Create project”:
4. Enter a project name and click “Create”
5. Click “Enable APIs and services”

6. Search for the “Cloud Translation API” and enable it.
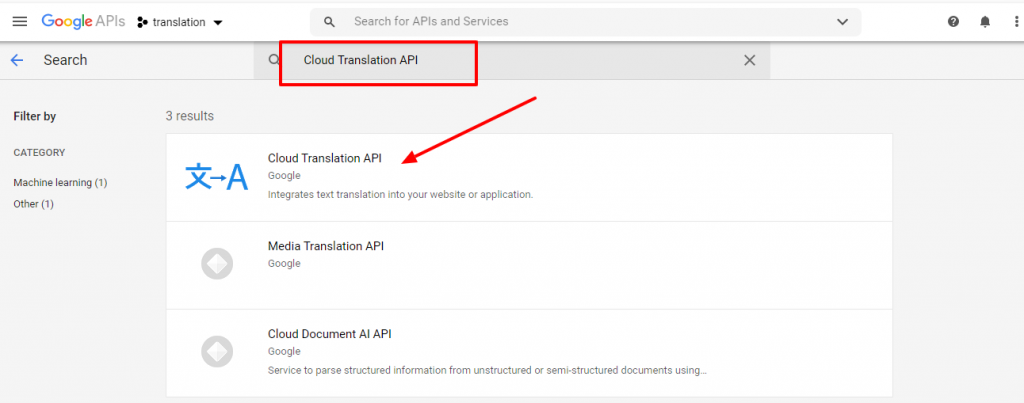
In case it demands your billing account. Do it for getting a free trial.
Now we have a project.
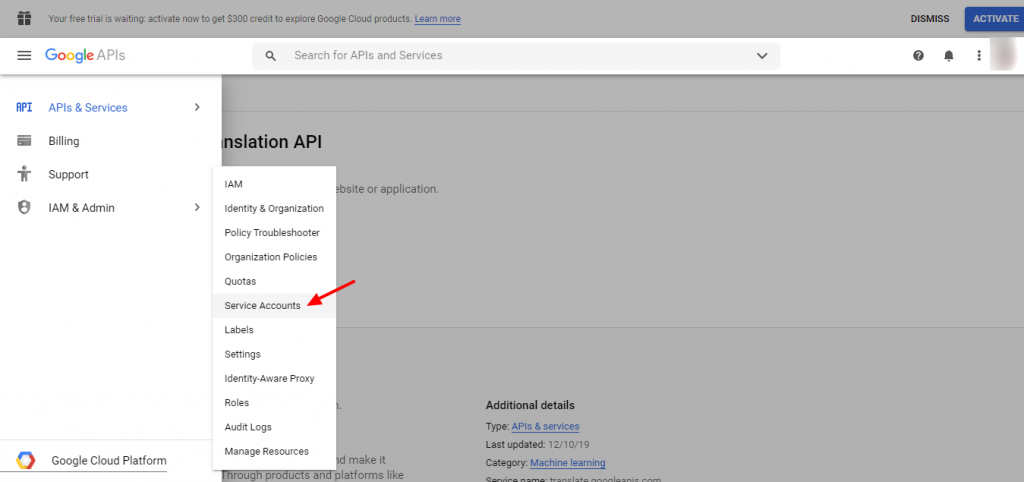
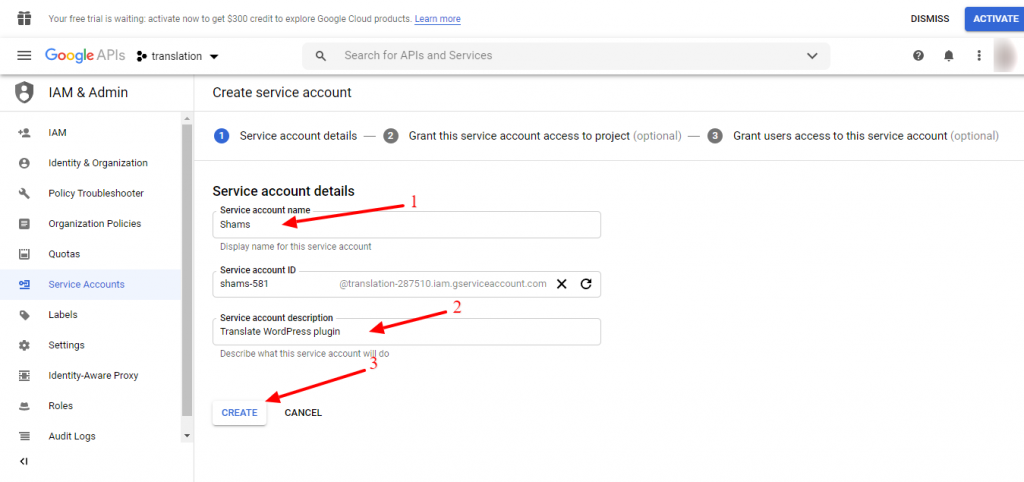
Step 02: Create a Service Account
1. Go to “Service accounts” section from the main menu: “IAM & Admin”
2. Click on “Create service account”
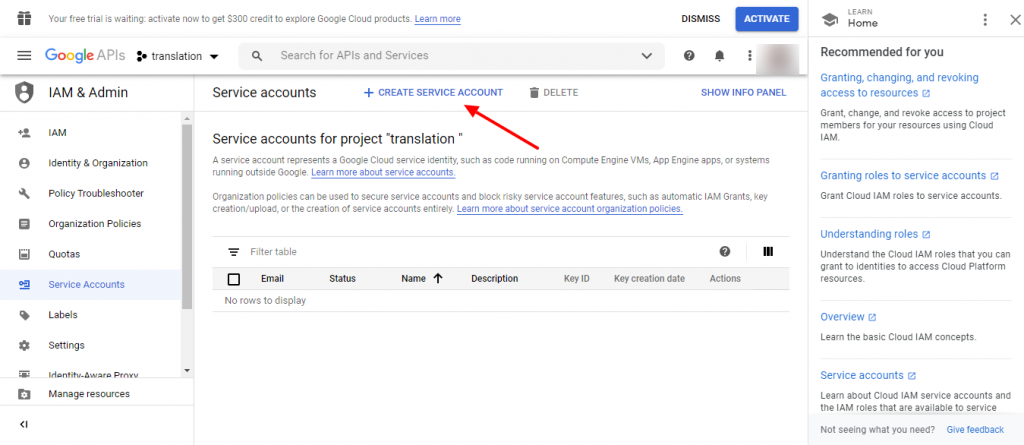
3. Enter a name and a description for the service account and click “Create”
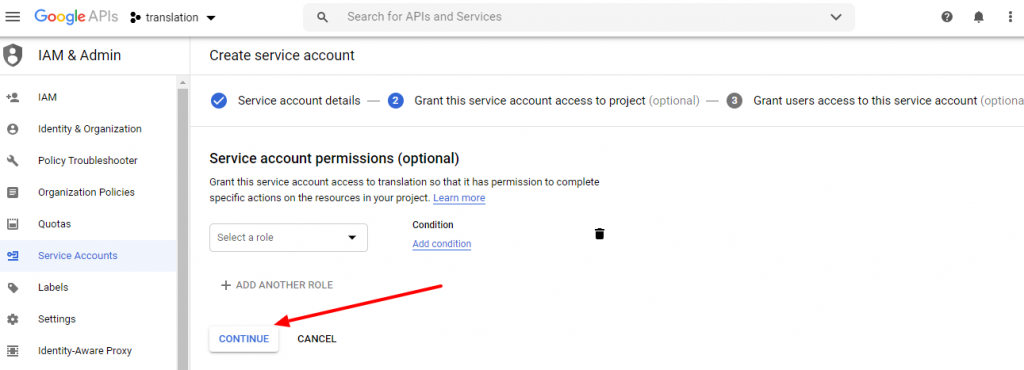
4. Click “Continue” to skip role selection as we don’t need it
5. Now click “Create key” and select the JSON format. Then click “Done”.

6. After you create the key, the browser will download it automatically. Remember the folder where you’re going to save the file as we’ll need it later.
Step 03: Final Step
Now it’s all ready to go but before running the script be sure you have set the GOOGLE_APPLICATION_CREDENTIALS environment variable as described in the guide:
Example: Linux or macOS
Replace [PATH] with the file path of the JSON file that contains your service account key.
export GOOGLE_APPLICATION_CREDENTIALS="[PATH]"For example:
export GOOGLE_APPLICATION_CREDENTIALS="/home/user/Downloads/service-account-file.json"Example: Windows
Replace [PATH] with the file path of the JSON file that contains your service account key, and [FILE_NAME] with the filename.With PowerShell:
$env:GOOGLE_APPLICATION_CREDENTIALS="[PATH]"For example:
$env:GOOGLE_APPLICATION_CREDENTIALS="C:\Users\username\Downloads\[FILE_NAME].json"With command prompt:
set GOOGLE_APPLICATION_CREDENTIALS=[PATH]Now that we are done with the boring stuff, we can start translating!
- Clone the repository from https://github.com/GreenTreeLabs/po-gtranslator
- Open up your command line and run the following command:
- Git clone https://github.com/GreenTreeLabs/po-gtranslator.git
- If you don’t have git installed you can download it here.
- Enter the directory po-translator:
cd po-gtranslator- Install the dependencies:
npm install- In case you don’t have the npm utility be sure to install Node.js from here.
- Run the script with all the needed parameters:
node po-gtranslator.js --project_id=final-tiles-gallery --po_source=it.po --po_dest=it_IT.po --mo=it.mo --lang=itLet’s have a look at each parameter:
--project_id: ID of your Google project, you can get it from the Google Cloud Console
--po_source: path of the empty PO file that you want to translate
--po_dest: path of the PO file with the translations
--mo: path of the MO file
--lang: code of the language you want to translate to
Note that the source PO file will be kept untranslated and it can be used to generate as many languages as you need. The PO file you need to add to your plugin or theme is the one you pass as –po_dest, which is unique for each language.
Congratulations! You have just completed all of the steps to translate WordPress plugins and themes.
How to Automatically Translate WordPress Plugin FAQ

Question 1: Is Multilingual Sites are Allowed in WordPress?
Answer: WordPress does not support a bilingual or multilingual blog out of the box. But you can use a plugin to translate your site into any other language. Or, as a developer you can follow this blog to get your job done. There is also guidance for WooCommerce Multilingual Marketplace to build multilingual stores.
Question 2: What Is the Best Translation Plugin for WordPress?
Answer: Here is a list of the best WordPress translation plugin;
- TranslatePress
- WPML
- Polylang
- Weglot
- MultilingualPress
- Translate WordPress with GTranslate
- Transposh WordPress Translation
- Google Website Translator
Question 3: How to Create a Multilanguage Plugin for WordPress?
Answer: Go to Appearance » Widgets and add the language switcher widget to your sidebar or another widget-ready area. You can choose a drop-down, or use language names with flags.
Once you are done, click the save button to store your widget settings. You can now preview your site to see the language switcher in action.
Question 4: How to Use Google Translate Plugin in WordPress?
Answer: After activating the plugin go to Settings » Google Language Translator to configure the plugin. Make sure that the check box next to the plugin status is checked. After that, you need to select your website’s default language, and the languages you want to be available for translation.
Question 5: What Is Polylang?
Answer: Polylang is a WordPress multilingual plugin that helps you to create a bilingual or multilingual WordPress site. You write posts, pages and create categories and post tags as usual, and then define the language for each of them. The translation of a post, whether it is in the default language or not, is optional. You can use as many languages as you want.
Question 6: How to Add Languages to WordPress?
Answer: From the WordPress dashboard, open Settings > General. In the General Settings page, scroll down to find the language setting at the very bottom of the page. In the drop-down box, you will find many languages. Choose the one that you want and click on it.
Translate Your WordPress Plugins and Sell It Globally

You don’t need to be global. Instead, make your WordPress products global by offering translation-ready plugins and themes and sell them around the world.
As a WordPress developer, you must ensure translation files before making your WordPress products selling checklist.
If you face any complications while trying to translate WordPress plugins and themes following our tutorial guide, let us know through the comment box below. We will answer you in the meantime.
Subscribe To Our Newsletter
Don’t miss any updates of our new templates and extensions
and all the astonishing offers we bring for you.
