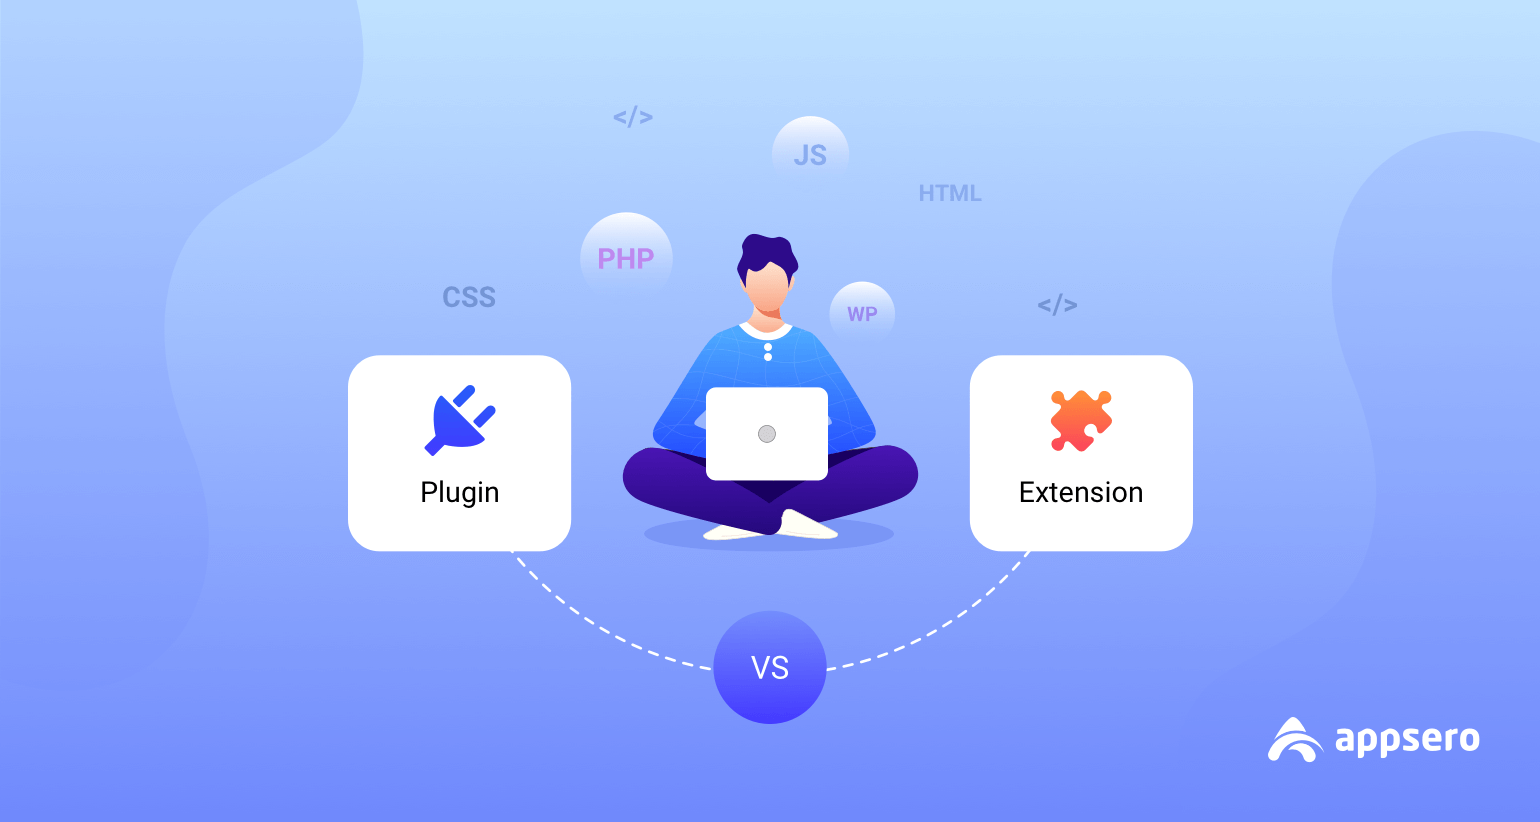
Sometimes people mix up plugins and extensions together. Are you one of them and a rising developer? Then you must have a clear vision in this sector. Plugins are for WordPress and extensions are for the Chrome browser.
In programming language, plugin is a PHP file whether extension is a manifest.json file
Today we will see the key differences between plugins vs extensions and you can create one easily with WordPress and chrome. This combat will give you a crystal clear view of these two crucial parts of a website.
- What are WordPress Plugins?
- What are Chrome Extensions?
- Difference Between a Plugin and an Extension
- How to Create WordPress Plugins within 5 Steps
- How to Create Chrome Extension within 6 Steps
What are WordPress Plugins?
Plugins are software that assists us to operate and manage our website, any business, or team in an effortless way. For using plugins one must have a WordPress website.
When you are running a WordPress website, plugins are essential material. The extended functionality of a plugin can help your website in multiple ways. Before using this, you first need to know how to install a WordPress plugin.
What are Chrome Extensions?

Well, an extension is quite similar to a plugin. The only difference is, that plugins are used in websites particularly and extensions are used in browsers. Sometimes they have added to pages automatically and sometimes you may need to add them separately.
Difference Between a Plugin and an Extension
We think only the definitions can not take away your confusion. Thus we create a table to make sure the polarity of Plugin and Extension.
| Plugin | Extension |
| Add functionality to the WordPress website. | Mostly used in web browsers. |
| Need PHP to build a WordPress plugin. | Need Manifest, HTML, CSS, and JavaScript to build an extension. |
| Open Source software. | Proprietary Software. |
| Anyone can modify the source code. | The source code is restricted. |
| Securing plugins is complex. | Securing extensions is easy. |
How to Create WordPress Plugins within 5 Steps
Creating a WordPress plugin is effortless if you just follow the tutorial here.
Step 1: Download Visual Studio Code on Your Desktop
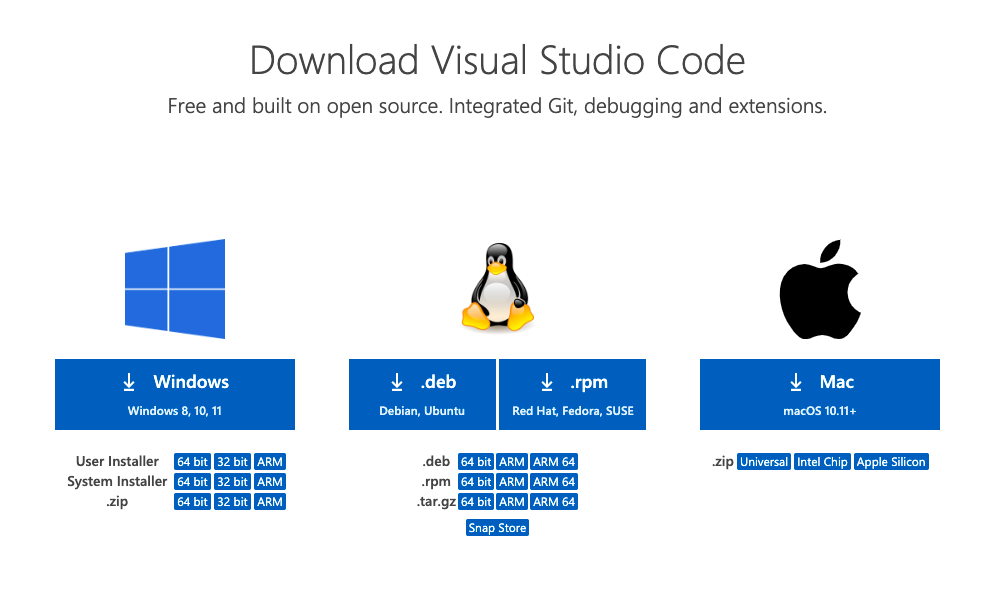
Firstly download Visual Studio Code according to your OS (Operating System). Here we will make the code snippets that will make the plugin file. We have to find the perfect yet straightforward codes to make the plugin functional.
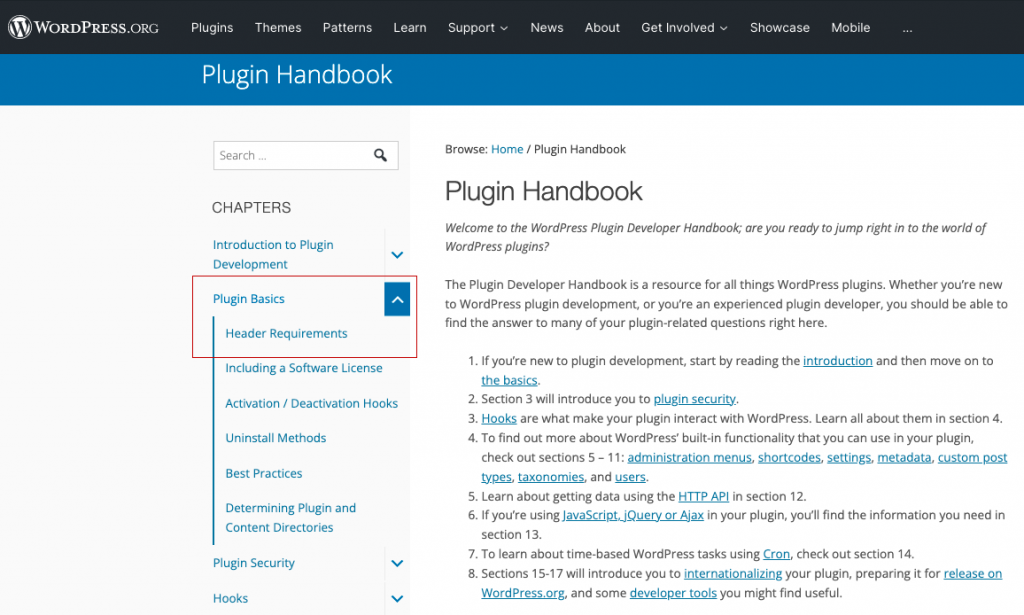
Step 2: Navigate to Plugin Handbook
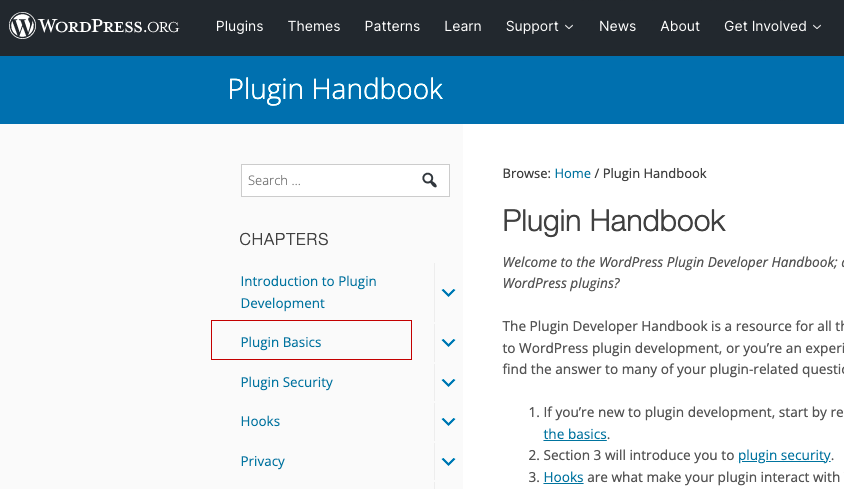
The WordPress industry is super cool for developers. Here, you can get the codes accordingly to your need. Navigate to WordPress Developer Site and find the Plugin Basics. In this section, you will get all the necessary codes to create a WordPress plugin from scratch. But as we will show the process shortly, we will just pick the vital codes from here.
Now click on Header Requirements, and you will see some code snippets with some detailed information about it.
Step 3: Copy-Paste Codes in Visual Studio Code
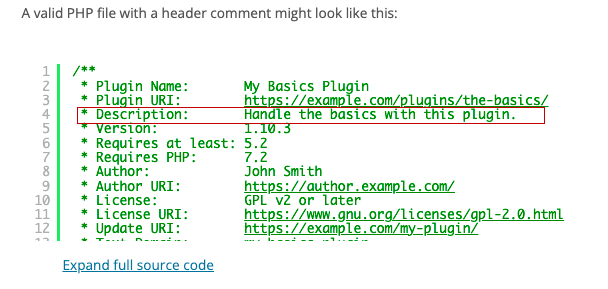
A WordPress plugin is a PHP file with a WordPress plugin header comment. You must create a directory to hold your plugin and organize the plugin files in one place. The Header Requirements tell you what a plugin must have to recognize itself to WordPress.
At a minimum, a header comment must contain the Plugin Name:
/**
* Plugin Name: YOUR PLUGIN NAME
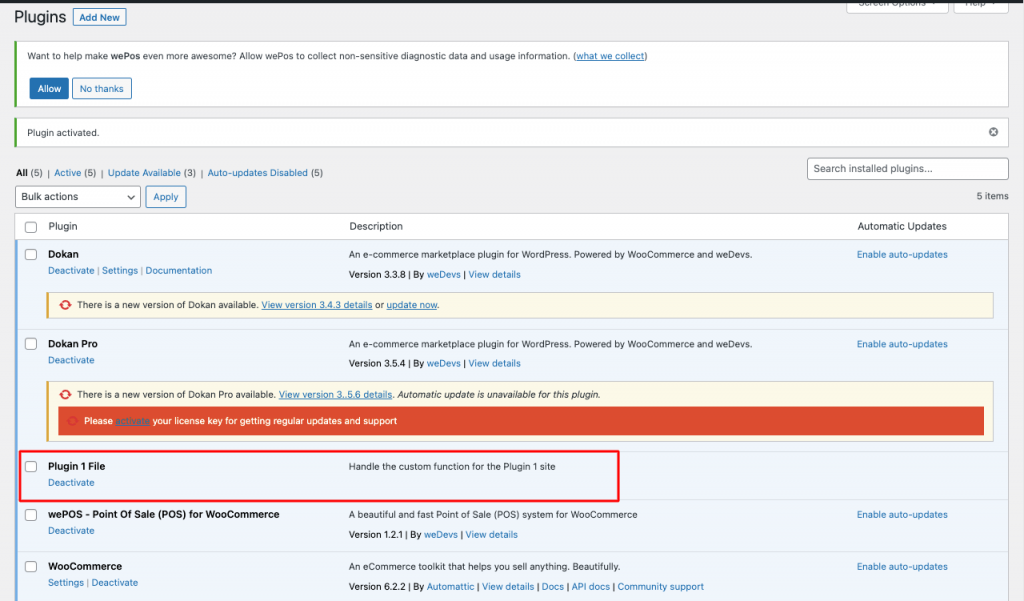
*/Copy this code and paste it into your Visual Studio Code. Write the name of your plugin in the “YOUR PLUGIN NAME” section. For instance, we have name it Plugin File 1. Now, save it as a PHP folder on your desktop.
Step 4: Add Details of Your Plugin
Till now, you have just established the name. It’s time to add some details to the plugin file.
If you scroll down in the Header Requirements area, you will get a region called Header Fields. Copy the mentioned code and again paste it into your code snippets.
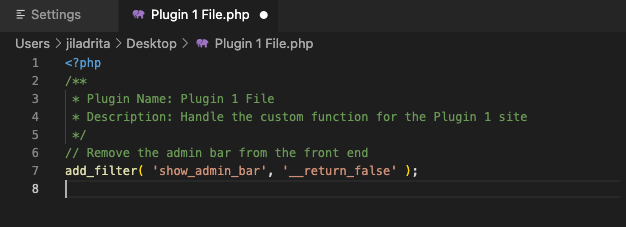
* Description: Handle the basics with this plugin.Change the Description according to your preferences. Like we have set like this-
* Description: Handle the custom function for the Plugin 1 siteYou will get multiple handy links for some key functions, like adding new posts or pages. If you feel they are unnecessary for you, avoid them by including this specific code in your plugin.
// Remove the admin bar from the front end
add_filter( 'show_admin_bar', '__return_false' );
So finally, the code snippet will look like this-
Step 5: Upload Your Plugin File from WordPress
You have almost created your plugin. Now save the code file as PHP and compress it.
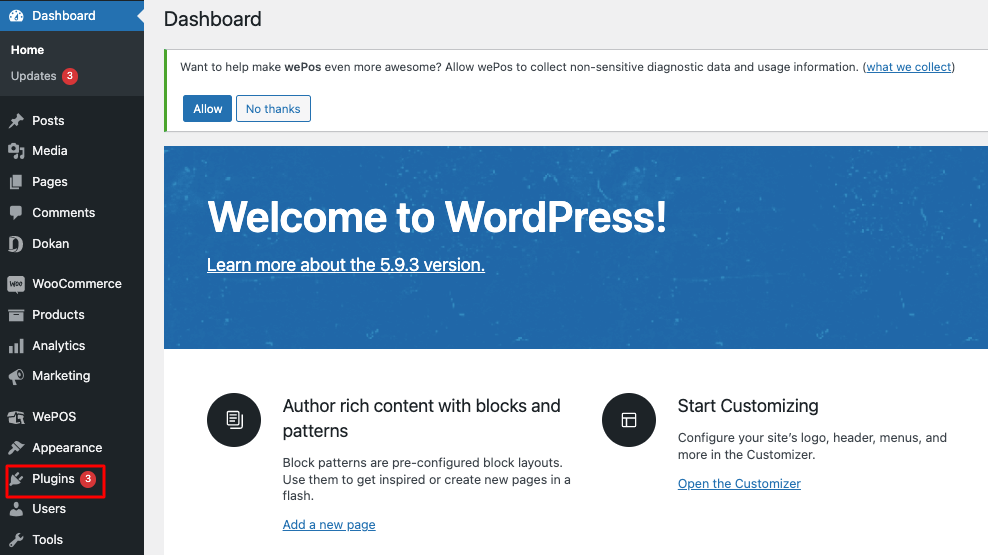
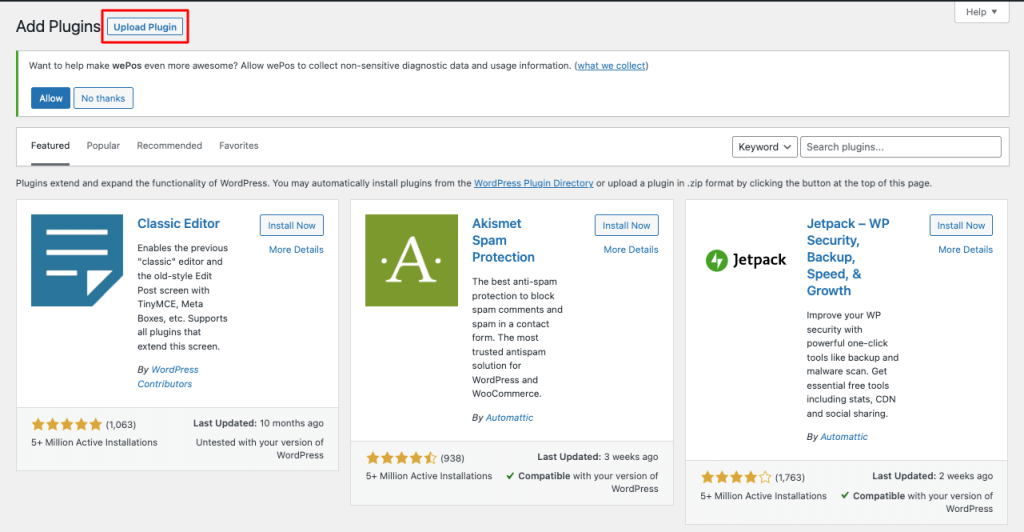
Go to your WordPress dashboard and click on Plugin.
Then click on Add New. After that, you will get an interface like the below-

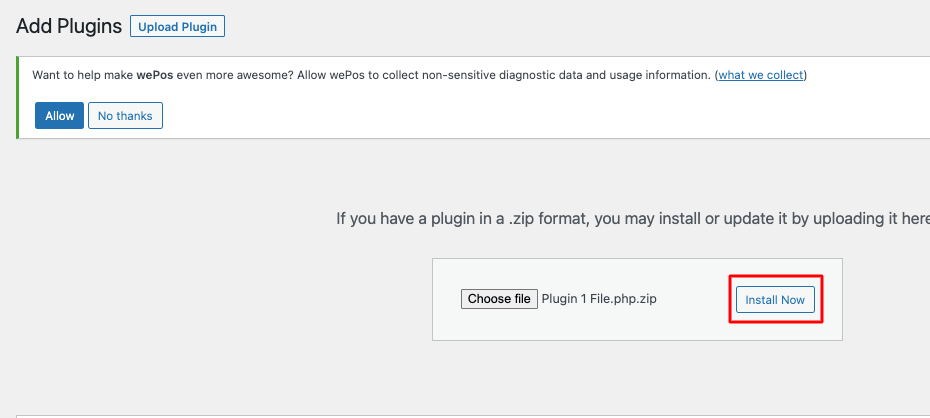
Click on Upload Plugin. Now upload that PHP file that we saved earlier.
Then hit the Choose File.

And then the Install Now button.
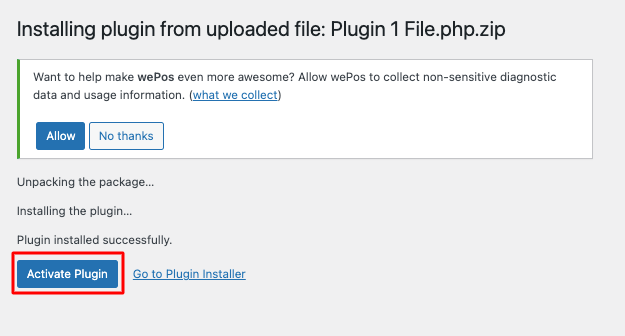
Click Activate to turn on the plugin on this WordPress website.
Well, now you are ready to participate in the WordPress repository.
How to Create Chrome Extension within 6 Steps
Building your Chrome Extension is fun. We have tried to make the journey smooth for you. Let’s dive together and manufacture an extension.
Step 1: Download Visual Studio on Your Desktop
Firstly download Visual Studio Code according to your OS (Operating System). Here we will make the code snippets that will make the file of your extension. We must find easy codes to make the Chrome extension serviceable.
Step 2: Create a Folder for Your Extension
Build a folder to keep the files of your extension on the desktop. Now, open a menifest.json file in Visual Studio Code. Then copy the code snippets-
{
    "name": "Dad Jokes",
    "description": "Jokes to Make You Laugh Everyday",
    "version": "0.0.1",
    "manifest_version": 3,
}
Save this, and your raw file for the extension is ready.
Step 3: Upload Your Extension in Chrome
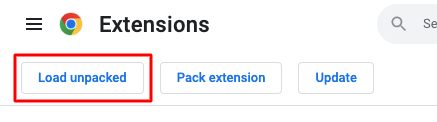
Go to the extension page and turn on the Developer Mode.
Now click on Load Unpacked and upload the menifest.json file. If you have any issues, you can not upload the file. Chrome will indicate that you must fix and try again to upload.
Once your extension is uploaded, you will see that like below-
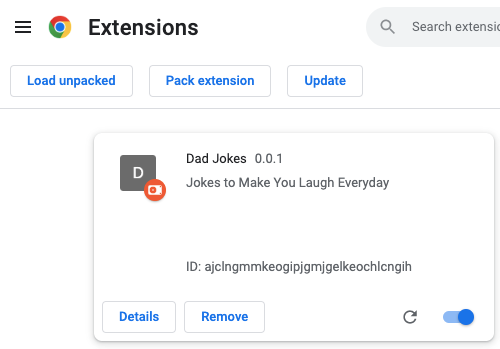
Step 5: Add Your Extension Details
As you can see, the uploaded extension on Chrome has no logo or page like other extensions. Let’s add some details to give it a description by explaining what will pop up when a user clicks this extension.
Browser Action
For defining the browser action we will add-
"action": {
        "default_popup": "popup.html"
        }
Here, “default_popup”: “popup.html” is the page for your extension.
Icon Dimension
We should also define the dimension of the icon, so add-
 "icons": {
        "128": "logo.png"
    },
activeTab Permission
Next, we will add permission. There are multiple types of permissions in Manifest. Currently, we want the activeTab permission, and it gives access to the tab that lasts while the user is on that page and is revoked when the user navigates away or closes the tab. The code is-
"permissions": ["activeTab"]If you face any error in this line then remove it.
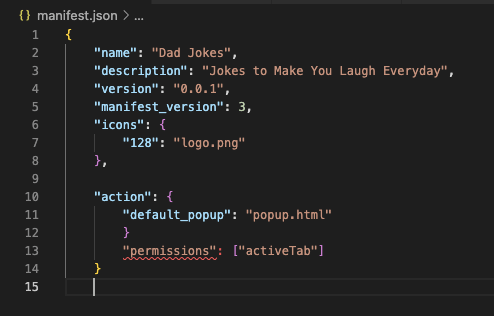
Your manifest.json file should look like-
Page Creation for Your Extension with HTML
Now, we will create the page for your extension. Just copy and paste the code. Change according to your preferences.
<!DOCTYPE html>
<html lang="en">
<head>
    <meta charset="UTF-8">
    <meta http-equiv="X-UA-Compatible" content="IE=edge">
    <meta name="viewport" content="width=device-width, initial-scale=1.0">
    <link rel="stylesheet" href="style.css">
    <title>Dad Jokes</title>
</head>
<body>
    <p>Joke will appear here</p>
    <script src="script.js"></script>
</body>
</html>
Adding script.js File
fetch('https://icanhazdadjoke.com/slack')
	 .then(data => data.json())
	 .then(jokeData => {
	 const jokeText = jokeData.attachments[0].text;
	 const jokeElement = document.getElementById('jokeElement');

	 jokeElement.innerHTML = jokeText;
	 })
Adding Style Sheet
You can add some style sheets as well.
body {
    width: 300px;
    height: 300px;
    background-color: aliceblue;
    display: flex;
    justify-content: center;
}

p {
    display: inner-flex;
    margin: auto 10px;
    font-size: 22px;
    color: blue;
    border-radius: 6px;
    border: 1px solid lightblue;
    padding: 10px;
}
The final look of this extension should be like-

Step 6: Upload Your Extension on Chrome as a Developer
You have uploaded an extension file that can also be used from your PC. If you want to spread it and have global users, you have to upload your extension as a developer. For that, register as a Developer in Chrome to upload your file. You will need to pay a one-time registration fee to register your account.
FAQ on Plugins and Extensions
Q 1: What are plugins and extensions in computing?
Answer: Sometimes plugins are also called extensions or addons. In computing, software that can add new functions to a host program is known as an extension.
Q 2: Why do we need WordPress plugins?
Answer: When you will run a WordPress site you would need to enrich the look, site speed optimization, SEO ranking factors, and a lot of essential things to stand out your website in the crowd.
Q 3: What is the benefit of any browser extension?
Answer: The software that we use in our browser to enhance our view from different angles is known as extensions. It can take advantage of the same application program interfaces (APIs) that JavaScript can on a web page. But amazingly, extensions can do much better as it has access to own set of APIs as well.
Q 4: Can Chrome extensions have viruses?
Answer: In some cases, Chrome extensions can hide malware with Android apps. You may have viruses even if you download apps from the official Chrome Web Store.
Q 5: Is adding an extension to Chrome safe?
Answer: Try to use Enhanced Safe Browsing for additional protection when you install a new extension from the Chrome Web Store. Trust those extensions that are built by developers who follow the Chrome Web Store Developer Program Policies.
Final Words on Plugins vs Extensions
Phew! We hope you enjoyed this battle between plugins and extensions ends. We tried to show you the common differences between them and how you can create one easily in a few simple steps. So, if you are a WordPress website owner, you would need plugins to enhance the usability in a specific zone. WordPress plugins are quite secure so there is no risk to select them.
On the other hand, Chrome extensions intensify a particular sector of web browsers, and before choosing an extension you must be careful as there can be malware viruses with them.
In case, you are a developer or into the WordPress plugin business, then you may want to check out Appsero for a hassle-free license management process.
Don’t forget to share your opinion in this debate.
Subscribe To Our Newsletter
Don’t miss any updates of our new templates and extensions
and all the astonishing offers we bring for you.

Your blog give me the basic idea about plugin building. Good Job.
Thank you for this comment. Be with us for such blogs.
You’re so interesting! I do not suppose I’ve truly read through something like this before. So wonderful to find another person with unique thoughts on this issue. Seriously.. many thanks for starting this up. This website is one thing that is needed on the internet, someone with a little originality!