The Easiest Way to Set up a WordPress Local Development Environment
Sometimes, you stumble upon a brilliant idea that just gets you all fired up! And if you’re a WordPress enthusiast like us, that means you’re itching to jump right into the development process. But let’s be real here, the last thing you want is to waste valuable time and creativity setting up a brand-new local WordPress playground.
This article will bring an end to this long-standing problem. With Local by Flywheel, you can easily get rid of the tiresome process of installing WordPress on localhost. Even WordPress.org suggested Local as a handy tool:
Local (by Flywheel) is pretty good. You only need to install it once and after that, you have a short and painless path to an up-and-running WordPress installation, though you do still have to launch the app first whenever you want a development environment.
WordPress Developer Blog
Keep reading to explore the simplest and most efficient method to establish your own WordPress local development environment using ‘Local WP.’ Our step-by-step instructions will help you create a secure offline playground for all your WordPress projects.
Quick navigation:
The prerequisites for setting up WordPress locally
How to set up an environment for WordPress local development
- Choose the right tool for an easy workflow
- Download and install Local on your computer
- Open Local and create a new site
- Install the essential plugins and themes
How to migrate your local WordPress site to a live server
Bonus: Use TasteWP if you want a shortcut solution
Get started with your WordPress local development
Why you need to set up a local development environment
Whether you’re a developer or a WordPress product marketer, you need to explore the backend of the admin panel to understand how your product will be functioning on live sites. And, setting up an environment for WordPress local development is the best way to do this.
Local development provides a safe sandbox for beginners to experiment, make mistakes, and learn without the risk of breaking a live website. You can test various configurations and settings without adverse consequences. Here are more reasons why you need a WordPress local development environment:
- Risk-free playground: You’ll get a risk-free, cost-effective, and controlled space to learn, experiment, and build everything WordPress.
- No cost involved: Setting up a local development environment is typically free, as you don’t need to pay for hosting services or domain names.
- Offline learning: Beginners can work on their WordPress skills and projects without an internet connection.
- Troubleshooting practice: Working in a local environment helps you learn how to troubleshoot common WordPress issues. You can experiment with solutions without affecting a live site.
- Controlled environment: You can replicate server configurations, PHP versions, and WordPress setups to match your hosting environment.
- Privacy and security: You can work on your projects privately without exposing them to the internet.
- Theme and plugin development: As a beginner, a local environment is an ideal place to start building and testing your themes and plugins.
- Customization and experiment: A local environment allows you to experiment with code, plugins, themes, CSS, and templates without affecting the live website’s appearance or functionality.
- Version control: WordPress projects often involve multiple collaborators. A local development environment integrates seamlessly with version control systems like Git.
Besides, you need to test everything in a staging environment before implementing major changes or updates to your live WordPress site. A local development environment serves as an ideal staging platform where you can replicate the live site and test updates thoroughly.
The prerequisites for setting up WordPress locally
Before setting up WordPress locally, there are several prerequisites you should consider. Yes, you need a computer and other tools. But, you also need to have patience while setting up a local WordPress environment. Here’s a list of the key requirements:
- Operating system compatibility: Ensure that the software you choose for local development is compatible with your operating system. Some tools may be specific to Windows or macOS.
- Code editor: A code editor or integrated development environment (IDE) for writing and editing PHP, HTML, CSS, and JavaScript code. Popular options include Visual Studio Code, Sublime Text, or PHPStorm.
- Local server software: You’ll need a local server environment to run PHP and MySQL, which are essential for WordPress. Common choices include:
- XAMPP (cross-platform)
- MAMP (macOS)
- WAMP (Windows)
- Laragon (Windows)
- Local by Flywheel (cross-platform)
- Docker (cross-platform)
So, you can start developing a local environment for WordPress, once you have a well-configured computer, an internet connection for the initial installation and updates, and a web browser like Google Chrome, Mozilla Firefox, or Safari for testing your local WordPress site.
How to set up an environment for WordPress local development
WordPress is one of the most user-friendly content management systems in the market. The only difficult part about it was installing WordPress on localhost. But, it’s no more challenging when you have tools like Local WP at your disposal.
It’s true that this process may not be instantaneous or entirely without challenges, especially for beginners. However, choosing the right WordPress development tool can determine the level of difficulty in setting up a WordPress local development to a great extent. So, read the following section carefully.
1. Choose the right tool for an easy workflow
Selecting the right WordPress development tool can greatly streamline your workflow. While the choice depends on your specific needs, we’ll shed some light on the four popular options (Local WP, XAMPP, Docker, and Laragon). These tools are known for their user-friendly interfaces and efficient workflows
Let’s see a simplified comparison table to make an informed decision.
| Aspect | Local WP | XAMPP | Docker | Laragon |
|---|---|---|---|---|
| Ease of Use | Very user-friendly interface | User-friendly | The learning curve for beginners | User-friendly, intuitive |
| Supported Operating Systems | Windows, macOS, Linux | Windows, macOS, Linux | Windows, macOS, Linux, and more | Windows |
| Customization | Limited | Highly customizable | Highly customizable | Limited, but user-friendly |
| Pre-configured Components | Apache, MySQL, PHP | Apache, MySQL, PHP | Containers for various services | Apache, MySQL, PHP, and more |
| Staging and Deployment | Yes | Manual | Portability and scalability | Limited, manual deployment |
| Multiple Site Support | Yes | Yes | Yes (through containerization) | Limited, manual configuration |
Now, get a close look at all aspects of these WordPress development tools. Local by Flywheel is the most user-friendly option. If you’re a beginner looking for a hassle-free experience to get started with WordPress development, it’s a strong choice. Laragon is also a user-friendly option, but it’s available only for Windows computers. That’s why we’ve chosen Local WP for this tutorial.
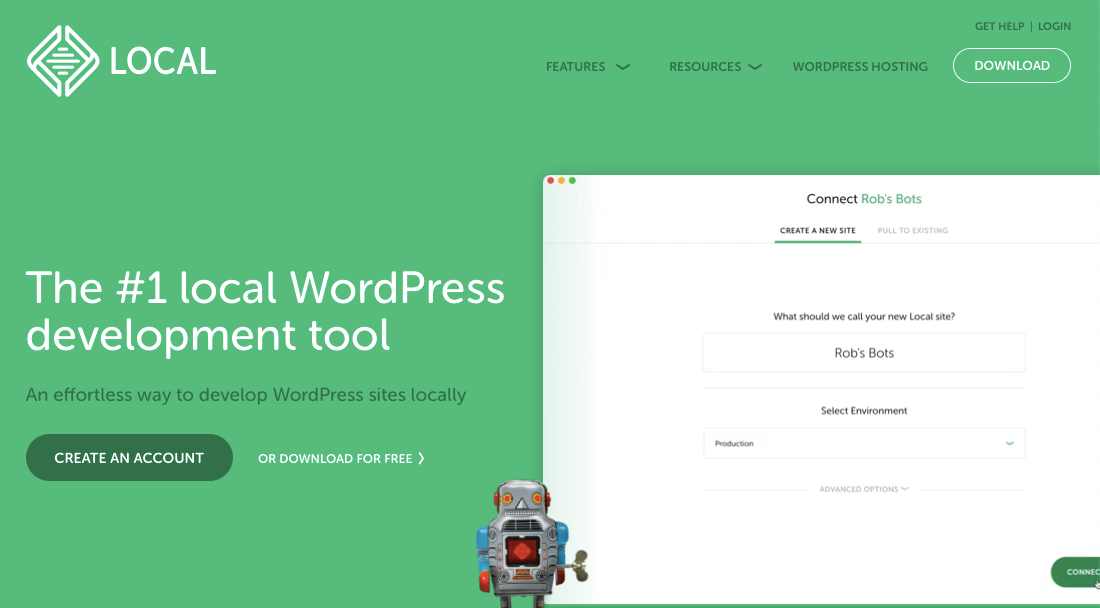
2. Download and install Local on your computer
You need a web browser to download Local on your computer. Visit this URL (https://localwp.com/) from your browser. Then download the Local app.
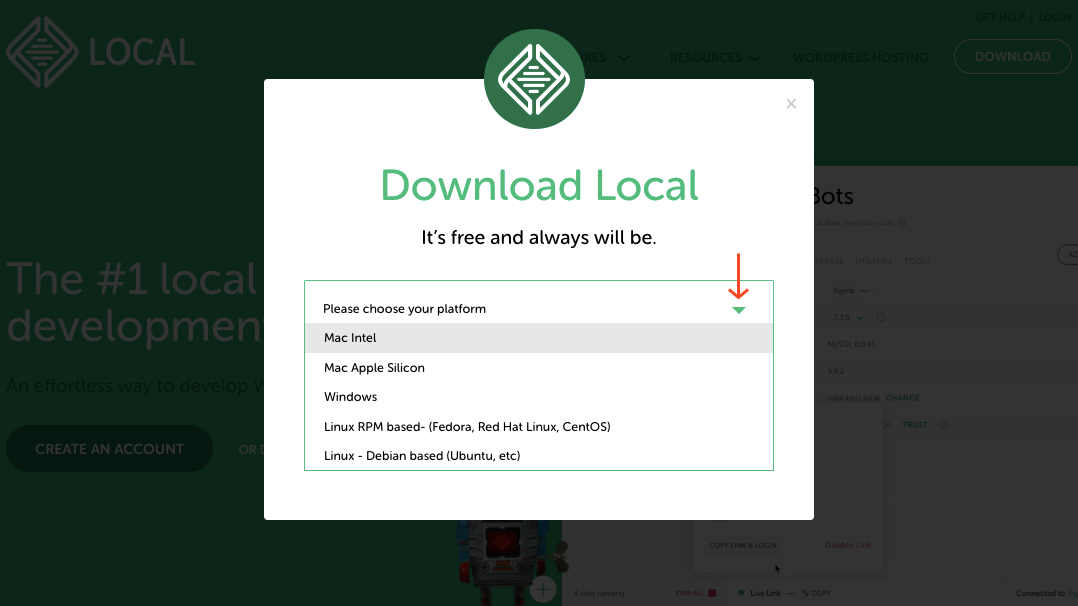
After clicking on the Download button, you’ll get a widget that lets you choose Local for your specific platform. Click on the dropdown icon to expand all available options. We’ve chosen Mac Intel for our case.
Wait for a few minutes for the download to complete. Then move the downloaded file to the Applications folder (for Mac).

Then go to Applications and open Local on your Mac.
3. Open Local and create a new site
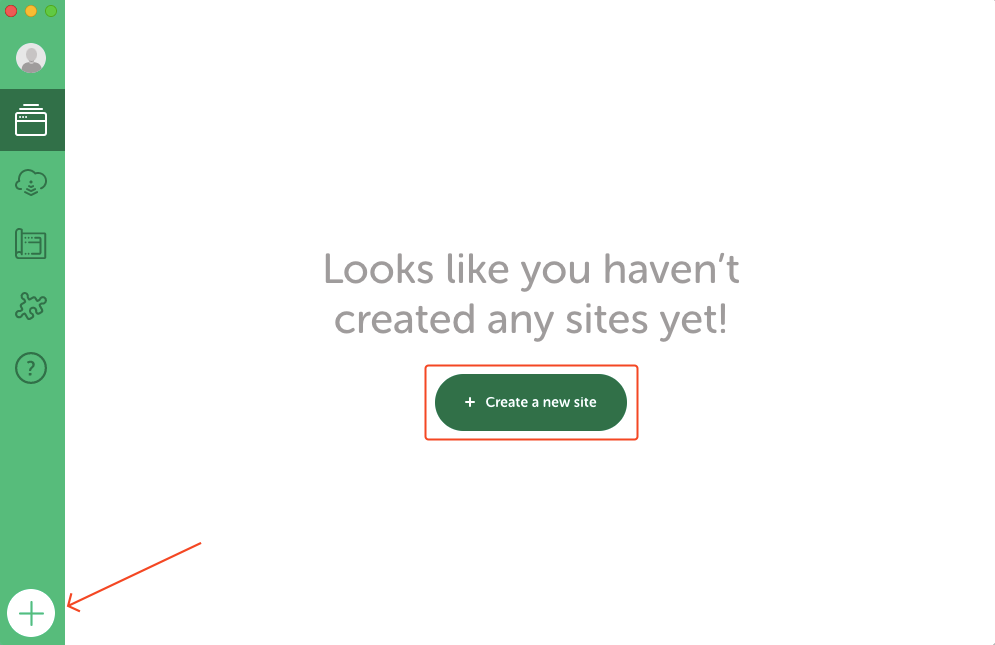
You’ll see a dashboard after opening Local. There are a few options in the left sidebar. The first icon comprises the list of all your websites. It is now empty as we haven’t created any site yet.
Click on the plus (+) icon from the left bottom or hit the Create a new site button to start adding a new local WordPress website.
Then, you’ll get two options to choose from. Choose the first one if you want to start from scratch. You can also choose the option Create from a Blueprint if you have pre-saved settings, including plugins and themes. Then press the Continue button to get to the next step.

Note: You can also import an existing site by uploading the website’s ZIP file.
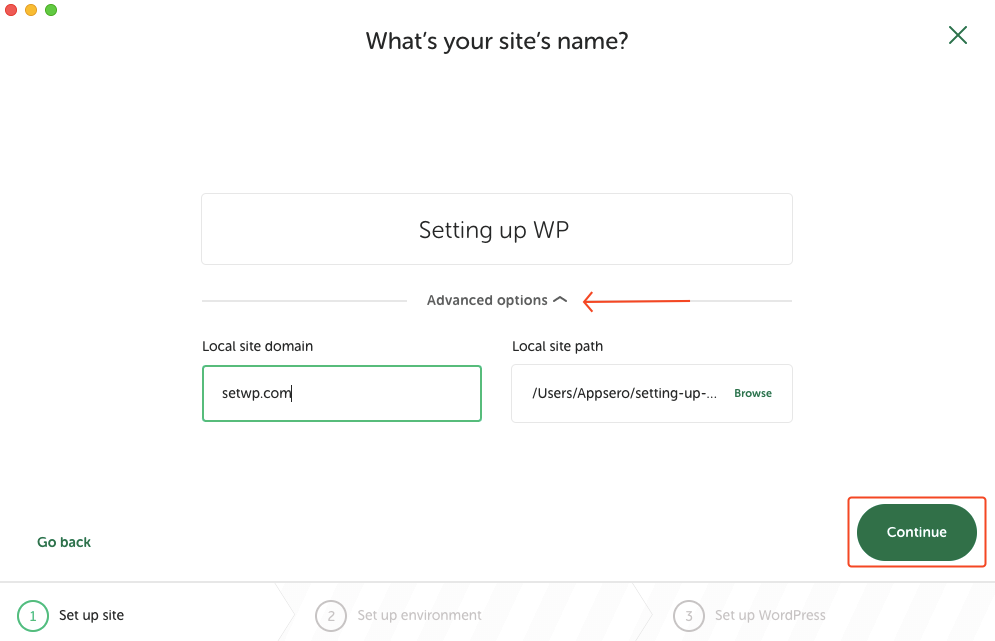
A. Provide your site details
Give your website a suitable name so that you can recognize it in further needs. It’s better to choose the Advanced options to fix a domain name and choose the local path where your website is going to be hosted. Then hit the Continue button.
B. Choose the environment as per your needs
Now it’s time to choose your preferred environment for your website. We recommend selecting the Preferred option. You can choose the Custom menu if you require it for your specific needs. Currently, the preferred option includes PHP 8.1.23, nginx web server, and MySQL 8.0.16 as Local’s default settings.
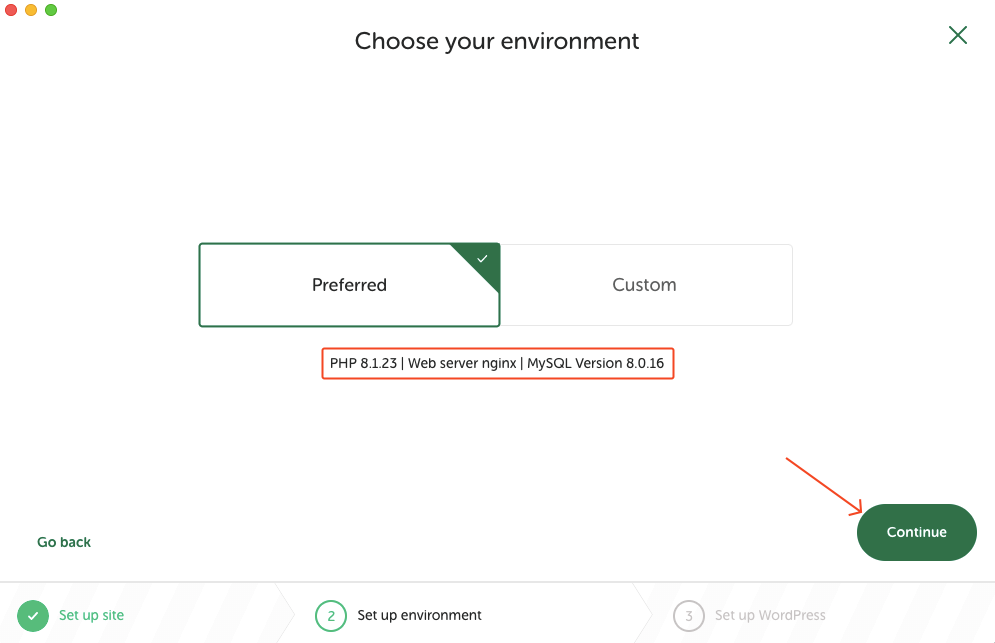
Hit the Continue button to move forward to the final step of setting up your environment for WordPress local development.
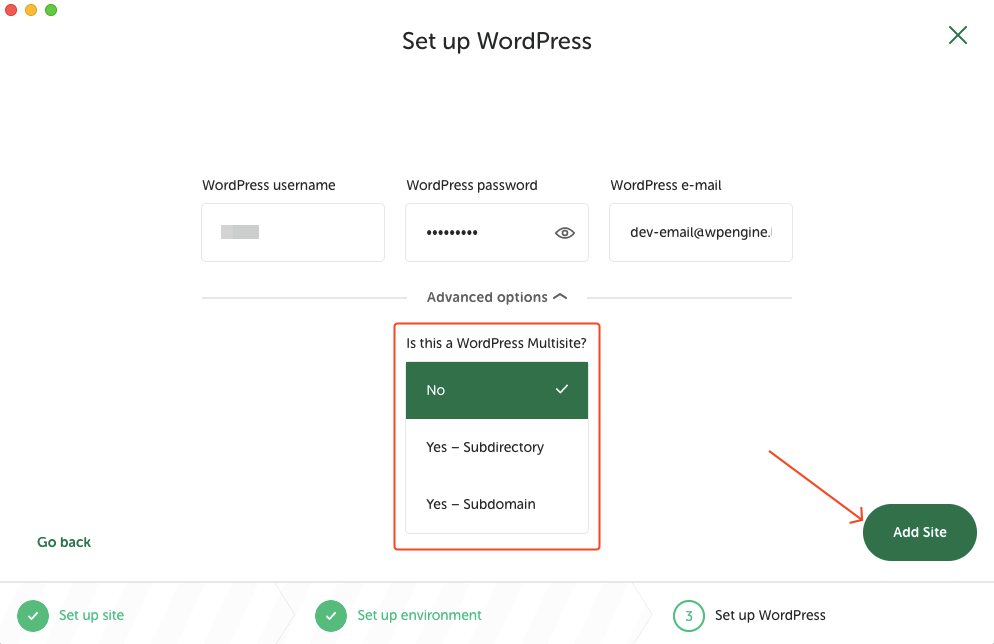
C. Finally, add your WordPress site
This is the last step of the installation process. Provide a username, password, and email address. Take careful note of these pieces of information. You’ll need them to access your website in the future.
You can explore the Advanced options if you need to installation for a WordPress Multisite, including subdirectories or subdomains.
Have patience! It often takes 3-5 minutes for Local to complete the WordPress installation process on your Local computer. You’ll see your website on the Local dashboard once the installation is complete.
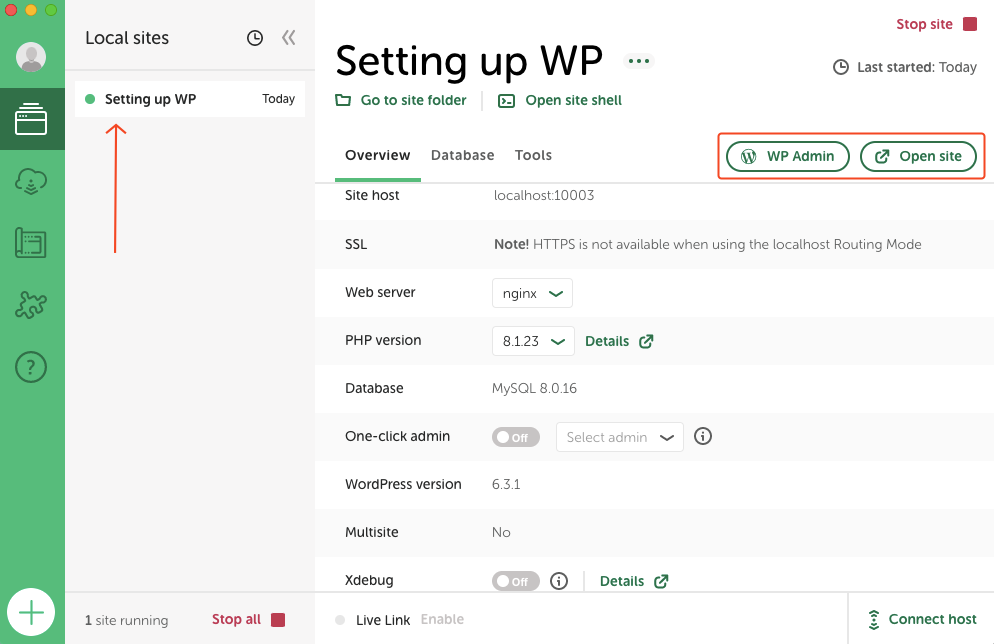
We named our website “Setting up WP”, you can see the website up and running. You can directly access the WordPress admin panel or visit the website from the Local app.
Your website should be ready to experiment with anything that involves WordPress. Before that check whether the WordPress installation has any issues or not.
D. Check both the frontend and backend of your website
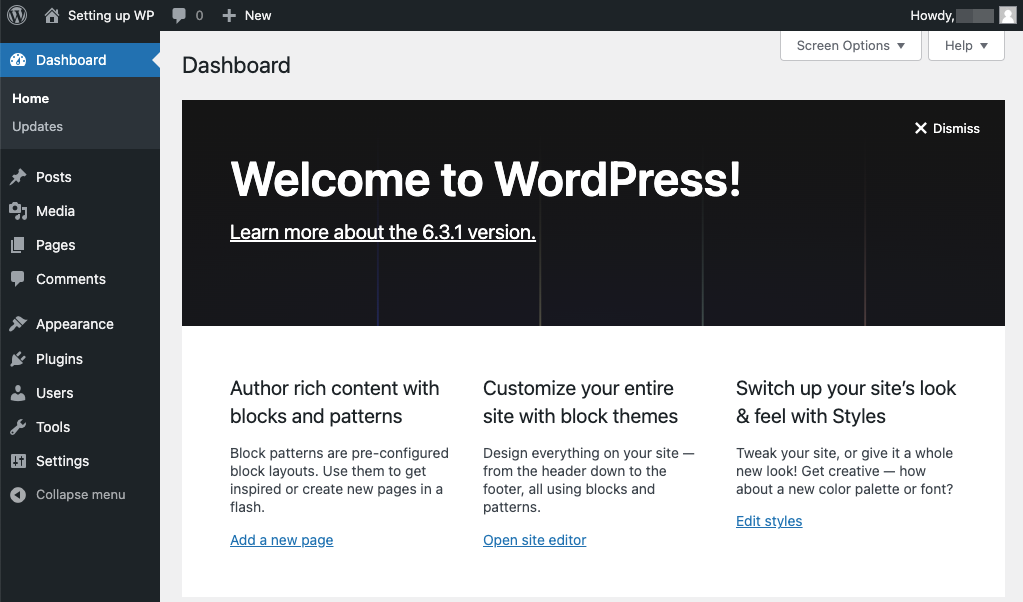
Go to your Local WP dashboard and navigate to your site’s control panel (as shown in the above picture). Click on the WP Admin button to access the WordPress admin panel. Provide the credentials you used before while setting up the local site. The correct pieces of information will take you to the backend of the website as shown below:
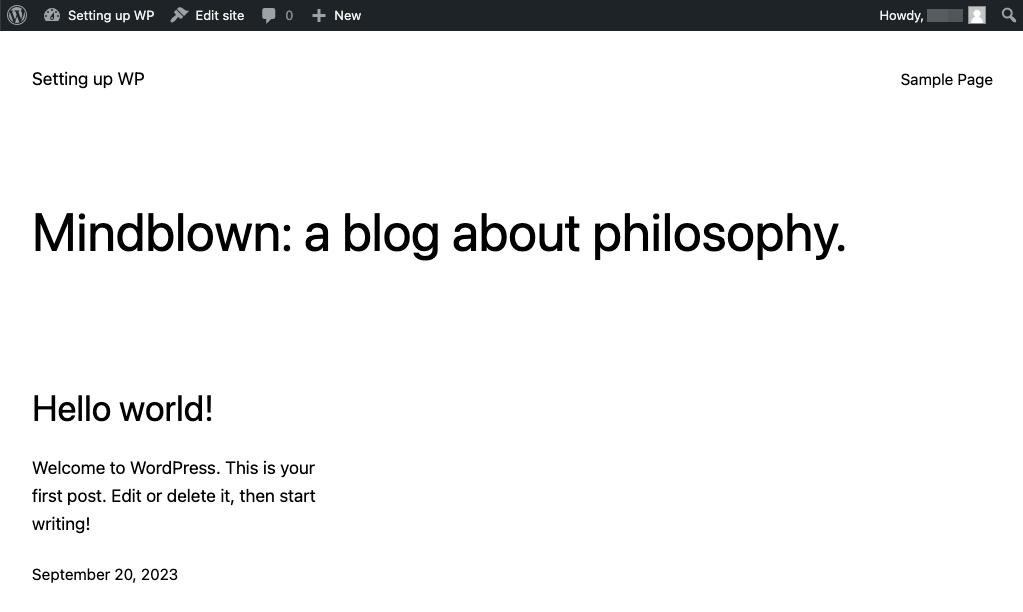
Click on the Open Site button to see the front end of the website. The local website automatically runs on the default WordPress theme. As the current default theme is Twenty Twenty-Three, our website looks like the following:
You’re good to go if both the WP admin panel and website load properly.
4. Install the essential plugins and themes
Now your website is ready. But, it has only the default functionalities provided by WordPress.org. You need to add essential plugins and install your preferred theme to enhance the user experience. However, the plugins and themes required for a new WordPress site can vary depending on the site’s purpose and niche.
There are several universally useful plugins and themes that can benefit almost any new WordPress website. Here’s a list of essential plugins and themes:
Essential plugins:
- RankMath SEO: A comprehensive SEO plugin to help optimize your site for search engines, improve rankings, and manage meta tags.
- Akismet Anti-Spam: Protects your site from spam comments and submissions, ensuring a clean and secure environment.
- Wordfence Security: Enhances website security by providing firewall protection, malware scanning, and login attempt monitoring.
- UpdraftPlus: Offers automated backups of your site, ensuring you can quickly restore it in case of data loss or issues.
- W3 Total Cache: Speeds up your site by caching static files, reducing load times, and improving user experience.
- Contact Form 7: Allows you to create and manage contact forms for user engagement and inquiries.
- MonsterInsights: Provides Google Analytics integration to track your website’s performance, visitor statistics, and user behavior.
- WooCommerce (if applicable): Essential for e-commerce sites, enabling you to create an online store with features like product listings, shopping carts, and payment processing.
- Jetpack: Offers a wide range of features, including performance optimization, security, site statistics, and social media integration.
- Smush: Automatically optimizes and compresses images to reduce their file sizes without sacrificing quality, improving site speed.
Note: If you’re a developer and looking for a detailed list of the best WordPress plugins for developers, read this post:
Recommended themes:
- Astra: A lightweight and highly customizable theme suitable for various types of websites, including blogs, portfolios, and e-commerce sites.
- GeneratePress: Another fast and flexible theme known for its simplicity and performance optimization.
- OceanWP: A multipurpose theme with a clean design and a wide range of customization options.
- Hestia: A one-page design theme that’s ideal for small businesses, startups, and creative portfolios.
- Neve: A fast and SEO-friendly theme that’s perfect for bloggers and small businesses.
Remember to prioritize quality over quantity, as too many plugins can slow down your site and cause compatibility issues. Additionally, regularly update your plugins and themes to ensure security and compatibility with the latest WordPress version.
Also read: How to Use GitHub for WordPress Projects – A Beginners’ Guide
How to migrate your local WordPress site to a live server
The Local WP tool lets users easily connect to the host- only if they want to connect with Flywheel and WP Engine. You need to use a plugin or follow the manual process when connecting to hosts other than these two options.
For new users, the Duplicator plugin offers an easy and widely used solution. Manual migration is an option but can be complex for people with low technical knowledge. That’s why we recommend using a plugin for ease and simplicity.
You can easily migrate your local site to a live server by following this guide: Easiest Way to Move a WordPress Site from Localhost to Server [Step by Step]
Bonus: Use TasteWP if you want a shortcut solution
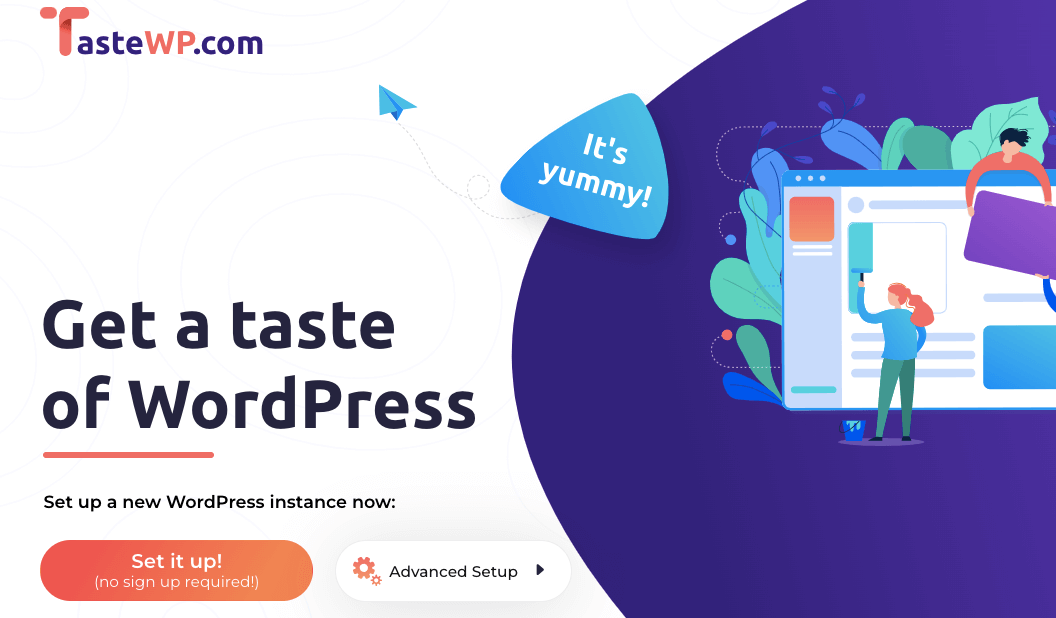
If you want a one-click installation process of creating a testing ground for your WordPress needs, TasteWP is the best solution. But, it’s not available locally. You need to have an internet connection to use this platform as your staging website. Here’s a straightforward guide on how to use TasteWP for staging a WordPress website:
- Go to the TasteWP website (https://tastewp.com/): Simply click on the Set it up! button. Creating a site on TasteWP without logging in gives you 2 days of validity; logging in extends it to 7 days. You can also get a permanent website by subscribing to the premium plan.
- Create a new site (temporary or permanent): You can use the advanced options to configure your preferred settings, including WordPress version, PHP version, and other advanced configurations. TasteWP also lets users choose pre-installed plugins and themes.
- Migrate your site to another hoster (if needed): TasteWP includes a migration plugin (Backup Migration) that simplifies the process of moving your website to a different hosting provider.
TasteWP is a great platform to test WordPress themes and plugins on your site in a secure sandbox environment. For those who prefer testing WordPress in a preconfigured sandbox, skipping the setup hassle, this is the perfect platform.
Get started with your WordPress local development
No software is 100% perfect. Local also has issues. It can be incredibly frustrating when your go-to local development tool isn’t performing at its best. If any issue arises, you can follow general troubleshooting tips for guidance.
Now you know everything from setting up a WordPress local development to troubleshooting possible pitfalls. So, download Local WP, set up your local WordPress website, and start developing right away. Remember to regularly back up your local WordPress site and keep your development environment up to date.
Subscribe To Our Newsletter
Don’t miss any updates of our new templates and extensions
and all the astonishing offers we bring for you.

TasteWP.com is a much better solution if you want to test plugins or themes. So many things might work offline, and once you get them on the live site they don’t, so devs should not waste time and resources on local.
And for the migrations in general, I recommend the Backup Migration plugin, it is quick and easy. It can also create staging sites (locally and on TasteWP.com).
We preferred a platform that works completely offline. TasteWP is good and we love it. But, when it comes to local WordPress development, we’ve found Local WP more useful.