How to Use GitHub for WordPress Development – A Beginners’ Guide
You might be a poet of codes but the path to success involves more than just writing code. Especially, when you’re a WordPress developer, you need a tool for version control, code collaboration, and project management. This is where GitHub steps in to revolutionize your WordPress development process.
Git and GitHub go hand in hand. Git tracks changes and allows version control. GitHub takes it a step further, providing a platform for smooth code review, bug-catching, and efficient project organization. Whether you’re monitoring code changes or deploying themes and plugins, these two tools are absolutely essential for ensuring a flawless WordPress development experience.
In this guide, we’ll show you how to use GitHub for WordPress development. We’ll also discuss the fundamentals of Git and how you can use them on GitHub to facilitate WordPress development. Let’s get started!
Quick Navigation:
- A brief introduction to GitHub
- Why use GitHub for WordPress development?
- 10 common Git commands you should know as a developer
- How to use GitHub for WordPress development
- Simplify GitHub theme and plugin deployments with WP Pusher
- Learn Git & GitHub from reliable resources
- Use Appsero to push new updates using Git
A brief introduction to GitHub
At its core, GitHub is built upon the Git version control system, enabling developers to track codebase changes over time. GitHub makes it easier to revert to previous versions and merge contributions seamlessly. It also offers a user-friendly interface, making it accessible even to those new to version control.
GitHub serves as both a code repository and a dynamic community hub. This community-driven platform empowers developers to explore and actively contribute to a diverse range of open-source projects. Users can report bugs, suggest improvements, and engage in discussions through its issue-tracking system.

GitHub’s widespread adoption has fostered an ecosystem of innovation and developers worldwide can collaborate, learn, and build software together. Here are a few interesting facts you should know about GitHub.
- Over 90% of the Fortune 100 companies use GitHub.
- 100 million developers worldwide are actively using the platform.
- More than 94 million developers actively use GitHub for their projects.
- The GitHub site draws 14 million daily visitors and achieves 96,419,713 page impressions.
- Microsoft acquired GitHub in 2018 for $7.5 billion, demonstrating its industry significance. (Source: The New York Times)
GitHub’s popularity is evident through its impressive statistics. These numbers signify the continuous flow of contributions, discussions, and innovations happening on the platform daily.
Git vs GitHub: What’s the difference?
Git and GitHub are two related but distinct entities that play different roles in version control and collaborative software development. Git is the version control system itself, while GitHub is a web-based platform that hosts Git repositories and provides additional features for collaborative software development.
Many developers use Git locally on their machines and then push their repositories to GitHub for remote hosting and collaboration with teams or the wider open-source community. Simply put, while Git is the core technology, GitHub provides a collaborative ecosystem for developers to work together.
Why use GitHub for WordPress development?
GitHub empowers developers to work together seamlessly, manage changes effectively, and deliver high-quality WordPress projects with confidence. Here are some compelling reasons to use Git as well as GitHub for WordPress development:

- Version control: Git tracks code changes, allowing easy rollbacks and error tracking.
- Collaboration: GitHub fosters teamwork on WordPress projects with pull requests and code reviews.
- Code organization: Git’s branching and merging capabilities help developers manage code changes efficiently.
- Open source community: GitHub encourages developers to contribute, report issues, and suggest improvements.
- CI/CD integration: Automate testing and deployment processes.
- Safe experimentation: Git’s branching enables developers to test new ideas without affecting the main codebase.
- Backup and recovery: Hosting code on GitHub ensures an offsite backup of the project.
- Documentation: Using GitHub encourages developers to maintain clear and detailed documentation
Together, Git and GitHub streamline WordPress development and foster a thriving community. Whether you’re a solo developer or part of a team, these benefits can make a significant difference in your WordPress development journey.
10 common Git commands you should know as a developer
As a developer, it’s essential to be familiar with some common Git commands. You’ll be able to manage version control and collaborate on projects efficiently with these commands’ help. Here are some of the most important Git commands to know:
git init: Initializes a new Git repository in the current directory.git clone <repository_url>: Creates a local copy of a remote repository.git add <file>: Stages changes for the next commit. Usegit add .to stage all changes.git commit -m "Your commit message": Records staged changes and adds a commit message.git status: Shows the status of your working directory and staged changes.git log: Shows the commit history, including commit IDs, dates, and messages.git pull: Fetches and merges changes from the remote repository to your local branch.git push: Pushes committed changes to the remote repository.git merge <branch_name>: Merges changes from the specified branch into the current branch.git revert <commit_id>: Reverts changes associated with a specific commit.
These commands are just the tip of the iceberg when it comes to Git functionalities. But they cover the basics needed for everyday version control tasks. With practice, you’ll learn how to Git and be able to leverage its full potential for efficient software development.
How to use GitHub for WordPress development
Using GitHub for WordPress development can significantly enhance your workflow, collaboration, and code management. It comes with faster issue resolution, and the ability to experiment and innovate confidently. You should use Git and GitHub to take your WordPress projects to new heights and ensure a smooth and efficient development journey.
Follow these below steps to harness the power of Git and GitHub in your WordPress projects:
Step 1: Create a local WordPress environment
Creating a local WordPress environment using LocalWP is a straightforward process. It allows you to develop and test your WordPress websites locally on your computer. Here’s a step-by-step guide to setting up a local WordPress environment using LocalWP:
Download and Install LocalWP
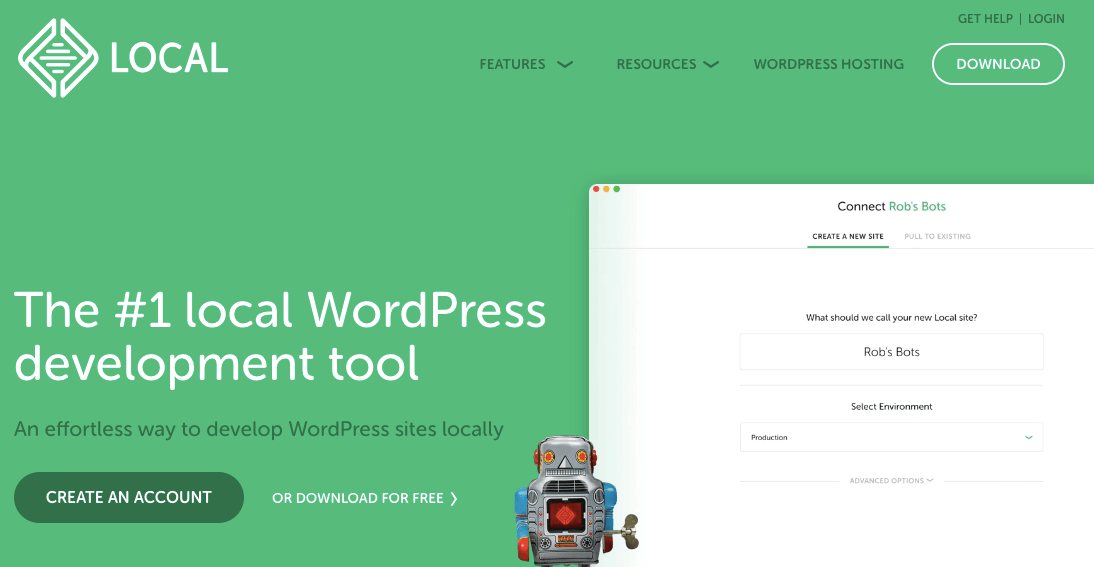
Go to the LocalWP website (https://localwp.com/) and download the appropriate version for your operating system (Windows or macOS). Install LocalWP by following the on-screen instructions.
Create a new local site
After installation, open LocalWP on your computer. Click the ‘+’ icon or the “Create a new site” button in the LocalWP dashboard. Enter a name for your site and choose the environment.
Set your desired WordPress admin username and password. Click the “Add Site” button to create your local WordPress environment.
Congratulations! You have successfully set up a local WordPress environment using LocalWP. Now you can develop, test, and customize your WordPress website locally before deploying it to a live server.
Step 2: Install GitHub and Git on your device
Go to the GitHub website: https://github.com/ and click on the “Sign Up” button. Provide the required information, including your username, email address, and password. Then, follow the instructions to complete the account creation process.
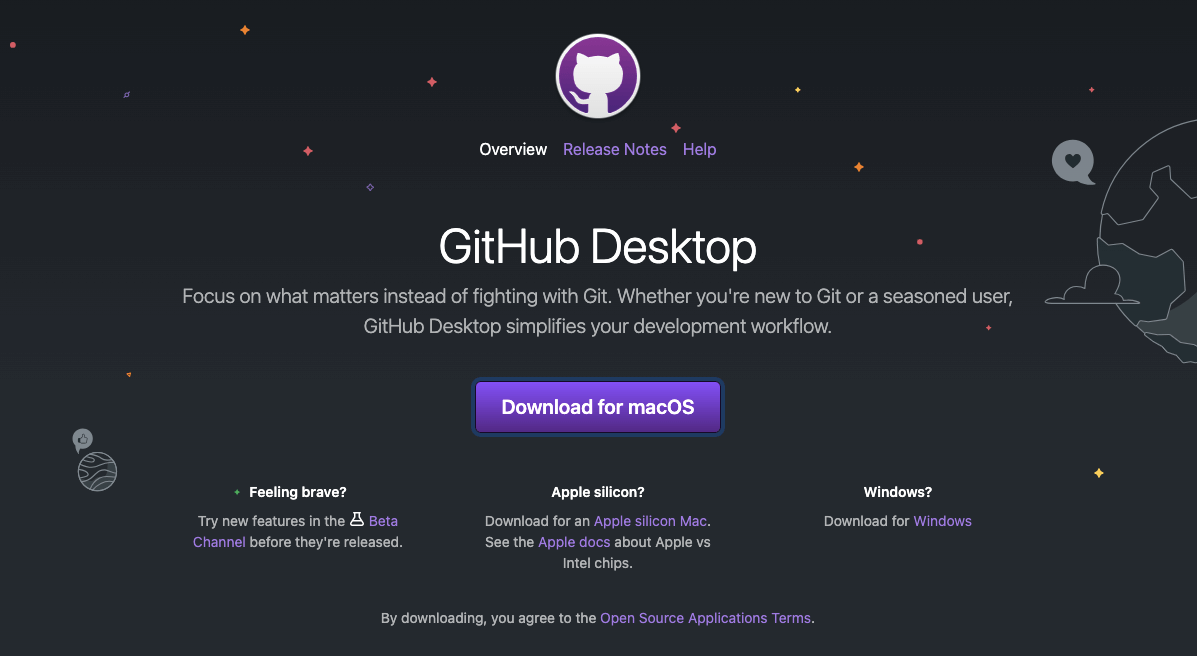
Download the GitHub Desktop installer from the official GitHub Desktop website: https://desktop.github.com/ for your computer. We’re showing these steps for macOS. Open the downloaded file and then drag the GitHub Desktop application to the Applications folder.
Once installed, open GitHub Desktop from the computer. You’ll be prompted to log in with your GitHub account. Log in to your account and authorize your desktop to complete the installation process.
Note that, GitHub Desktop provides a graphical user interface (GUI) that some users find more intuitive. Ultimately, the choice between GitHub Desktop and the web version comes down to personal preference and your comfort level with using Git on the command line.
Now, it’s time to install Git on your computer.
Git supports the most popular operating systems, such as Windows, Mac, and Linux. Notably, most Mac and Linux machines come pre-installed with Git. Moreover, When you install GitHub Desktop, it automatically includes the latest version of Git if you don’t already have it. You can read the following guide if you still need to install Git on your computer.
Step 3: Configure Git with your GitHub credentials
You need to connect your Git client to your GitHub account. Upon successful configuration, you’ll be able to clone, push, and pull repositories between your local machine and GitHub without the need to provide your GitHub credentials each time.
Open your terminal or command prompt, and enter the following commands with your GitHub account information. Copy the following code snippet and paste it into your terminal. Don’t forget to use your GitHub username in place of “Your GitHub Username”.
git config --global user.name "Your GitHub Username"Then copy the following snippet and paste it into your terminal. Write your email address in place of “[email protected]”.
git config --global user.email "[email protected]"This connection makes collaborating on GitHub repositories much more seamless and secure.
Step 4: Set up a local repository for your project
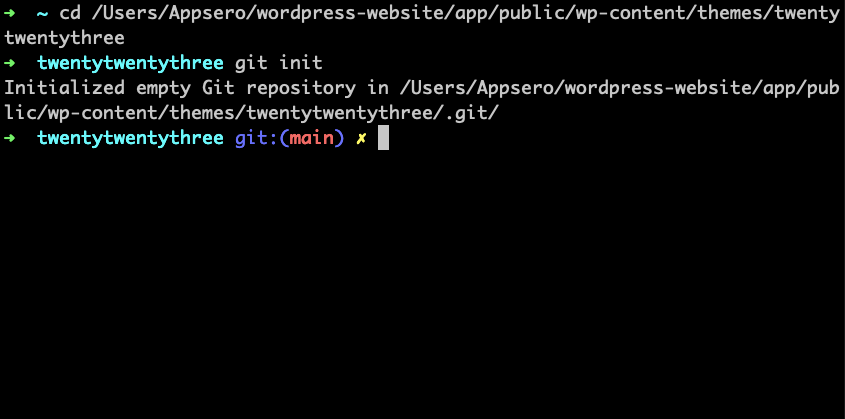
Create a local Git repository for your project. You need to enter your target folder using the respective Git command via your terminal. We’ll be working with our website’s WordPress theme for this tutorial. In this case, our theme is Twenty Twenty Three.
The theme’s folder is already available in our local WordPress installation. First, we need to find out the path of this folder. Then use the following command.
cd /Users/Appsero/wordpress-website/app/public/wp-content/themes/twentytwentythreeThis command will only take you to the right place if the file path is correctly typed. Now, you can initiate Git for this directory by using the following command.
git init This will look like the below image:
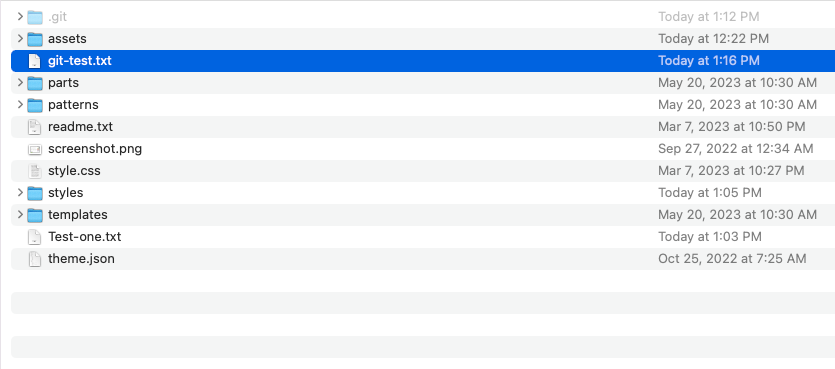
Now, let’s make some changes in the folder to see how Git deals with them. Add a file to your local repository. We’ve created a txt file here and named it git-test.txt.
Add this newly added file to your Git by using the following command.
git add file-nameLet’s add another file in the twenty twenty-three directory to see how Git responds. We added git-test-1.txt to show you how Git functions. Use the git status command to see how Git deals with such changes.
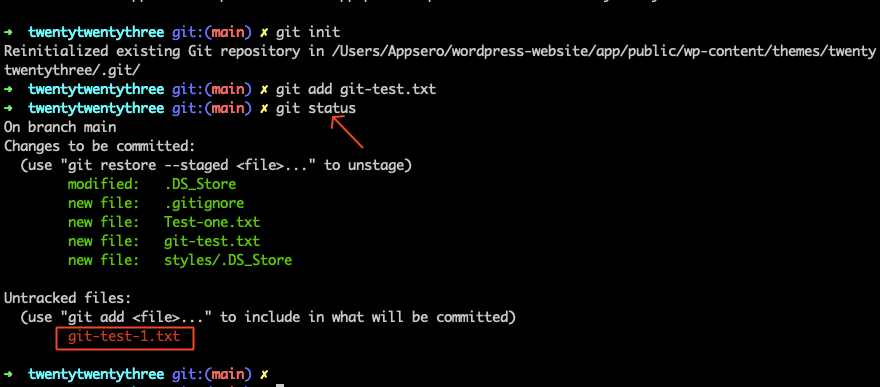
Since you’ve not added the git-text-1.txt file to the repository, Git will show it as an untracked file. You need to add it using the git add <file-name> command as before.
After adding the modified or added files, you can commit all the changes using the Git command:
git commit -m "Your message"This command will save all your changes. This version of the repository will be stored under the message you used along with the commit command. Your local repository is now ready. Let’s learn how you can create a new repository on GitHub.
Step 5: Create a new repository on GitHub
Go to the GitHub website and click the green “Create repository” button, located on the left side of the page or in the dropdown menu when you click the “+” sign at the top right corner of the page.
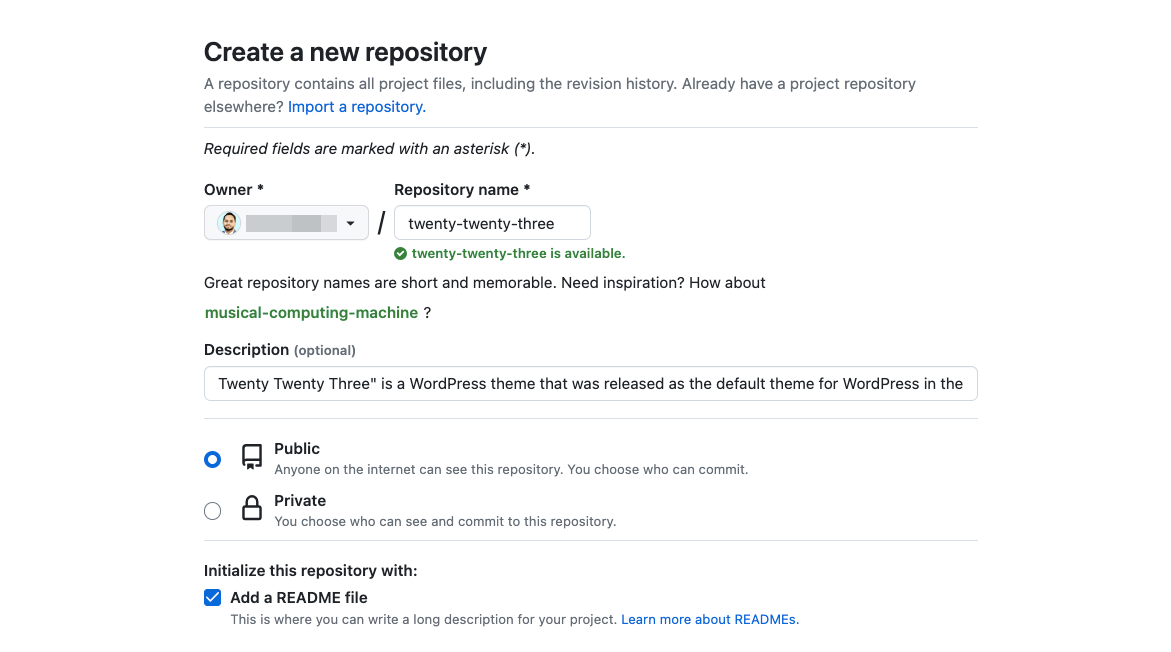
On the “Create a new repository” page, you will need to fill out the following information:
- Repository Name: Choose a descriptive and meaningful name for your repository.
- Description (Optional): Add a brief description to explain what your repository is about.
- Visibility: Choose whether you want your repository to be public (visible to everyone) or private (accessible only to you and collaborators).
- Initialize this repository with a README: Select this option if you want to create an initial README file for your repository. This file typically contains information about your project.
- Add .gitignore: You can choose a .gitignore template to exclude specific files from being tracked by Git.
- Choose a license (Optional): You can select an open-source license for your project if desired.
After providing the required information, click the green “Create repository” button at the bottom of the page. And your repository will be ready. The repository’s URL will be displayed on the page, and you can share it with others to collaborate or access your project.
Step 6: Connect your project to the remote GitHub repository
If you haven’t connected your local repository to the remote GitHub repository, use the following command:
git remote add origin <remote_repository_url>Don’t forget to replace <remote_repository_url> with the URL of your GitHub repository. This URL can be found on your GitHub repository page.
If you are pushing changes from a local branch and want to update the remote repository with the merged changes, use the git push command:
git push origin target_branchReplace “target_branch” with the name of your desired branch name (e.g., main/master). With these steps, you can successfully merge changes from one branch into another in Git. You can continue to make changes, create new commits, and push them to GitHub to keep your local and remote repositories in sync.
Step 7: Clone from GitHub to your local repository
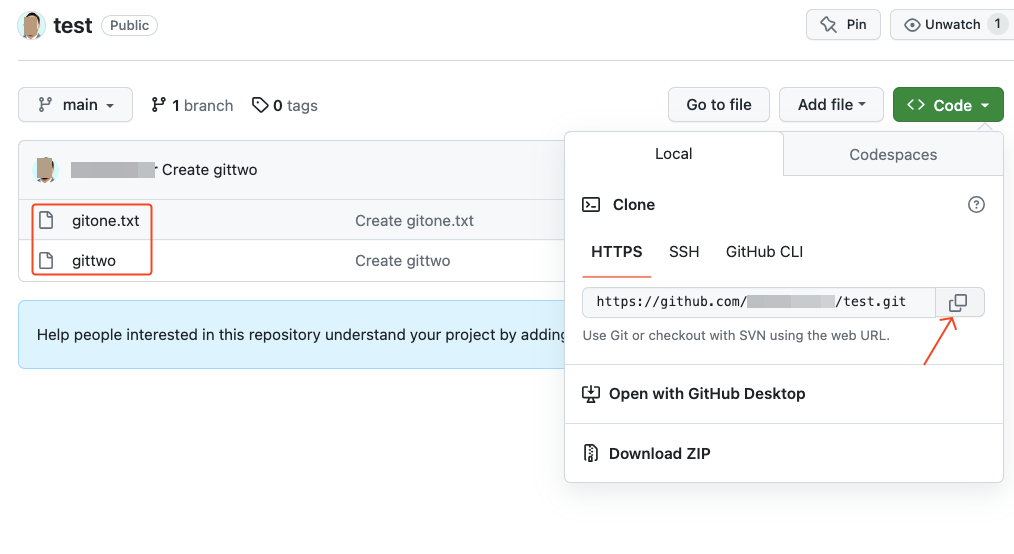
Let’s see now how you can clone a repository from GitHub to your local computer. You need to navigate to the remote repository on your GitHub account and copy its URL. Then paste the following command into your terminal.
git clone <remote_repository_url>In our case, we added two new files to our test repository and named those files gitone.txt and gittwo. Then we copied the URL from this page and ran the above command.
After successfully cloning the branch, you’ll see the files in your local repository as well. Here’s our example:
The test folder is cloned inside the twentytwentythree folder. And, the test folder contains newly added files gitone.txt and gittwo.
Step 8: Send pull requests using GitHub
You can send a pull request using your GitHub account. Go to the original repository on GitHub where you want to contribute. You should see a banner with a button saying “Pull request.” Click on that button.
On the pull request page, you’ll see a comparison of the changes between your branch and the original repository’s branch.
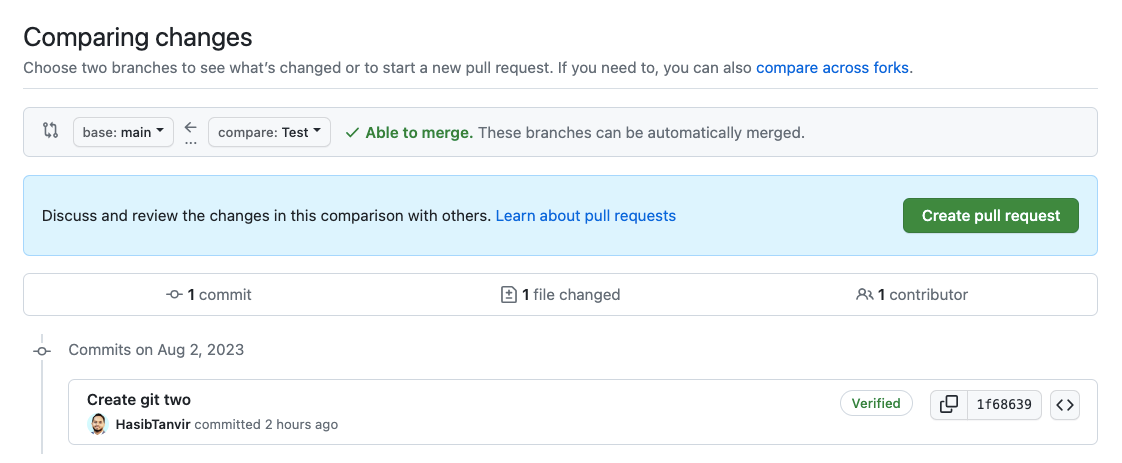
Add a descriptive title and comment to explain your pull request, outlining the changes you made and their purpose. Click on the “Create pull request” button to submit your changes for review.
Your pull request will be sent to the repository maintainers, who can review the changes and provide feedback.
Note: Some repositories may prefer contributors to fork the repository and send pull requests from their forks for better project management and collaboration.
Step 9: Merge the changes as a repository owner
As a repository owner on GitHub, you can merge changes from a pull request into the main branch of your repository.
Go to your repository on GitHub. Click on the “Pull requests” tab at the top of the repository page. Click on the request you want to merge. Review the changes, comments, and discussions in the pull request to ensure you understand the proposed changes.
If there are any conflicts between the changes in the pull request and the main branch, GitHub will notify you. You’ll need to resolve these conflicts first. If you are satisfied and have reviewed the code, you can approve the pull request by clicking the “Merge pull request” button. Then click on the “Confirm merge” button to proceed with the merge.
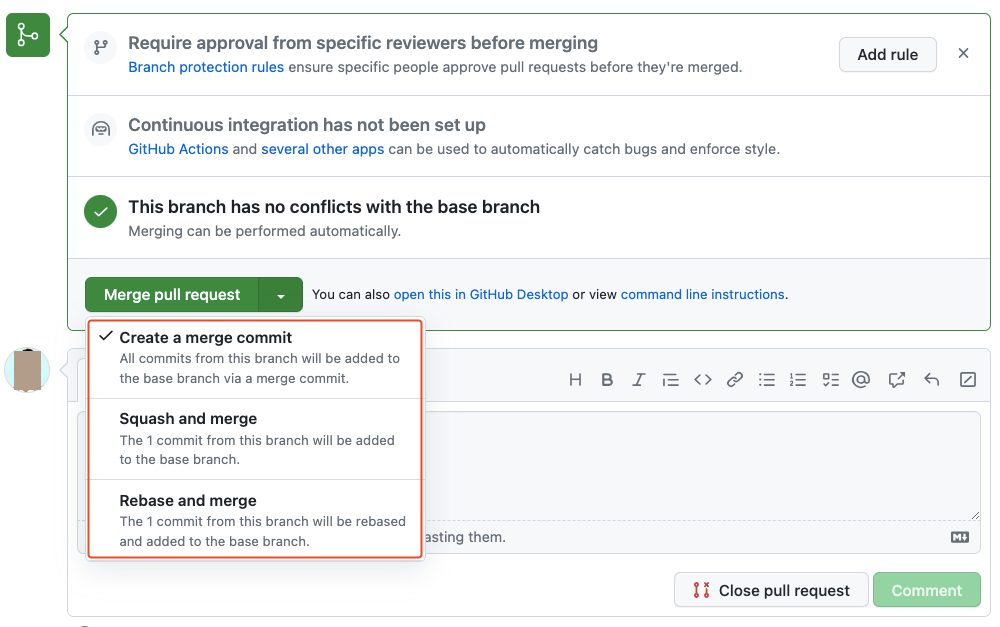
Note: If you prefer a clean commit history, you can select the “Squash and merge” or “Rebase and merge” options instead.
Once the merge is complete, the changes from the pull request will be incorporated into the main branch of your repository.
Step 10: Create new issues using GitHub
Creating issues on GitHub is a crucial aspect of project management and collaboration. It allows contributors and users to report problems, request features, suggest improvements, and track discussions related to the repository’s development. To create a new issue using GitHub, follow these steps:
- Go to the repository where you want to create the issue on GitHub.
- Click on the “Issues” tab at the top of the repository page.
- Click on the green “New issue” button to create a new issue.
- Fill out the issue details including a descriptive title and additional context.
- Use labels, assignees, and projects (Optional)
- Before submitting the issue, you can click on the “Preview” tab to see how it will look to others.
- Once you’ve filled out the issue details, click on the “Submit new issue” button to create the issue.
The issue will now be added to the repository’s issue tracker, and others can view and interact with it. As the repository owner or maintainer, you can also review and respond to these issues, prioritize them, and coordinate with the community to address them effectively.
Simplify GitHub theme and plugin deployments with WP Pusher
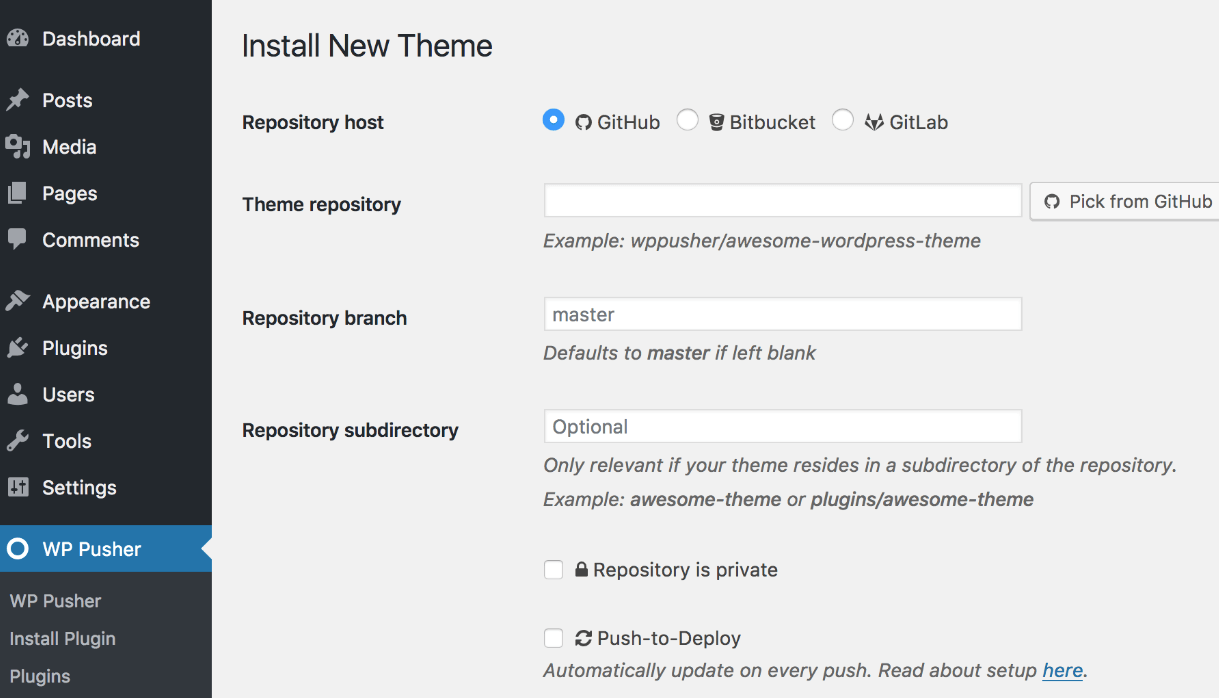
WP Pusher is a powerful tool that simplifies the process of deploying WordPress themes and plugins directly from GitHub repositories. It provides seamless integration between GitHub and WordPress, making it easier for developers to manage and update their code.
If you want to reduce manual efforts and improve overall development workflow, you can install and use WP Pusher on your WordPress site. Learn how to use WP Pusher for your WordPress project from the following video.
Install and update a WordPress plugin directly from GitHub with WP Pusher
After completing these steps, WP Pusher will keep your installed themes or plugins in sync with their respective GitHub repositories. Any updates pushed to the GitHub repository will automatically be applied to your WordPress site.
Enable one-click automatic updates using Appsero
Learn Git & GitHub from reliable resources
Learning how to use Git and GitHub is a valuable skill for software developers and anyone involved in collaborative projects. Here are some reliable resources to get you started:
- Official Git documentation: The official Git website provides comprehensive documentation and guides to help you understand Git’s core concepts and commands. Visit: https://git-scm.com/doc
- GitHub guides: GitHub has a series of guides that cover various topics, including an introduction to Git, understanding pull requests, branching, and more. Visit: https://docs.github.com/
- YouTube tutorials: YouTube hosts numerous video tutorials from developers and organizations that can help you grasp Git and GitHub concepts visually. Search for “Git tutorials” or “GitHub tutorials” on YouTube.
- Pro Git book: The “Pro Git” book by Scott Chacon and Ben Straub is an excellent resource for learning Git. It covers Git basics, branching, collaborating with others, and more. Read it online for free: https://git-scm.com/book/en/v2
- Practice on Personal Projects: The best way to learn Git and GitHub is through hands-on experience. Create a test repository and practice various Git commands and workflows.
Remember, learning Git and GitHub takes time and practice. Start with the basics, work on small projects, and gradually dive into more advanced concepts. Stay curious, seek help from the developer community, and don’t hesitate to experiment and learn from your mistakes.
Use Appsero to push new updates using Git

Appsero plays nice with all popular platforms that serve as code collaboration and version control tools for software development projects. You can simplify your development process by automating the release of new versions for your Plugin or Theme from Bitbucket, GitLab, and GitHub.
Just push your project tags to GitHub, GitLab, or Bitbucket, and let Appsero take care of the magic! With this seamless integration, your users will receive automatic updates from Appsero. You can ensure they always have the latest version of your product.
Subscribe To Our Newsletter
Don’t miss any updates of our new templates and extensions
and all the astonishing offers we bring for you.
