6 Easy Steps to Push Plugin Updates from Github to WordPress.org
Don’t you feel trouble while you push plugin updates on WordPress.org? Because you need to first build your plugin in Github then transfer it in SVN and finally push it. Because WordPress doesn’t support Github.
Truly, as developers, we also feel the same pain while we need to update our plugins. To minimize the time and effort there is a process called Appsero where you don’t need to learn SVN. Just stay with Appsero, follow the steps below, and your plugin will be in WordPress without using SVN. Isn’t it amazing?
So, let’s know how to push plugin updates from Github to WordPress.org without any struggle.
How to Push Plugin Updates Effortlessly

You can automatically release a new version of your WordPress Plugin or Theme from GitHub or Bitbucket. Push your project tags to GitHub or Bitbucket to create a new release in Appsero and all of your users will get an automatic update from Appsero.
Step 1: Connect With GitHub or Bitbucket
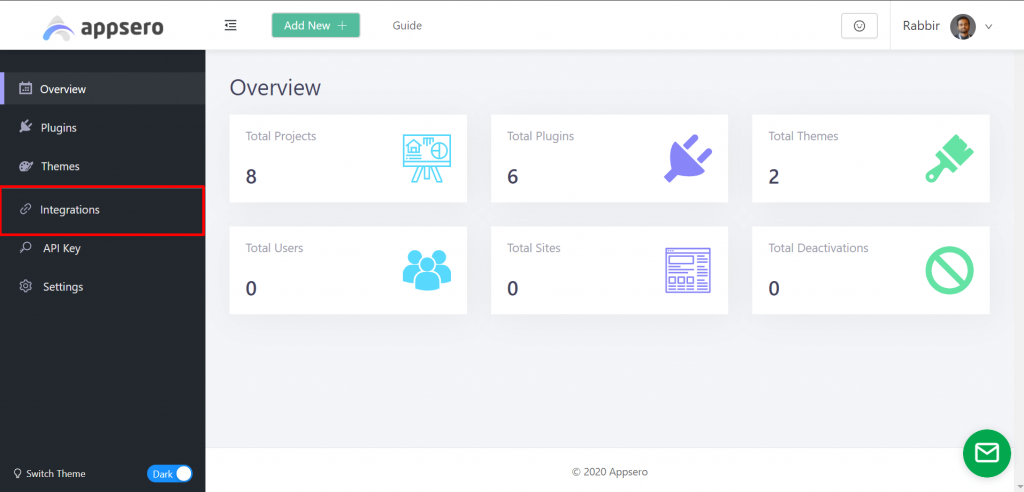
To connect your profile with GitHub or Bitbucket go to the Integrations page.
It’s important that you only connect Github or Bitbucket. Not both for your free plugin.

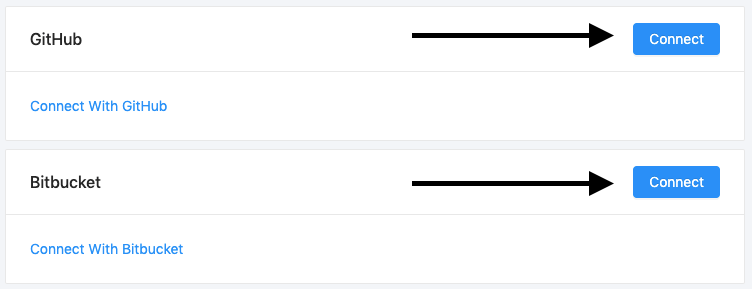
Then click on the Connect button of your project Git repository manager.

Now go to your specific project’s Integrations page and select the repository for your Plugin or Theme.

Make Sure You Are Connected with Your WordPress.org Account
Go to the Appsero Dashboard’s Integration page. Make sure you have connected your WordPress.org account with Appsero.

Step 2: Install dependencies
To install dependencies your repository must contain both composer.json and composer.lock files. If these two files are present then Appsero will automatically run the composer install for you.
Step 3: Remove Files or Folder From Production
Add a JSONfile in the root directory called appsero.json and add an array with exclude key.
{
“exclude”: [
“README.md”,
“appsero.json”,
“composer.json”,
“composer.lock”,
“.gitignore”,
“assets/src”
]
}
Made with Love by WordPress Experts for WordPress Experts.
Appsero
Step 4: Custom Directory Name
By default, we use project slug for your Plugin or Theme directory name, But you have the option to change it. Add directory name with key name in the appsero.json file.
{
“name”: “push-to-deploy”
}
Step 5: Give Proper Changelog, Update Readme & Main function file
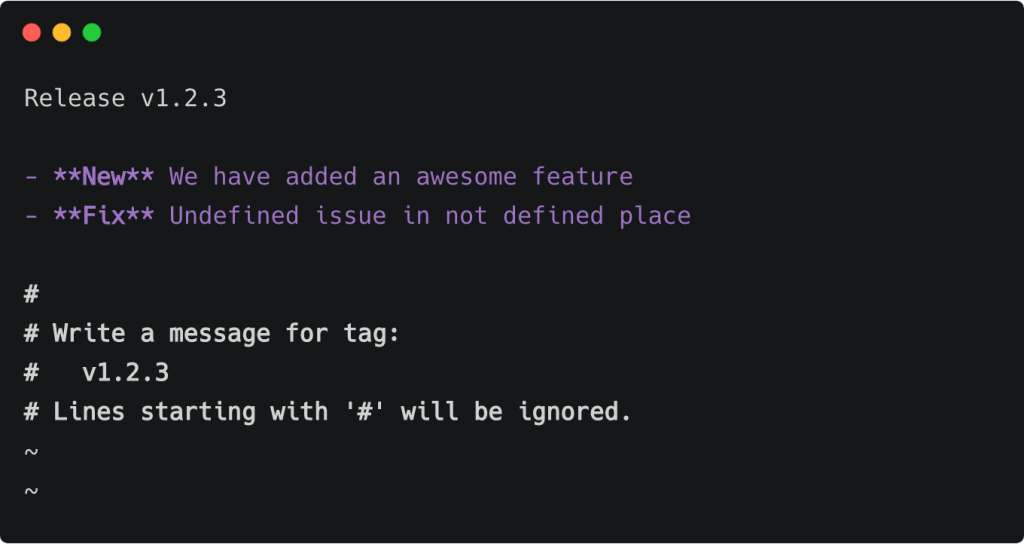
- Add a changelog in the tag message. Don’t add -m flag in your tag command. Please look at the example below.

- Update your readme file with the latest version tag. If you are pushing version 1.6, make sure it’s reflected on your readme.md/readme.txt file
- Update your main function file with the proper version tag. If you are pushing version 1.6, make sure it’s the same on your main function file.
Step 6: Deploy to WordPress.org from Git Account
Now you can deploy directly from your Git account to WordPress.org by running the following command.
$ git tag -a “v1.2.3”
Then you will need to push the tag to your branch (which you selected while configuring push to deploy).
$ git push origin master
$ git push origin “{tag name}”
A success /failed email will send to your email address after processing the project files.
Wrapping Up the Plugin Updates
So, that’s all for your plugin updates. The process of theme updates is the same as well. You can ask for any help from our support team and write your queries in the comment section below.
To reduce your deployment time up to 3X use Appsero. No matter where (GitHub, Bitbucket, or Gitlab) you push your new builds, uses will be automatically updated. Appsero takes care of your deployment auto-magically.
Subscribe To Our Newsletter
Don’t miss any updates of our new templates and extensions
and all the astonishing offers we bring for you.
